Four Steps of Preproduction: Part 02
(Cinematic Lighting Lesson 17)
Summary: In Part One Ryan discussed how reading the script and meeting with the team impact the lighting choices you’ll make on your projects. In Part Two we go over the second two steps of preproduction: location and tech scouts; and ordering cameras and lights for the production.
Length: 8:18 minutes
Worksheet

** You must be an Advanced or Pro Access member for these worksheet downloads. **
For information about downloads: FAQ downloads
!! Want to see the whole video? Become a member !!
- If you are already a member, you can log in below.
Introduction
I’ve heard it said before that if you fail to plan you plan to fail. Nowhere is this more true than in producing video content. That’s why the preproduction process is key to great lighting. In part one I showed you how to read the script in order to look for lighting cues and how to work with your team. In part two I’m going to cover how to location scout and how to place an order so you can have the tools that you need in order to walk away with the images that you see in your head.
Step Three: Location and Tech Scouts
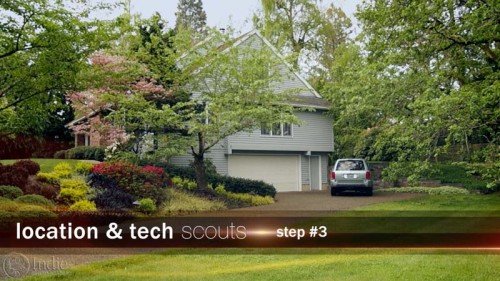
There are two types of scouting trips you’ll do during pre-production: the location scout and the tech scout. The location scout is simply to find a suitable location for the project. Something that fits the look and tone of the project. After the location has been decided, the team returns to do the tech scout. The tech scout is to determine what challenges the location presents and what the technical requirement are for that location. So the tech scout is all about logistics at the location. While these two scouting trips are normally done separately, they are starting to be done at the same time, especially on a smaller project.
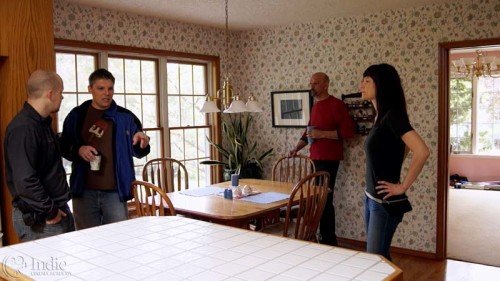
As you scout the location, hopefully you’ll have your key team members there: the director, production designer, gaffer, key grip, and audio. The fewer people on the scout, the more responsibility and the more information you’ll have to relay to the rest of your team so that they can fully support the demands of the location and production.
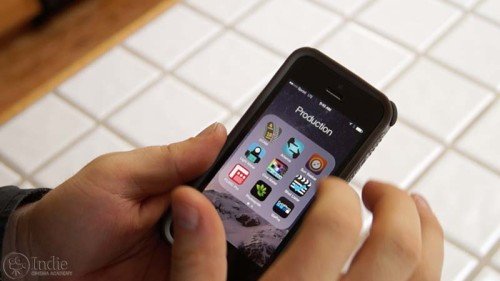
Regardless of the type of scout I am doing, I’ll bring along my two essential scouting tools: my iPhone and my light meter...
** Want to read the rest of the transcript? Become a member. **
Smartphone Apps
Camera / Audio
- Sony Alpha a7S Mirrorless Digital Camera
- Canon EF 24-70mm f/2.8L II USM Lens
- Fotodiox Lens Mount Adapter – Canon EOS (EF / EF-s) to Sony E-Mount
- Bright Tangerine Misfit Matte Box
- Tilta FF-T03 15mm Follow Focus with Hard Stops
- Sachtler Panorama 7+7 Head 100mm (similar head: 1006 DV 10 SB Fluid Head)
- Sachtler Carbon Fiber Tripod (similar tripod: Carbon Fiber HD Tripod Legs)
- MYT Works 4′ Medium slider w/ HiHat
- Hollywood Beefy Baby Stand (8.5′) (two, to raise the MYT Works slider)
- Movcam Cage for Sony A7S
- Hollywood Black Magic 1/2 Filter
- Sekonic L-758Cine DigitalMaster Light Meter
- Sekonic C-700 SpectroMaster Color Meter
- Wooden Camera A/B Gold-Mount Plate for Sony A7, A7r and A7s
- Audio Technica AT835b Shotgun Microphone
(similar microphone: Audio Technica BP4071 Shotgun Microphone)
- Wooden Camera DSLR A-Box
- Delkin Devices 64GB SDXC Memory Card 600x UHS-I
- DSC Labs One Shot Reference Chart (Matte Finish)
Behind the Scenes (BTS) Cameras
- GoPro Hero3 Black (similar camera: GoPro HERO4 Black)
- Motrr Galileo: App-Driven Motorized Head w/ GoPro Mount
- Sony Alpha SLT-A57
- Filmcity DSLR Camera Cage Shoulder Rig kit (FC-03)
Lighting / Grip Gear
- Fill-Lite 200
- Fill-Lite Wall Soft Light
- LED (900) (Bestlight®)
- 24×36″ – Black Double Net
- 1/8 Color Temperature Orange (CTO) Filter (24×198″ Roll)
- 1/2 Color Temperature Orange (CTO) Filter (24×198″ Roll)
- Foam Core Bounce (White)
- Floppy – 48×48″ (1.2×1.2m)
- Matthews Century C Stand Grip Arm Kit – 10.5′ (3.2m)
- PBL Sandbags x4 bags
 https://indiecinemaacademy.com/wp-content/uploads/2016/01/LC120-CorporateVideo-Thumbnail-Web.jpg
450
800
Ryan E. Walters
https://indiecinemaacademy.com/wp-content/uploads/2013/12/Indie_cinema_Logo_2color-MF-300x116-web.png
Ryan E. Walters2016-01-11 00:15:082016-05-05 11:22:30How to Cinematically Light a Corporate Video (Cinematic Lighting Lesson 20)
 https://indiecinemaacademy.com/wp-content/uploads/2015/12/LC119-LightFast-Thumbnail.jpg
450
800
Ryan E. Walters
https://indiecinemaacademy.com/wp-content/uploads/2013/12/Indie_cinema_Logo_2color-MF-300x116-web.png
Ryan E. Walters2015-12-29 12:38:562016-01-10 21:42:39How To Light Quickly (Cinematic Lighting Lesson 19)
 https://indiecinemaacademy.com/wp-content/uploads/2015/09/LC121_LightingHighSpeed-Thumbnail-Web.jpg
450
800
Ryan E. Walters
https://indiecinemaacademy.com/wp-content/uploads/2013/12/Indie_cinema_Logo_2color-MF-300x116-web.png
Ryan E. Walters2015-09-21 00:15:372016-01-10 21:42:57Lighting For Extreme Frame Rates (Cinematic Lighting Lesson 21)
 https://indiecinemaacademy.com/wp-content/uploads/2015/09/LC115_12Questions-Thumbnail-Free-Web.jpg
450
800
Ryan E. Walters
https://indiecinemaacademy.com/wp-content/uploads/2013/12/Indie_cinema_Logo_2color-MF-300x116-web.png
Ryan E. Walters2015-09-07 00:30:532015-10-30 19:06:3612 Crucial Questions To Ask Before You Light Your Set (Cinematic Lighting Lesson 15)
 https://indiecinemaacademy.com/wp-content/uploads/2015/08/LC114-3StrLightingNghtExt-Thumbnail.jpg
450
800
Ryan E. Walters
https://indiecinemaacademy.com/wp-content/uploads/2013/12/Indie_cinema_Logo_2color-MF-300x116-web.png
Ryan E. Walters2015-08-24 00:30:112015-10-30 18:55:173 Strategies for Lighting Your Night Exteriors (Cinematic Lighting Lesson 14)
 https://indiecinemaacademy.com/wp-content/uploads/2015/08/LC112_5SratDayExt-Thumbnail-800x450-jpg-web.jpeg
450
800
Ryan E. Walters
https://indiecinemaacademy.com/wp-content/uploads/2013/12/Indie_cinema_Logo_2color-MF-300x116-web.png
Ryan E. Walters2015-08-10 00:15:422015-10-30 18:54:545 Essential Strategies To Lighting Day Exteriors (Cinematic Lighting Lesson 12)
 https://indiecinemaacademy.com/wp-content/uploads/2015/07/LC113-10TricksDayExt-Thumbnail-800x450-web-.jpg
450
800
Ryan E. Walters
https://indiecinemaacademy.com/wp-content/uploads/2013/12/Indie_cinema_Logo_2color-MF-300x116-web.png
Ryan E. Walters2015-07-27 00:15:252015-10-30 18:55:0310 Tips To Lighting Day Exteriors (Cinematic Lighting Lesson 13)
 https://indiecinemaacademy.com/wp-content/uploads/2015/07/LC123_SmallCommercial-thumbnail-800X450.jpg
450
800
Ryan E. Walters
https://indiecinemaacademy.com/wp-content/uploads/2013/12/Indie_cinema_Logo_2color-MF-300x116-web.png
Ryan E. Walters2015-07-13 14:24:582015-10-30 19:19:44How To Light A Small Commercial (Cinematic Lighting Lesson 23)
 https://indiecinemaacademy.com/wp-content/uploads/2015/06/LC118-WhereToBeginLighting-featured.jpg
450
800
Ryan E. Walters
https://indiecinemaacademy.com/wp-content/uploads/2013/12/Indie_cinema_Logo_2color-MF-300x116-web.png
Ryan E. Walters2015-06-29 00:30:302015-12-29 12:43:40Where To Begin Lighting Your Set (Cinematic Lighting Lesson 18)
https://indiecinemaacademy.com/wp-content/uploads/2015/06/LC118-WhereToBeginLighting-featured.jpg
450
800
Ryan E. Walters
https://indiecinemaacademy.com/wp-content/uploads/2013/12/Indie_cinema_Logo_2color-MF-300x116-web.png
Ryan E. Walters2015-06-29 00:30:302015-12-29 12:43:40Where To Begin Lighting Your Set (Cinematic Lighting Lesson 18)Leave a Reply
Want to join the discussion?Feel free to contribute!
Leave a Reply Cancel reply
You must be logged in to post a comment.
This site uses Akismet to reduce spam. Learn how your comment data is processed.

Hi, nice lessons.
Can you please tell me what kind of iPhone apps for pre-production and lighting you are using?
Thanks.
Thanks Alex, I’m glad you like the lessons. We use a bunch of applications, depending on what our needs are. Here are the ones we recommend: pCAM, Artemis, Sun Seeker, Light Meter, Cine Meter II, Shot Lister, Dark Sky, & Photosynth.
The two that you see in the video are: Artemis & Sun Seeker.
Hope that helps. 🙂
Thanks, I really appreciate it.
Hi Ryan:
This is really good. What’s the name of the director’s viewfinder app that you use? I couldn’t find it in the Apple App Store . . .
Thanks.
The director’s viewfinder app we used for this is Artemis: https://itunes.apple.com/us/app/artemis-directors-viewfinder/id324917457
I’m glad you like it. I’d also recommend checking out the other apps that I mention in my reply to Alex.
Very informative article, is there a director viewfinder app for android users or another one similar to it
There is an android version of the app we used in this lesson: Artemis Director’s Viewfinder. But I am sure there are other android based director’s viewfinder apps if you want something else.
I have a suggestion that you request from your key grip and gaffer to create some tutorials
In the future we will be creating lesson modules for other set roles, such as grip, gaffer, 1st assistant camera, make-up artist, etc.
Hi, thank you for your work, I learn a lot.
I never used a light meter and I would be really intersted to know more about how you use it and how it affects your choices.
The right way to expose for skin tones, log, natural and artificial light.
A in depth lesson focus on this tool would be great !
That is a really great question, and is something that we hear a lot. A few years ago Ryan devoted an entire page discussing using a light meter, specifically the Sekonic 758 Cine. Here is the link: http://www.ryanewalters.com/SP/sekonicprofiles.html The page starts off talking about creating your own profiles for your camera/lens choices, but if you scroll down past that you’ll find a video called: “The Cinematographer Series: Lighting 101: Using A Meter.” Many of your questions will be answered by that video, so I highly recommend checking it out. Then, below the video is even more information about using a meter, some tricks, working with LOG and RAW, and then more about creating meter profiles. (We no longer are creating profiles to post here, however we GREATLY recommend learning to create your own profiles. It really isn’t that hard and in the process you will learn a lot about light, meters, and cameras.)