Virtual Tour of Our Remodel


As we remodel our house, I’ve been using a new instrument I bought for my company: a 3D real estate scanner. It incorporates stereoscopic cameras (six, paired up to point slightly down, slightly up, and straight out) and infrared cameras to photograph spaces in nearly all directions as well as determine distances of everything in the room. From all of this, it is able to create some incredible models and virtual tours of homes and buildings (see below).
Instructions
Types of Viewing Modes
There are three ways to view the floorplan: Inside mode, dollhouse, and floor plan. Inside mode is the traditional panoramic walkthrough as if you are standing in the house. Dollhouse allows you to look at the house at an angle. Floor plan is looking from above. To switch between modes, click on the picture of a 3D box in the lower left corner (sometimes it is a picture of a person).
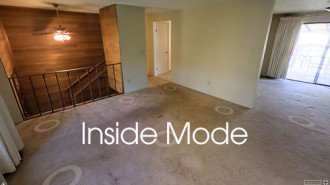
Inside Mode is simply the panoramic stitches directly from the camera. So what you see is what the camera saw, including shadows, lighting, and obstructions.
Dollhouse and floor plan modes incorporate distance and 3D data from the infrared sensors on the camera, as well as augmenting the photos with high dynamic range (HDR) processing and averaging between multiple photos. As a result, the images of a room look a lot better with richer colors and fewer shadows. The 3D data is converted into shapes that the photo images are mapped onto, allowing you to see 3D objects in space such as beds, doors, counters, railings, ceiling fans, etc. Often these objects look blocky since the 3D data is simplified so that the house model loads faster. An odd effect of this is that objects hanging from the ceiling or objects on the wall can seem to float in space as you are looking through a wall.
In floor plan mode, you may see gray shapes in the room. This is because the scanner was not able to see this area, either because it was on top of something (like a refrigerator) or is was in a closed closet.
Moving Through The House
Inside mode: You will see pictures of circles on the ground, which represent where the scanner was located for each scan. You can either click on the circles to go to them, or use your arrow keys to move to circles. Use your mouse or arrow keys to pan and tilt to look around, similar to street view on Google Maps.
Dollhouse mode: Use your mouse to move the house from side to side and go forward and back. To spin the house as well as tilt the house, use your arrow keys. By clicking anywhere in the house, you will be taken to that part of the house and enter into “Inside Mode.”
Floor plan: Use your arrow keys to spin house and zoom in / zoom out. You can move the house back and forth with your mouse.
Viewing Options
Viewing Floors
In all modes you can view floors individually or all at the same time. To toggle between these options, click on the floor options in the lower right corner.
Viewing size
To view full screen, click on the box in the lower right corner.
Five Week Remodel
Friday, April 22, 2016
The following model is after 5 weeks of remodeling the house: Things changed:
- Painted all walls and ceilings
- New doors, bi-folds, and moulding around doors and windows
- New hardwood floors (strand woven bamboo since we needed something that could withstand our dog)
- New baseboard (still touching it up)
- Temporary caps on the stair handrail and the half-wall in the kitchen. The stair cap will be installed in a week, and the kitchen halfwall will be finished when we remodel the kitchen (this fall?)
- Gas line installed for fireplaces and water heater
- Relocated refrigerator
- Framed in the rest of the basement (I’ll finish it once we move in)
- Started installing new outlets and switches
One Week Remodel
Sunday, March 27, 2016
The following model is after 8 days of remodeling the house: Saturday through Saturday. Things changed:
- Removed carpet, pad, and baseboard moulding
- Removed wall between kitchen and dining room
- Removed kitchen pantry and walls (will be moving the refrigerator to that location)
- Removed between guest bathroom sink and toilet
- Removed cedar paneling from entryway walls
- Nailed up 1/4″ sheetrock where cedar paneling was since cedar paneling was glued on, which damaged underlying sheetrock.
- Taped and mudded sheetrock. (Hired out.)
- Removed cedar paneling and cabinets from basement. (Will frame wall rest of way to ceiling, the sheetrock.)
- FOUND window behind basement cabinets
- Removed bricks from living room fireplace
- Removed bedroom doors, closet accordion doors, and accompanying moulding
- Removed ceiling fans
- Removed banister
- Moved light switch from stairwell center wall to right next to front door
- Removed window coverings
- Removed track lighting in hallway
- Removed particle board in hallway, living room, and dining room. (Will replace with plywood then hardwood floor.)
- Replaced damaged particle board in bedrooms
- MAJOR landscaping: removed two evergreen shrubs (and roots), three rhododendrons (and roots), flowering dogwood (and roots). Removed significant branches from two huge pines, a spruce, and a Japanese plumb tree. Pruned back four Japanese hollies, two rhododendrons, and a hydrangea.
- Prepped and painted new solid core doors, baseboards, and doorway moulding.
The “Before” Scan
Friday, March 18, 2016
The following model was created 1 hour after the previous owners moved out. It shows what we have to work with, dirt and all (literally).