The Secrets To Lighting Faces
(Tricks Of The Trade #1)
Summary: How a person is lit can make or break your project. In this video Ryan reveals his secrets to lighting faces, how to overcome common problems, and shows you a simple setup that you can use at home to practice your technique.
Length: 11:15 minutes
Video Lesson
Want to see the whole video? Become a member.
You can also buy Tricks of the Trade lessons individually for $7 or purchase the Cinematic Lighting Module.
- If you are already a member or have already purchased this video, you can log in below.
Transcript
Lighting Diagrams
Tools We Used
 https://indiecinemaacademy.com/wp-content/uploads/2016/01/LC120-CorporateVideo-Thumbnail-Web.jpg
450
800
Ryan E. Walters
https://indiecinemaacademy.com/wp-content/uploads/2013/12/Indie_cinema_Logo_2color-MF-300x116-web.png
Ryan E. Walters2016-01-11 00:15:082016-05-05 11:22:30How to Cinematically Light a Corporate Video (Cinematic Lighting Lesson 20)
https://indiecinemaacademy.com/wp-content/uploads/2016/01/LC120-CorporateVideo-Thumbnail-Web.jpg
450
800
Ryan E. Walters
https://indiecinemaacademy.com/wp-content/uploads/2013/12/Indie_cinema_Logo_2color-MF-300x116-web.png
Ryan E. Walters2016-01-11 00:15:082016-05-05 11:22:30How to Cinematically Light a Corporate Video (Cinematic Lighting Lesson 20) https://indiecinemaacademy.com/wp-content/uploads/2015/12/LC119-LightFast-Thumbnail.jpg
450
800
Ryan E. Walters
https://indiecinemaacademy.com/wp-content/uploads/2013/12/Indie_cinema_Logo_2color-MF-300x116-web.png
Ryan E. Walters2015-12-29 12:38:562016-01-10 21:42:39How To Light Quickly (Cinematic Lighting Lesson 19)
https://indiecinemaacademy.com/wp-content/uploads/2015/12/LC119-LightFast-Thumbnail.jpg
450
800
Ryan E. Walters
https://indiecinemaacademy.com/wp-content/uploads/2013/12/Indie_cinema_Logo_2color-MF-300x116-web.png
Ryan E. Walters2015-12-29 12:38:562016-01-10 21:42:39How To Light Quickly (Cinematic Lighting Lesson 19) https://indiecinemaacademy.com/wp-content/uploads/2015/09/LC121_LightingHighSpeed-Thumbnail-Web.jpg
450
800
Ryan E. Walters
https://indiecinemaacademy.com/wp-content/uploads/2013/12/Indie_cinema_Logo_2color-MF-300x116-web.png
Ryan E. Walters2015-09-21 00:15:372016-01-10 21:42:57Lighting For Extreme Frame Rates (Cinematic Lighting Lesson 21)
https://indiecinemaacademy.com/wp-content/uploads/2015/09/LC121_LightingHighSpeed-Thumbnail-Web.jpg
450
800
Ryan E. Walters
https://indiecinemaacademy.com/wp-content/uploads/2013/12/Indie_cinema_Logo_2color-MF-300x116-web.png
Ryan E. Walters2015-09-21 00:15:372016-01-10 21:42:57Lighting For Extreme Frame Rates (Cinematic Lighting Lesson 21) https://indiecinemaacademy.com/wp-content/uploads/2015/09/LC115_12Questions-Thumbnail-Free-Web.jpg
450
800
Ryan E. Walters
https://indiecinemaacademy.com/wp-content/uploads/2013/12/Indie_cinema_Logo_2color-MF-300x116-web.png
Ryan E. Walters2015-09-07 00:30:532015-10-30 19:06:3612 Crucial Questions To Ask Before You Light Your Set (Cinematic Lighting Lesson 15)
https://indiecinemaacademy.com/wp-content/uploads/2015/09/LC115_12Questions-Thumbnail-Free-Web.jpg
450
800
Ryan E. Walters
https://indiecinemaacademy.com/wp-content/uploads/2013/12/Indie_cinema_Logo_2color-MF-300x116-web.png
Ryan E. Walters2015-09-07 00:30:532015-10-30 19:06:3612 Crucial Questions To Ask Before You Light Your Set (Cinematic Lighting Lesson 15) https://indiecinemaacademy.com/wp-content/uploads/2015/08/LC114-3StrLightingNghtExt-Thumbnail.jpg
450
800
Ryan E. Walters
https://indiecinemaacademy.com/wp-content/uploads/2013/12/Indie_cinema_Logo_2color-MF-300x116-web.png
Ryan E. Walters2015-08-24 00:30:112015-10-30 18:55:173 Strategies for Lighting Your Night Exteriors (Cinematic Lighting Lesson 14)
https://indiecinemaacademy.com/wp-content/uploads/2015/08/LC114-3StrLightingNghtExt-Thumbnail.jpg
450
800
Ryan E. Walters
https://indiecinemaacademy.com/wp-content/uploads/2013/12/Indie_cinema_Logo_2color-MF-300x116-web.png
Ryan E. Walters2015-08-24 00:30:112015-10-30 18:55:173 Strategies for Lighting Your Night Exteriors (Cinematic Lighting Lesson 14) https://indiecinemaacademy.com/wp-content/uploads/2015/08/LC112_5SratDayExt-Thumbnail-800x450-jpg-web.jpeg
450
800
Ryan E. Walters
https://indiecinemaacademy.com/wp-content/uploads/2013/12/Indie_cinema_Logo_2color-MF-300x116-web.png
Ryan E. Walters2015-08-10 00:15:422015-10-30 18:54:545 Essential Strategies To Lighting Day Exteriors (Cinematic Lighting Lesson 12)
https://indiecinemaacademy.com/wp-content/uploads/2015/08/LC112_5SratDayExt-Thumbnail-800x450-jpg-web.jpeg
450
800
Ryan E. Walters
https://indiecinemaacademy.com/wp-content/uploads/2013/12/Indie_cinema_Logo_2color-MF-300x116-web.png
Ryan E. Walters2015-08-10 00:15:422015-10-30 18:54:545 Essential Strategies To Lighting Day Exteriors (Cinematic Lighting Lesson 12) https://indiecinemaacademy.com/wp-content/uploads/2015/07/LC113-10TricksDayExt-Thumbnail-800x450-web-.jpg
450
800
Ryan E. Walters
https://indiecinemaacademy.com/wp-content/uploads/2013/12/Indie_cinema_Logo_2color-MF-300x116-web.png
Ryan E. Walters2015-07-27 00:15:252015-10-30 18:55:0310 Tips To Lighting Day Exteriors (Cinematic Lighting Lesson 13)
https://indiecinemaacademy.com/wp-content/uploads/2015/07/LC113-10TricksDayExt-Thumbnail-800x450-web-.jpg
450
800
Ryan E. Walters
https://indiecinemaacademy.com/wp-content/uploads/2013/12/Indie_cinema_Logo_2color-MF-300x116-web.png
Ryan E. Walters2015-07-27 00:15:252015-10-30 18:55:0310 Tips To Lighting Day Exteriors (Cinematic Lighting Lesson 13)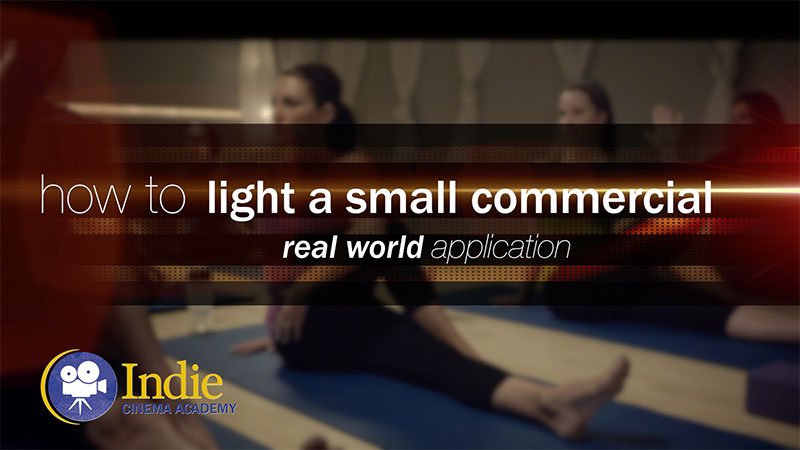 https://indiecinemaacademy.com/wp-content/uploads/2015/07/LC123_SmallCommercial-thumbnail-800X450.jpg
450
800
Ryan E. Walters
https://indiecinemaacademy.com/wp-content/uploads/2013/12/Indie_cinema_Logo_2color-MF-300x116-web.png
Ryan E. Walters2015-07-13 14:24:582015-10-30 19:19:44How To Light A Small Commercial (Cinematic Lighting Lesson 23)
https://indiecinemaacademy.com/wp-content/uploads/2015/07/LC123_SmallCommercial-thumbnail-800X450.jpg
450
800
Ryan E. Walters
https://indiecinemaacademy.com/wp-content/uploads/2013/12/Indie_cinema_Logo_2color-MF-300x116-web.png
Ryan E. Walters2015-07-13 14:24:582015-10-30 19:19:44How To Light A Small Commercial (Cinematic Lighting Lesson 23) https://indiecinemaacademy.com/wp-content/uploads/2015/06/LC118-WhereToBeginLighting-featured.jpg
450
800
Ryan E. Walters
https://indiecinemaacademy.com/wp-content/uploads/2013/12/Indie_cinema_Logo_2color-MF-300x116-web.png
Ryan E. Walters2015-06-29 00:30:302015-12-29 12:43:40Where To Begin Lighting Your Set (Cinematic Lighting Lesson 18)
https://indiecinemaacademy.com/wp-content/uploads/2015/06/LC118-WhereToBeginLighting-featured.jpg
450
800
Ryan E. Walters
https://indiecinemaacademy.com/wp-content/uploads/2013/12/Indie_cinema_Logo_2color-MF-300x116-web.png
Ryan E. Walters2015-06-29 00:30:302015-12-29 12:43:40Where To Begin Lighting Your Set (Cinematic Lighting Lesson 18)
Hi Ryan,
Excellent video!
I wanted to inquire about the Queenshiny HMI listed as being used in the video: can you recommend this light? It is considerably cheaper than an Arri HMI, but I am worried that it is a cheap knockoff–would love to hear your thoughts.
Thanks!
Craig
Hey Craig, We bought the two Queenshiny HMIs about a month ago, wanting to test them out to see if they were an “adequate” knockoff we could recommend to people on a budget. We have to say they are doing the job nicely, although obviously it is too early for us to fully endorse them. That said, this past week we did have to do some rewiring after both failed on the same day: the ballast cable on the 575W pulled completely apart and the power switch on the 1200W failed. After a solder job on the cable and ordering a new switch on Ebay ($5), everything is working again. The innards all look quality, though, as most likely all HMIs come with the same components. The electronics of an HMI are very straightforward, and really it is just the actually bulb that needs to be built perfectly. So if a quality bulb fits in a knockoff ballast, everything should be groovy. (That’s our logic, at least. Anyone should feel free to chime in, if they have knowledge on the inner workings of HMIs.) We now make it our regular routine to check the ballast cable’s inner wires to make sure they are in good condition, since they seem to be made of an older rubber insulation. After a few more months of use, we’ll do a more thorough review with pictures.
(Oh, and speaking of ARRI, the Queenshiny 575W HMI arrived with “ARRI” written on the side; they have no shame!)
Thanks- I’m glad that you found this video helpful. 🙂
To follow up on Tim’s comments, these HMI’s are definitely knock offs. While they are getting the job done, and we have run into the issues that Tim pointed out, there is at least one huge draw back to them- they are NOT hot strike-able. So that means that you have to wait 15 minutes for them to cool down before you can turn them on again. So if you need to turn them off to move their position, be SURE that you need to do so. 15 minutes may not seem like a big deal, but if you do that twice, you’ve lost 30 minutes of time- and if not done at the right time during the shoot, that could mean everyone is waiting on the light to cool before the shoot can resume.
The other thing we haven’t tested is whether or not it is really flicker free. So far we have just done 24 fps with it, nothing off speed. So we will not know if it works at other frame rates until we test it out for real. (I’ve often seen practice / real world result be a lot different than the published specs… just part of what you have to deal with when you buy cheap knock offs…)
I enjoy your site immensely and learn a lot. But I am an amateur and have a limited budget. I wonder if you can guide me with choosing a nonprofessional lamp. In The Netherlands, where I live, shops have cheaper brands. What is most important in a LED lamp (as key light). I understand that the size in centimeters is important if you want a soft light for interviewing? So the larger the better? Or does it also depends on the numbers of LEDs in that frame, or the output in lux? I will use the lamp(s) for documentary style films (interviews) and for fiction. Or is it always better to go for a Litepanel 1 x 1 of which the prices in the Netherlands nor are reduced.
I already have a medium sized LED lamp. I guess I can best use that one as fill, but with some form of diffusion? And for rim light I probably need a kind of spot light. Is there a cheaper alternative for an expensive fresnel lamp? Sorry for all those questions, but buying the wrong equipment is expensive and I also have to keep my wife in a good mood.
Jan,
I love the Netherlands- my wife and I were just there visiting family in Utrecht. Beautiful place. 🙂
Unfortunately, there isn’t one metric that is most important when it comes to lights- they all interact with each other. And the type of camera you use also plays a factor.
The first question to ask is: When you are shooting, do you have to deal with windows a lot or not?
If you see outside of windows, or if there is usually a lot of daylight coming into where you shoot, and you can’t completely block that light, then it will be best to choose daylight color temperature LED’s.
The second question to ask is: How much daylight do you have to compete with?
If you have to compete with direct sun a lot, then you really should look into HMI’s. If you don’t have to deal with direct sun, then look into more powerful LED’s. It is always easier to dim a light down to the right level…
The third question to ask is: What kind of color quality to they have?
As you can see in our article on “Are LED’s Ruining Your Projects?” the color quality has a big impact on the end results.
So if you figure out the color balance that you need (Daylight or tungsten), then get the light that has the best color quality, as well as the highest output. From there you can shape the light to fit your needs.
I’d highly recommend checking out our LED Database to compare the results of different LEDs.
There are two brands that stick out to me in terms of quality color, high output, and affordable prices: Lights from Aputure and lights from LiteGear.
What kind of lights you use for each role, really depends on what you like. There isn’t a “right” answer. What I like to do, is to have a big soft key light, and then I use the Key Side Fill approach with a 3/4 back kicker.
With that kind of setup, my Key light will usually be a about 4 feet x 4 feet in size. So I’ll put a 4×4 frame of diffusion in front of the light. Or I’ll use a Fill-Lite 200, and put it as close as possible to the talent. Then I’ll either position the diffusion so it wraps around, like you saw in the Beyond 3 Point video, or if I add a fill light, it will be a smaller LED with diffusion on it. The kicker, will also be an LED, but that one will not have anything on it, which allows the light to be “hard”.
If you are using a traditional rim light, it doesn’t have to be a spot light. A spot will help you control it, and contain it to the talent, but really you can use any bare light to get the same effect.
What I’d recommend, is taking a look at the lighting diagrams that we have with the lessons, seeing what kind of look you like, and then use that as a starting place to light from. You can replace the lights we use with the ones you have and get similar results. 🙂
I hope that helps. 🙂
Thanks for the reply. It helped. Utrecht is indeed a pretty town. I couldn’t find the same lighting gear brands in Holland, so I bought a LED light that was recommended because of its color quality. I practiced with a 4 x frame with some sort of diffusion and following your video’s and diagrams we managed to get great light, far better than we could have got with books. Better light makes so much of a difference!
Awesome! I’m glad that it helped, and I’m really glad that you got the results you were looking for. Congrats on a successful shoot! 🙂