Four Steps of Preproduction: Part 01
(Cinematic Lighting Lesson 16)
Summary: One key piece to great lighting is good preproduction. In Part One of the four steps of preproduction, Ryan discusses how the first two steps–reading the script and meeting with the team–impact the lighting choices you’ll make on your projects. In Part Two we go over the second two steps: location and tech scouts; and ordering cameras and lights.
Length: 6:36 minutes
!! Want to see the whole video? Become a member !!
- If you are already a member, you can log in below.
Introduction
Whether you are working on a projects large or small, the key to great lighting really lies in the preproduction process. That’s why in the next two videos I’m going to share with you the four steps that I go through on every one of my projects and how they contribute to the end look of the film. In this first video I’m going to cover reading the script and meeting with your team. In the next video I’m going to show you how to location scout and how to place your order.
Step One: Read The Script
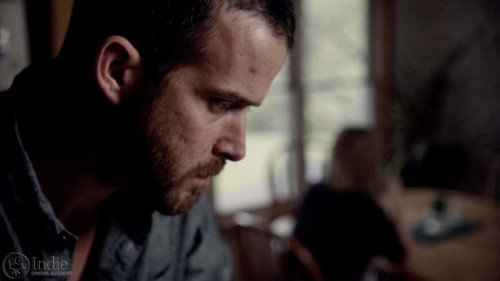
Every production begins and ends with the script. As obvious as it may sound, reading the script is where you’ll begin the lighting process. The script gives you a wealth of information that will dictate your lighting choices. So let’s start by looking at an example script that uses a narrative or feature film format. The principles are easily adapted to any production...
** Want to read the rest of the transcript? Become a member. **
Camera
Behind the Scenes (BTS) Cameras
 https://indiecinemaacademy.com/wp-content/uploads/2016/01/LC120-CorporateVideo-Thumbnail-Web.jpg
450
800
Ryan E. Walters
https://indiecinemaacademy.com/wp-content/uploads/2013/12/Indie_cinema_Logo_2color-MF-300x116-web.png
Ryan E. Walters2016-01-11 00:15:082016-05-05 11:22:30How to Cinematically Light a Corporate Video (Cinematic Lighting Lesson 20)
 https://indiecinemaacademy.com/wp-content/uploads/2015/12/LC119-LightFast-Thumbnail.jpg
450
800
Ryan E. Walters
https://indiecinemaacademy.com/wp-content/uploads/2013/12/Indie_cinema_Logo_2color-MF-300x116-web.png
Ryan E. Walters2015-12-29 12:38:562016-01-10 21:42:39How To Light Quickly (Cinematic Lighting Lesson 19)
 https://indiecinemaacademy.com/wp-content/uploads/2015/09/LC121_LightingHighSpeed-Thumbnail-Web.jpg
450
800
Ryan E. Walters
https://indiecinemaacademy.com/wp-content/uploads/2013/12/Indie_cinema_Logo_2color-MF-300x116-web.png
Ryan E. Walters2015-09-21 00:15:372016-01-10 21:42:57Lighting For Extreme Frame Rates (Cinematic Lighting Lesson 21)
 https://indiecinemaacademy.com/wp-content/uploads/2015/09/LC115_12Questions-Thumbnail-Free-Web.jpg
450
800
Ryan E. Walters
https://indiecinemaacademy.com/wp-content/uploads/2013/12/Indie_cinema_Logo_2color-MF-300x116-web.png
Ryan E. Walters2015-09-07 00:30:532015-10-30 19:06:3612 Crucial Questions To Ask Before You Light Your Set (Cinematic Lighting Lesson 15)
 https://indiecinemaacademy.com/wp-content/uploads/2015/08/LC114-3StrLightingNghtExt-Thumbnail.jpg
450
800
Ryan E. Walters
https://indiecinemaacademy.com/wp-content/uploads/2013/12/Indie_cinema_Logo_2color-MF-300x116-web.png
Ryan E. Walters2015-08-24 00:30:112015-10-30 18:55:173 Strategies for Lighting Your Night Exteriors (Cinematic Lighting Lesson 14)
 https://indiecinemaacademy.com/wp-content/uploads/2015/08/LC112_5SratDayExt-Thumbnail-800x450-jpg-web.jpeg
450
800
Ryan E. Walters
https://indiecinemaacademy.com/wp-content/uploads/2013/12/Indie_cinema_Logo_2color-MF-300x116-web.png
Ryan E. Walters2015-08-10 00:15:422015-10-30 18:54:545 Essential Strategies To Lighting Day Exteriors (Cinematic Lighting Lesson 12)
 https://indiecinemaacademy.com/wp-content/uploads/2015/07/LC113-10TricksDayExt-Thumbnail-800x450-web-.jpg
450
800
Ryan E. Walters
https://indiecinemaacademy.com/wp-content/uploads/2013/12/Indie_cinema_Logo_2color-MF-300x116-web.png
Ryan E. Walters2015-07-27 00:15:252015-10-30 18:55:0310 Tips To Lighting Day Exteriors (Cinematic Lighting Lesson 13)
 https://indiecinemaacademy.com/wp-content/uploads/2015/07/LC123_SmallCommercial-thumbnail-800X450.jpg
450
800
Ryan E. Walters
https://indiecinemaacademy.com/wp-content/uploads/2013/12/Indie_cinema_Logo_2color-MF-300x116-web.png
Ryan E. Walters2015-07-13 14:24:582015-10-30 19:19:44How To Light A Small Commercial (Cinematic Lighting Lesson 23)
 https://indiecinemaacademy.com/wp-content/uploads/2015/06/LC118-WhereToBeginLighting-featured.jpg
450
800
Ryan E. Walters
https://indiecinemaacademy.com/wp-content/uploads/2013/12/Indie_cinema_Logo_2color-MF-300x116-web.png
Ryan E. Walters2015-06-29 00:30:302015-12-29 12:43:40Where To Begin Lighting Your Set (Cinematic Lighting Lesson 18)
https://indiecinemaacademy.com/wp-content/uploads/2015/06/LC118-WhereToBeginLighting-featured.jpg
450
800
Ryan E. Walters
https://indiecinemaacademy.com/wp-content/uploads/2013/12/Indie_cinema_Logo_2color-MF-300x116-web.png
Ryan E. Walters2015-06-29 00:30:302015-12-29 12:43:40Where To Begin Lighting Your Set (Cinematic Lighting Lesson 18)Leave a Reply
Want to join the discussion?Feel free to contribute!
Leave a Reply Cancel reply
You must be logged in to post a comment.
This site uses Akismet to reduce spam. Learn how your comment data is processed.

Hey Ryan I need some help and would love to know if you had a solution.I have a shoot coming up which is a product shoot, shot in a narrow yet long room of approximately 10ft wide x 24ft long. The subject is stood behind a table from which he does demonstrations and directly behind him is a North facing large window, we will be shooting using the length of the room with his table roughly 5ft from the window. Could you please suggest a lighting set up that would look natural, interesting and utilise the lights we have which are 3×800 arri lites, 2k arri blonde, 2 ft kino flow and a 300w Dedo. I would greatly appreciate any feedback and thanks for these great videos!
Unfortunately there are too many variables to give you a specific solution, but I can give you the questions to ask, and an idea of how to proceed forward… (These are not in any specific order.)
Key Question 01: What environmental lighting will affect my light levels?
– How north is north? (Meaning will the sun ever come through the window. The sun seeker app should help you figure that out.)
– What’s outside the window? (Is there a big reflective building that will bounce sun in through the window even if direct sun doesn’t come through.)
– Are there interior lights that need to be used in the setup?
– How much light comes through the windows?
Key Question 02: Can I control any environmental light?
– How high up is the location?
– How big is the window?
(If the location is on the first floor, and the window isn’t too big, you can fly a 6×6, 8×8, or 12×12, net behind it (outside) to cut the exterior levels)
– Do the windows have blinds? If so, how controllable are they? Do you like their look?
– Do I need to see outside? If so, how much to I need to see?
(If you can’t fly a net behind the window you can use the blinds on the window to control how much light comes through.)
Key Question 03: Do I need to match the daylight to the tungsten lights I have?
– Can I have mixed lighting?
– If so, how much is acceptable?
– If not, how close does it have to be?
(Do I have to use Full CTB to match, can I use half CTB to match?)
Key Question 04: How much power do I have? (Total, and number of circuits…)
– Are all the circuits in the same room?
– Can I pull power from other rooms?
(If you only have one circuit and it is only 20 amps, then you’ll only be able to plug in, 2x 800 Arri + 300w Dedo, or 2x 800 + 2′ Kino, or 1 2k Arri Blonde)
Key Question 05: Does the room HAVE to be shot that way?
– Is looking out the window integral to the story?
– Can the room be re-arranged to not look out the window?
– Can the table be pulled away from the window?
Key Question 06: What kind of look / mood / tone am I after?
– Can it be more moody (low key) or does it need to be more cheery and bright (high key)?
Key Question 07: What camera am I shooting on?
– What is the frame rate, ISO, shutter, and T-stop you’ll be shooting at?
– What is the latitude of the camera? (Referenced in Camera Foundations Lesson 06)
– Is it acceptable to have any of the image blown out, or does every highlight need to be captured?
Key Question 08: What kind of time do I have at the location, and what’s the size of my crew?
– Do I have the time to setup lights, rearrange the room?
– Do I have the crew to get the job done within the time I have?
The answers to those questions will inform the best way to approach your lighting setup.
The problem, as I see it anyway, are that you are having to fight the daylight ambience with your tungsten lights…
Here are some general solutions:
– Flip the room around, close the blinds, put black over them (Flags, Floppies, cloth…) use your own lights to light it how you want it.
– Pull the table away from the window (Probably about 12-ish feet away), draw the blinds partially, light the setup how you want. White balance to the tungsten lights you are using, and let the background go blue, that will create a color separation between subject and background, and the warmer colors feel closer (Cinematic Lighting Lesson: Four Elements Of Light)
– If you are stuck against the window, and you have to match the daylight color temp, and you have limited power, Try brining in a bunch of bead board, Foam core, and white card. See how much light you can bounce back into the scene. (You might also have to use silver bounce) You’ll have to adjust the bounces throughout the day as the light levels form the sun change…)
– In my ideal setup, for this situation, I would be able to pull the table away from the window, draw the blinds slightly to I could feel texture in them, but not see everything outside, and use Daylight Kino Flo tubes to light the setup. (Soft light is better for demonstrations, as it allows the subject to move around more.) I would move the table so that the window was towards one side of the table, and then I would motivate the key from that same side of the frame. I would then add a rim or a kicker also motivated by the window. And then I would fill to taste from the same side as the key. (Key Side Fill Approach: Cinematic Lighting: Beyond 3 Point Part 02)
Thank you very much for this detailed reply and taking the time to help. I appreciate it!
Very informative article, just I have a suggestion why you do not shoot the making of some your projects , and you show us how you applied the concepts you discussed in this article
We plan to do “making of” lessons of some of our real-life projects. It is tricky for a number of reasons: 1) The client has to approve of it because they may not want behind the scenes filmed; 2) creating lessons take a full crew, so filming the making of would double the size of our crew (one crew for the project, one crew for the behind the scenes); 3) breaking down scenes to show different ways to set it up takes time on set. However on real projects things move quickly making it hard to film more than the specific shots needed for that project. All that being said, we are working with some clients with the specific aim to film the process — beginning to end — of how their project came together.