Beyond Three-Point Lighting: Part 01
(Cinematic Lighting Lesson 05)
Summary: Tired of the same training on three-point lighting? So are we. Join us as we explore four other lighting methods you can utilize on your next film or video production. In this lesson, after a quick overview of the three-point method, we cover side lighting and cross-key lighting. In Part 02 we will cover the other two lighting setups.
Length: 4:54 minutes
!! Want to see the whole video? Become a member !!
- If you are already a member, you can log in below.
Introduction
Are you tired of the same old training on the basic three point lighting setups? So am I. Sure it works on some productions, but it doesn’t fit for everything. So over the next two videos I’m going to show you four other lighting setups you can use on any of your productions. In this video I’ll start with side lighting, and cross key lighting, and in the next video I’ll show you the other two.
Three-Point Lighting: A Review
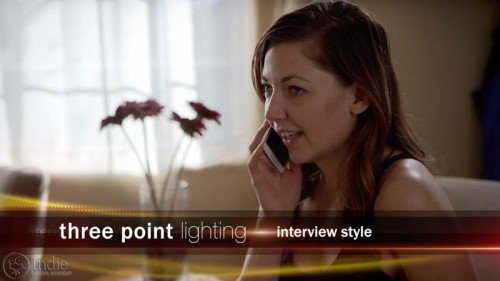
In case you’ve been living in a cave somewhere and you’re not familiar with three-point lighting, here’s a brief summary. Most people teach it on a basic interview setup. The talent looks off camera, you throw your key light on one side, your fill light on the other, and then you slap your hair light from above and behind the talent. Viola. This is three point lighting, which is where most people begin. And to be honest, it’s not a bad starting place.
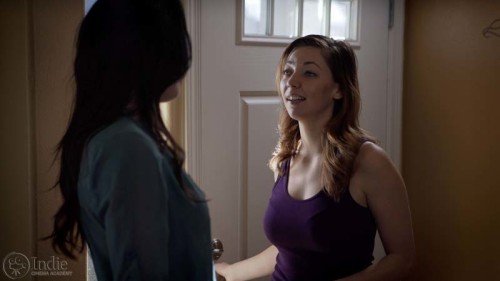
But if this is all you ever do, you’re lighting is going to suffer because it looks and feels artificial. Why? You ask. Well, because IT IS artificial. How many times in life you do run across a lighting situation that looks this perfect? Never. Another reason it looks artificial to me is that your fill light is filling in the all the shadows; you’re essentially erasing them. That’s not what great lighting is about.
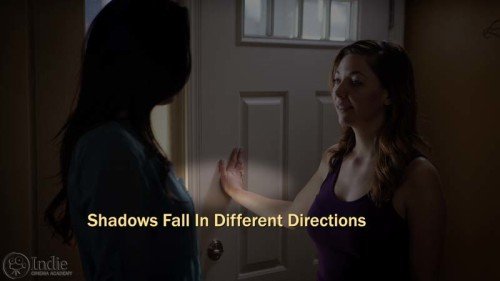
Furthermore, placing the fill light opposite the key creates additional problems on set. It may work fine for a static interview, but what happens when the talent moves within a scene. Now you have two opposing lights that you and the talent have to maneuver around and control. That means a high probability of double shadows. It will also take you forever to control those shadows. When it comes down to it, there are more effective ways to light.
So let’s get started...
** Want to read the rest of the transcript? Become a member. **
** Want to see the lighting diagrams? Become a member. **
Camera / Audio
- Sony Alpha a7S Mirrorless Digital Camera
- Canon EF 24-70mm f/2.8L II USM Lens
- Fotodiox Lens Mount Adapter – Canon EOS (EF / EF-s) to Sony E-Mount
- Bright Tangerine Misfit Matte Box
- Tilta FF-T03 15mm Follow Focus with Hard Stops
- Sachtler Panorama 7+7 Head 100mm (similar head: 1006 DV 10 SB Fluid Head)
- Sachtler Carbon Fiber Tripod (similar tripod: Carbon Fiber HD Tripod Legs)
- MYT Works 4′ Medium slider w/ HiHat
- Hollywood Beefy Baby Stand (8.5′) (two, to raise the MYT Works slider)
- Movcam Cage for Sony A7S
- Sekonic L-758Cine DigitalMaster Light Meter
- Sekonic C-700 SpectroMaster Color Meter
- Wooden Camera A/B Gold-Mount Plate for Sony A7, A7r and A7s
- Audio Technica AT835b Shotgun Microphone
(similar microphone: Audio Technica BP4071 Shotgun Microphone)
- Wooden Camera DSLR A-Box
- Delkin Devices 64GB SDXC Memory Card 600x UHS-I
- DSC Labs One Shot Reference Chart (Matte Finish)
Behind the Scenes (BTS) Cameras
- GoPro Hero3 Black (similar camera: GoPro HERO4 Black)
- Motrr Galileo: App-Driven Motorized Head w/ GoPro Mount
- Sony Alpha SLT-A57
- Filmcity DSLR Camera Cage Shoulder Rig kit (FC-03)
Lighting / Grip Gear
- Fill-Lite 200
- LED (900) (Bestlight®)
- 24×36″ – Black Double Net
- 1/8 Color Temperature Orange (CTO) Filter (24×198″ Roll)
- 1/2 Color Temperature Orange (CTO) Filter (24×198″ Roll)
- Foam Core Bounce (White)
- Floppy – 48×48″ (1.2×1.2m)
- Matthews Century C Stand Grip Arm Kit – 10.5′ (3.2m)
- PBL Sandbags x4 bags
 https://indiecinemaacademy.com/wp-content/uploads/2016/01/LC120-CorporateVideo-Thumbnail-Web.jpg
450
800
Ryan E. Walters
https://indiecinemaacademy.com/wp-content/uploads/2013/12/Indie_cinema_Logo_2color-MF-300x116-web.png
Ryan E. Walters2016-01-11 00:15:082016-05-05 11:22:30How to Cinematically Light a Corporate Video (Cinematic Lighting Lesson 20)
 https://indiecinemaacademy.com/wp-content/uploads/2015/12/LC119-LightFast-Thumbnail.jpg
450
800
Ryan E. Walters
https://indiecinemaacademy.com/wp-content/uploads/2013/12/Indie_cinema_Logo_2color-MF-300x116-web.png
Ryan E. Walters2015-12-29 12:38:562016-01-10 21:42:39How To Light Quickly (Cinematic Lighting Lesson 19)
 https://indiecinemaacademy.com/wp-content/uploads/2015/09/LC121_LightingHighSpeed-Thumbnail-Web.jpg
450
800
Ryan E. Walters
https://indiecinemaacademy.com/wp-content/uploads/2013/12/Indie_cinema_Logo_2color-MF-300x116-web.png
Ryan E. Walters2015-09-21 00:15:372016-01-10 21:42:57Lighting For Extreme Frame Rates (Cinematic Lighting Lesson 21)
 https://indiecinemaacademy.com/wp-content/uploads/2015/09/LC115_12Questions-Thumbnail-Free-Web.jpg
450
800
Ryan E. Walters
https://indiecinemaacademy.com/wp-content/uploads/2013/12/Indie_cinema_Logo_2color-MF-300x116-web.png
Ryan E. Walters2015-09-07 00:30:532015-10-30 19:06:3612 Crucial Questions To Ask Before You Light Your Set (Cinematic Lighting Lesson 15)
 https://indiecinemaacademy.com/wp-content/uploads/2015/08/LC114-3StrLightingNghtExt-Thumbnail.jpg
450
800
Ryan E. Walters
https://indiecinemaacademy.com/wp-content/uploads/2013/12/Indie_cinema_Logo_2color-MF-300x116-web.png
Ryan E. Walters2015-08-24 00:30:112015-10-30 18:55:173 Strategies for Lighting Your Night Exteriors (Cinematic Lighting Lesson 14)
 https://indiecinemaacademy.com/wp-content/uploads/2015/08/LC112_5SratDayExt-Thumbnail-800x450-jpg-web.jpeg
450
800
Ryan E. Walters
https://indiecinemaacademy.com/wp-content/uploads/2013/12/Indie_cinema_Logo_2color-MF-300x116-web.png
Ryan E. Walters2015-08-10 00:15:422015-10-30 18:54:545 Essential Strategies To Lighting Day Exteriors (Cinematic Lighting Lesson 12)
 https://indiecinemaacademy.com/wp-content/uploads/2015/07/LC113-10TricksDayExt-Thumbnail-800x450-web-.jpg
450
800
Ryan E. Walters
https://indiecinemaacademy.com/wp-content/uploads/2013/12/Indie_cinema_Logo_2color-MF-300x116-web.png
Ryan E. Walters2015-07-27 00:15:252015-10-30 18:55:0310 Tips To Lighting Day Exteriors (Cinematic Lighting Lesson 13)
 https://indiecinemaacademy.com/wp-content/uploads/2015/07/LC123_SmallCommercial-thumbnail-800X450.jpg
450
800
Ryan E. Walters
https://indiecinemaacademy.com/wp-content/uploads/2013/12/Indie_cinema_Logo_2color-MF-300x116-web.png
Ryan E. Walters2015-07-13 14:24:582015-10-30 19:19:44How To Light A Small Commercial (Cinematic Lighting Lesson 23)
 https://indiecinemaacademy.com/wp-content/uploads/2015/06/LC118-WhereToBeginLighting-featured.jpg
450
800
Ryan E. Walters
https://indiecinemaacademy.com/wp-content/uploads/2013/12/Indie_cinema_Logo_2color-MF-300x116-web.png
Ryan E. Walters2015-06-29 00:30:302015-12-29 12:43:40Where To Begin Lighting Your Set (Cinematic Lighting Lesson 18)
https://indiecinemaacademy.com/wp-content/uploads/2015/06/LC118-WhereToBeginLighting-featured.jpg
450
800
Ryan E. Walters
https://indiecinemaacademy.com/wp-content/uploads/2013/12/Indie_cinema_Logo_2color-MF-300x116-web.png
Ryan E. Walters2015-06-29 00:30:302015-12-29 12:43:40Where To Begin Lighting Your Set (Cinematic Lighting Lesson 18)Leave a Reply
Want to join the discussion?Feel free to contribute!
Leave a Reply Cancel reply
You must be logged in to post a comment.
This site uses Akismet to reduce spam. Learn how your comment data is processed.

Thank you so much for all of the videos you guys make! So great and really helpful how you break everything down. I have a question about the 1/8 and 1/2 cto that I am seeing in the ‘tools we used’ section in many of the videos. Are you applying 1/8 cto to the bestlight 900 led to add more warmth to it? or the 1/2 cto? I’m looking into getting some of these lights because of your tests and they are very affordable. Keep making great stuff!
Thanks for the kind words of support. I’m glad the videos have been helpful. 🙂
Yes, the CTO is for warming up the light. (Color Temperature Orange gel – CTO – was designed to warm up the light it was placed on.)
How much I warm up the light depends on what I’m trying to match, or the look I am trying to get.
Happy Shooting!