Master The Three Challenges Of Location Lighting
(Cinematic Lighting Lesson 09)
Summary: Shooting on location has it’s drawbacks when setting up lights: supplying power, rigging the lights, and various access issues. In this video Ryan takes you through these challenges then gives you ways to overcome them so they don’t slow you down.
Length: 6:34 minutes
!! Want to see the whole video? Become a member !!
- If you are already a member, you can log in below.
Introduction
Before we get into location lighting, it’s important to be aware of three challenges you’ll face any time you shoot on location: power, rigging, and access. In this video I’ll show you how to master those three challenges so that you can walk away with cinematic images and still make your shoot day.
Challenge #1: Power
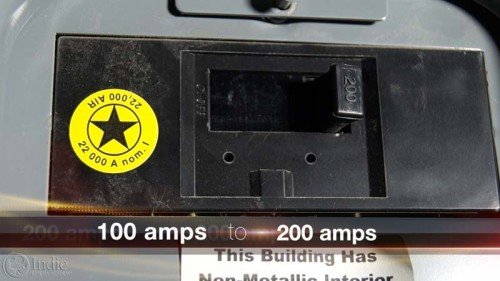
The first challenge is of course power. When you’re out on location, power is usually limited to what the location provides. In the US, houses can range from 100 amps to 200 amps of service, and that is broken down into either 15 amp or 20 amp circuits. While that may sound like a lot of power, its distribution throughout the location can greatly impact the production.
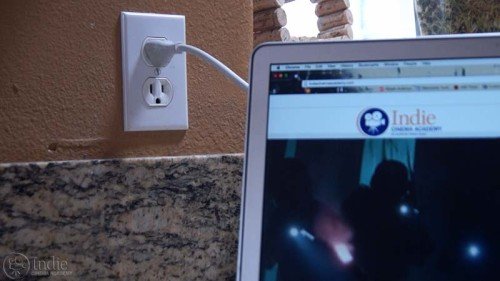
Typically, the electrical department will take care of routing power to the lights. But if you’re on a small crew and you’re responsible for running power, then know the how much power your lights draw so you don’t overload a circuit. Don’t forget: when you’re out on location, there is a good chance other things are plugged into the circuit you’re using. Account for this as you’re doing the math. If you’re not familiar with the math, or circuits, then hop on over to the lighting foundations series where we walk you through it.
If you don’t have enough power or circuits available to you at a location, here are three solutions...
** Want to read the rest of the transcript? Become a member. **
** Want to see the lighting diagrams? Become a member. **
Camera / Audio
- Sony Alpha a7S Mirrorless Digital Camera
- Canon EF 24-70mm f/2.8L II USM Lens
- Fotodiox Lens Mount Adapter – Canon EOS (EF / EF-s) to Sony E-Mount
- Bright Tangerine Misfit Matte Box
- Tilta FF-T03 15mm Follow Focus with Hard Stops
- Sachtler Panorama 7+7 Head 100mm (similar head: 1006 DV 10 SB Fluid Head)
- Sachtler Carbon Fiber Tripod (similar tripod: Carbon Fiber HD Tripod Legs)
- MYT Works 4′ Medium slider w/ HiHat
- Hollywood Beefy Baby Stand (8.5′) (two, to raise the MYT Works slider)
- Movcam Cage for Sony A7S
- Sekonic L-758Cine DigitalMaster Light Meter
- Sekonic C-700 SpectroMaster Color Meter
- Wooden Camera A/B Gold-Mount Plate for Sony A7, A7r and A7s
- Audio Technica AT835b Shotgun Microphone
(similar microphone: Audio Technica BP4071 Shotgun Microphone)
- Wooden Camera DSLR A-Box
- Delkin Devices 64GB SDXC Memory Card 600x UHS-I
- DSC Labs One Shot Reference Chart (Matte Finish)
Behind the Scenes (BTS) Cameras
- GoPro Hero3 Black (similar camera: GoPro HERO4 Black)
- Motrr Galileo: App-Driven Motorized Head w/ GoPro Mount
- Sony Alpha SLT-A57
- Filmcity DSLR Camera Cage Shoulder Rig kit (FC-03)
Lighting / Grip Gear
 https://indiecinemaacademy.com/wp-content/uploads/2016/01/LC120-CorporateVideo-Thumbnail-Web.jpg
450
800
Ryan E. Walters
https://indiecinemaacademy.com/wp-content/uploads/2013/12/Indie_cinema_Logo_2color-MF-300x116-web.png
Ryan E. Walters2016-01-11 00:15:082016-05-05 11:22:30How to Cinematically Light a Corporate Video (Cinematic Lighting Lesson 20)
 https://indiecinemaacademy.com/wp-content/uploads/2015/12/LC119-LightFast-Thumbnail.jpg
450
800
Ryan E. Walters
https://indiecinemaacademy.com/wp-content/uploads/2013/12/Indie_cinema_Logo_2color-MF-300x116-web.png
Ryan E. Walters2015-12-29 12:38:562016-01-10 21:42:39How To Light Quickly (Cinematic Lighting Lesson 19)
 https://indiecinemaacademy.com/wp-content/uploads/2015/09/LC121_LightingHighSpeed-Thumbnail-Web.jpg
450
800
Ryan E. Walters
https://indiecinemaacademy.com/wp-content/uploads/2013/12/Indie_cinema_Logo_2color-MF-300x116-web.png
Ryan E. Walters2015-09-21 00:15:372016-01-10 21:42:57Lighting For Extreme Frame Rates (Cinematic Lighting Lesson 21)
 https://indiecinemaacademy.com/wp-content/uploads/2015/09/LC115_12Questions-Thumbnail-Free-Web.jpg
450
800
Ryan E. Walters
https://indiecinemaacademy.com/wp-content/uploads/2013/12/Indie_cinema_Logo_2color-MF-300x116-web.png
Ryan E. Walters2015-09-07 00:30:532015-10-30 19:06:3612 Crucial Questions To Ask Before You Light Your Set (Cinematic Lighting Lesson 15)
 https://indiecinemaacademy.com/wp-content/uploads/2015/08/LC114-3StrLightingNghtExt-Thumbnail.jpg
450
800
Ryan E. Walters
https://indiecinemaacademy.com/wp-content/uploads/2013/12/Indie_cinema_Logo_2color-MF-300x116-web.png
Ryan E. Walters2015-08-24 00:30:112015-10-30 18:55:173 Strategies for Lighting Your Night Exteriors (Cinematic Lighting Lesson 14)
 https://indiecinemaacademy.com/wp-content/uploads/2015/08/LC112_5SratDayExt-Thumbnail-800x450-jpg-web.jpeg
450
800
Ryan E. Walters
https://indiecinemaacademy.com/wp-content/uploads/2013/12/Indie_cinema_Logo_2color-MF-300x116-web.png
Ryan E. Walters2015-08-10 00:15:422015-10-30 18:54:545 Essential Strategies To Lighting Day Exteriors (Cinematic Lighting Lesson 12)
 https://indiecinemaacademy.com/wp-content/uploads/2015/07/LC113-10TricksDayExt-Thumbnail-800x450-web-.jpg
450
800
Ryan E. Walters
https://indiecinemaacademy.com/wp-content/uploads/2013/12/Indie_cinema_Logo_2color-MF-300x116-web.png
Ryan E. Walters2015-07-27 00:15:252015-10-30 18:55:0310 Tips To Lighting Day Exteriors (Cinematic Lighting Lesson 13)
 https://indiecinemaacademy.com/wp-content/uploads/2015/07/LC123_SmallCommercial-thumbnail-800X450.jpg
450
800
Ryan E. Walters
https://indiecinemaacademy.com/wp-content/uploads/2013/12/Indie_cinema_Logo_2color-MF-300x116-web.png
Ryan E. Walters2015-07-13 14:24:582015-10-30 19:19:44How To Light A Small Commercial (Cinematic Lighting Lesson 23)
 https://indiecinemaacademy.com/wp-content/uploads/2015/06/LC118-WhereToBeginLighting-featured.jpg
450
800
Ryan E. Walters
https://indiecinemaacademy.com/wp-content/uploads/2013/12/Indie_cinema_Logo_2color-MF-300x116-web.png
Ryan E. Walters2015-06-29 00:30:302015-12-29 12:43:40Where To Begin Lighting Your Set (Cinematic Lighting Lesson 18)
https://indiecinemaacademy.com/wp-content/uploads/2015/06/LC118-WhereToBeginLighting-featured.jpg
450
800
Ryan E. Walters
https://indiecinemaacademy.com/wp-content/uploads/2013/12/Indie_cinema_Logo_2color-MF-300x116-web.png
Ryan E. Walters2015-06-29 00:30:302015-12-29 12:43:40Where To Begin Lighting Your Set (Cinematic Lighting Lesson 18)Leave a Reply
Want to join the discussion?Feel free to contribute!
Leave a Reply Cancel reply
You must be logged in to post a comment.
This site uses Akismet to reduce spam. Learn how your comment data is processed.

Hi Guys,
Just curious to know what camera you shot the interview with Ryan in this episode on? Really like the skin tones.
Also, great episode, love the “director’s chair” tip.
Craig
Hey Craig, For all of the Cinematic Lighting series we’ve been shooting with a Sony A7S with Canon glass. (We listed all of the gear we use for each lesson in the fourth tab, labelled Tools We Used.)
For the Camera Foundations series, we mostly used a Canon C100, along with a Canon 60D when we needed to film the C100’s screen.
Thanks for the info! The A7S has nice skin tones, which is not something I find with my FS100, so I was a bit surprised to see that was the camera you are using here. I might have to look into picking one of these up! Bit weirded out by the fact, according to a friend of mine, that the camera cannot shoot lower than 3200 ISO when in SLog mode. Any thoughts on this?
Yeah, it is a bit of a bummer that the camera can’t shoot lower than ISO 3200 in S-Log. But if you look at our lighting diagrams, you’ll see that we don’t typically shoot in S-Log. We’ll use either the Cine 4 setting (if we are going to do a bit of grading) or Cine 2 if we want to leave it as is out of the camera.
Getting good skin tones is more than just the camera (although that plays a big part). Your lighting and post processing also have a LOT to do with the final results. If the lighting and post processing isn’t done with an eye towards keeping good skin tones, then it doesn’t matter what camera you are shooting on…
Hey Ryan,
Just signed up yesterday really loving all the tutorials! A major problem I’m having is finding a portable diffusion frame that I can fit into a small car. Do the 4×4 frames breakdown, or what other options do I have?
Thanks! I’m glad you love the tutorials. 🙂
Yeah, portable diffusion frames are tough for sure… the ones we use are ones that I made myself and break down small-ish. They are four 1 inch tubes that are 4 feet long. When collapsed, they probably take up about an 8″ x 8″ x 4′ space including the bag they are in. I’ll be releasing a tutorial on how they are built in the article section. (They are super cheap to make.) You can also buy them from companies like Westcott (The DP Kit).
Hope that helps, and stay tuned for the tutorial. 🙂
Hi guys 🙂
Just wondering at 3:30 when taping bounce to ceiling what type of tape is that, keen to try this at home don’t want to ruin the ceilings 🙂
Cheers
Dave
Best to try any tape on an out-of-the-way part of the ceiling / wall / floor to make sure it doesn’t damage it. We use gaffer cloth tape and gaffer paper tape. You can buy this from many brands on Amazon as well as in guitar stores (since they use the tape a lot too).
Thanks so much Tim!
Hi very nice tutorial, Kindly may you mention to the tutorial you handle math electricity in it
Thank you!
Right now we don’t yet have a lesson on the math involved in calculating electrical loads for film sets. We will be including that in our Foundations of Lighting series later this year.