Your Guide To High Speed
Part 4: Common Lighting Problems
Summary: Lighting for high speed is not as straightforward as lighting for 24 frames per second. In this video Ryan covers some common lighting issues and how to overcome them. We’ll cover amount of light, flicker from various sources, and gaining options by adjusting the shutter angle.
Length: 5:30 minutes
Introduction
Lighting for high speed is just a matter of turning some lights on and starting to film, right? Not so fast. High speed video introduces some unique challenges that you just don’t face when you’re shooting at 24 frames per second. That’s why we’ve teamed up with Via Films in order to help you navigate the world of light levels, how to avoid flicker, and choosing the appropriate shutter angle.
Bring The Light
As we covered in the camera foundations series, the higher the frame rate you record at, the more light you need. The reason is that you are shooting at a shorter shutter duration. At 24 frames with a 180 degree shutter, each frame is exposed for 1/48 of a second. At 1,000 frames a second with a 180 degree shutter each frame is only exposed for 1/2000 of a second. So when you switch to 1,000 frames you are effectively putting on a 5 stop ND filter in front of the lens. That means you need 32 times more light to shoot at 1,000 frames a second than at 24 frames. So it is crucial that you plan for your lighting requirements with specific frame rates in mind.
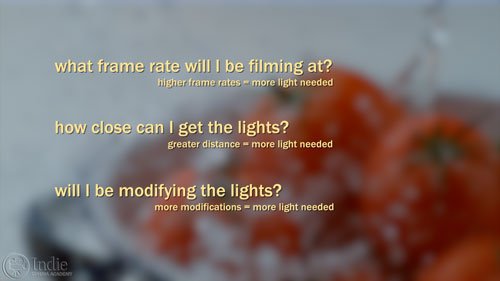
As you plan your shoot, here are the crucial questions to ask:
- What frame rate will I be filming at? The higher the frame rate, the more light you need.
- How close can I get the lights? The farther away the lights are the more light you need.
- Will I be modifying the light at all, such as diffusion? The more the light is modified, the more light you’ll need.
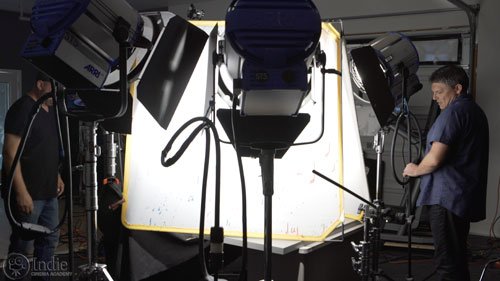
As you answer these questions, I highly encourage you to consult with your gaffer. If you are your own gaffer, consult the spec sheets of the lighting manufacture, or talk with the rental house about what tool might be the best fit for your shoot. If in doubt, get bigger lights. It is always easier to decrease light levels than it is to increase light levels.
What The Flicker?
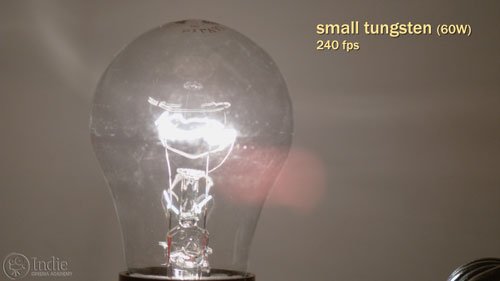
The type of light you use on a shoot has a huge affect on the end result. When it comes to high speed, not all lights are created equal. Light sources that look great at 24 frames per second may not look so great at higher frame rates because they introduce flicker into the image.
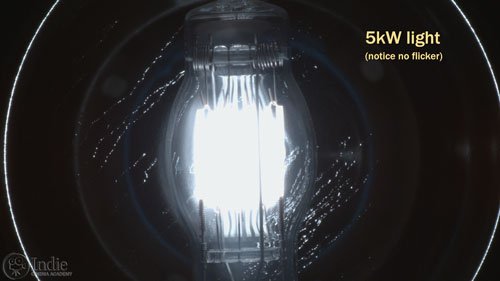
The kind of flicker you get depends on the light source and on the power supply. With traditional tungsten lights you can see flicker in lights that are smaller than 5kW. The flicker in tungsten lights is actually created by the power source, since the lights run on alternating current, or AC. This type of flicker is caused by the filament cooling down and heating back up as the current alternates. With bulbs smaller than 5kW, the cooling is more drastic so chances are you’ll see it flicker. To avoid this on smaller lamps, change the frame rate you are shooting at or change the power source to direct current (DC.) The reason you don’t see this on lights 5kW and up is that the filament doesn’t cool down as much between cycles.
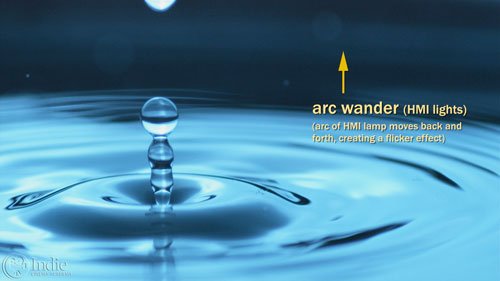
HMIs are generally not a good choice for high speed, even the ones with flicker-free ballasts. The reason is something called arc-wander. The arc of the HMI lamp is actually moving back and forth and it can create the look of flicker in the image.
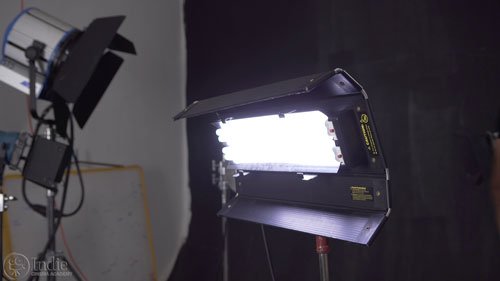
Fluorescents and LEDs may or may not flicker depending on several factors. If you use these types of lights, it is best to test them prior to the shoot using your combined frame rate and shutter angle. Once you have confirmed that they will work, you can feel confident using them on your shoot.

So, if you want a light source that is guaranteed to work for your high speed shoot, go with tungsten lights 5kW and above. Next to that, I’d recommend LED lights, but test those out first to confirm they work. Then, if you have to, go to fluorescents, but again test first. If you’re left with no choice, then use HMIs, but keep a close eye out for arc-wander.
What Shutter Angle Will Work?
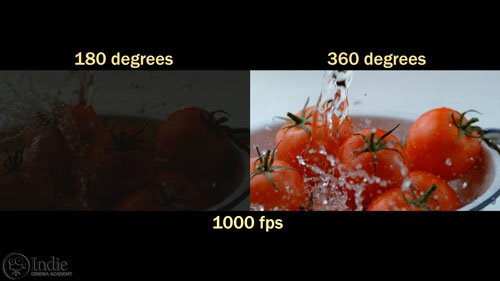
Another issue that you’ll face with high speed shooting is your choice of shutter angle. Although the 180 degree shutter angle rule can also apply to high speed, you can deviate from this rule with less of an effect on the end result. If you change from 180 degrees to 360 degrees, you have just doubled the amount of light entering the camera which can help you out if you are out of light. And when you are at high frame rates, the additional motion blur, although visible, is not as noticeable as at 24 frames.
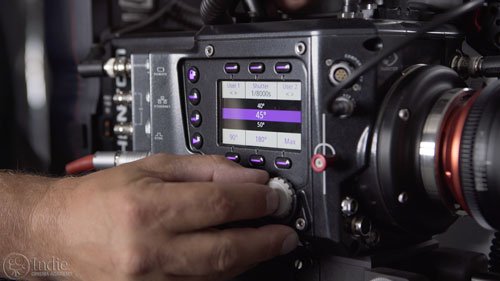
Of course you may want to go in the other direction too. When filming extremely fast objects–such as a bullet–a shutter angle of 90 or 45 degrees works well to freeze the action. If you do that, just remember that you now need two times or four times more light.
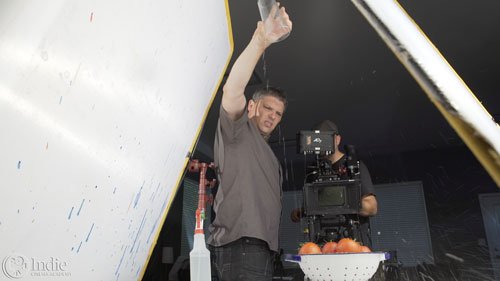
Like with most things, it’s always best to test various shutter angles to see if the amount of blur will work for your subject. If you don’t test, you might run into unexpected issues that can upset your shoot.
Final Thoughts
High speed video requires a lot of light, so I always recommend going big. To avoid flicker, go with a 5kW tungsten light or check out some of the LEDs that are out there. And always choose a shutter angle that supports the subject that you’re filming.
So did you learn anything new or did anything surprise you when it comes to lighting for high speed video? Or maybe you’ve used a light that’s introduced flicker on some of your sets. I want to know. Just leave a comment below. And if you have any questions, ask away, and I’ll be sure to respond.
Camera / Audio
High Speed Cameras
Interview Camera Package
- Sony Alpha a7S Mirrorless Digital Camera
- Canon EF 24-70mm f/2.8L II USM Lens
- Fotodiox Lens Mount Adapter – Canon EOS (EF / EF-s) to Sony E-Mount
- Bright Tangerine Misfit Matte Box
- Tilta FF-T03 15mm Follow Focus with Hard Stops
- Sachtler Panorama 7+7 Head 100mm (similar head: 1006 DV 10 SB Fluid Head)
- Sachtler Carbon Fiber Tripod (similar tripod: Carbon Fiber HD Tripod Legs)
- Movcam Cage for Sony A7S
- Sekonic L-758Cine DigitalMaster Light Meter
- Sekonic C-700 SpectroMaster Color Meter
- Wooden Camera A/B Gold-Mount Plate for Sony A7, A7r and A7s
- Audio Technica AT835b Shotgun Microphone
(similar microphone: Audio Technica BP4071 Shotgun Microphone)
- Wooden Camera DSLR A-Box
- Delkin Devices 64GB SDXC Memory Card 600x UHS-I
- DSC Labs One Shot Reference Chart (Matte Finish)
Behind the Scenes (BTS) Cameras
- GoPro Hero3 Black (similar camera: GoPro HERO4 Black)
- GoPro Hero4 Session
- GoPro HERO+ LCD
- Luxebell Aluminium Skeleton for GoPro Hero Black 4
- PolarPro ProGrip
- GoMount GoClamp
- Sony Alpha A7S Package (see interview camera above)
Lighting / Grip Gear
- ARRI ST5 Studio Fresnel – 5000 Watts, Stand Mount (120-230VAC)
- Aputure Light Storm LS1/2w
- Aputure Light Storm LS1
- Fill-Lite 200
- Fill-Lite Wall Soft Light
- Open End Scrim – 24×36″ – White Artificial Silk
- Solid Frame Scrim – 48×48″ – White Artificial Silk
- Pro Sun-Bounce Kit – Silver/White Screen (4 x 6′)
- 24×36″ – Black Double Net
- Matthews Century C Stand Grip Arm Kit – 10.5′ (3.2m)
- Master Combo HD Stand (11′)
- PBL Sandbags x4 bags
 https://indiecinemaacademy.com/wp-content/uploads/2016/01/LC120-CorporateVideo-Thumbnail-Web.jpg
450
800
Ryan E. Walters
https://indiecinemaacademy.com/wp-content/uploads/2013/12/Indie_cinema_Logo_2color-MF-300x116-web.png
Ryan E. Walters2016-01-11 00:15:082016-05-05 11:22:30How to Cinematically Light a Corporate Video (Cinematic Lighting Lesson 20)
 https://indiecinemaacademy.com/wp-content/uploads/2015/12/LC119-LightFast-Thumbnail.jpg
450
800
Ryan E. Walters
https://indiecinemaacademy.com/wp-content/uploads/2013/12/Indie_cinema_Logo_2color-MF-300x116-web.png
Ryan E. Walters2015-12-29 12:38:562016-01-10 21:42:39How To Light Quickly (Cinematic Lighting Lesson 19)
 https://indiecinemaacademy.com/wp-content/uploads/2015/12/CS006-HighSpeed-Part06-FREE-Thumbnail-Web.jpg
450
800
Ryan E. Walters
https://indiecinemaacademy.com/wp-content/uploads/2013/12/Indie_cinema_Logo_2color-MF-300x116-web.png
Ryan E. Walters2015-12-14 00:15:052015-12-29 13:20:06Your Guide To High Speed, Part 6: Five Tips For A Successful Shoot
 https://indiecinemaacademy.com/wp-content/uploads/2015/12/CS005-HighSpeed-Part05-FREE-Thumbnail-Web.jpg
450
800
Ryan E. Walters
https://indiecinemaacademy.com/wp-content/uploads/2013/12/Indie_cinema_Logo_2color-MF-300x116-web.png
Ryan E. Walters2015-11-30 09:00:282015-12-29 15:41:16Your Guide To High Speed, Part 5: Lighting Six High Speed Sets
 https://indiecinemaacademy.com/wp-content/uploads/2015/12/CS004-HighSpeed-Part04-FREE-Thumbnail-Web.jpg
450
800
Ryan E. Walters
https://indiecinemaacademy.com/wp-content/uploads/2013/12/Indie_cinema_Logo_2color-MF-300x116-web.png
Ryan E. Walters2015-11-16 00:15:182015-12-29 13:17:26Your Guide To High Speed, Part 4: Common Lighting Problems
 https://indiecinemaacademy.com/wp-content/uploads/2015/12/CS003-HighSpeed-Part03-FREE-Thumbnail-Web.jpg
450
800
Ryan E. Walters
https://indiecinemaacademy.com/wp-content/uploads/2013/12/Indie_cinema_Logo_2color-MF-300x116-web.png
Ryan E. Walters2015-11-02 00:15:272015-12-29 13:15:49Your Guide To High Speed, Part 3: Camera Operation & Workflow
 https://indiecinemaacademy.com/wp-content/uploads/2015/12/CS002-HighSpeed-Part02-FREE-Thumbnail-Web.jpg
450
800
Ryan E. Walters
https://indiecinemaacademy.com/wp-content/uploads/2013/12/Indie_cinema_Logo_2color-MF-300x116-web.png
Ryan E. Walters2015-10-19 12:25:282015-12-29 15:21:30Your Guide To High Speed, Part 2: Frame Rate
 https://indiecinemaacademy.com/wp-content/uploads/2015/12/CS001-HighSpeed-Part01-FREE-Thumbnail-Web.jpg
450
800
Ryan E. Walters
https://indiecinemaacademy.com/wp-content/uploads/2013/12/Indie_cinema_Logo_2color-MF-300x116-web.png
Ryan E. Walters2015-10-05 00:15:592015-12-29 13:20:38Your Guide To High Speed, Part 1: Introduction
 https://indiecinemaacademy.com/wp-content/uploads/2015/09/LC121_LightingHighSpeed-Thumbnail-Web.jpg
450
800
Ryan E. Walters
https://indiecinemaacademy.com/wp-content/uploads/2013/12/Indie_cinema_Logo_2color-MF-300x116-web.png
Ryan E. Walters2015-09-21 00:15:372016-01-10 21:42:57Lighting For Extreme Frame Rates (Cinematic Lighting Lesson 21)
https://indiecinemaacademy.com/wp-content/uploads/2015/09/LC121_LightingHighSpeed-Thumbnail-Web.jpg
450
800
Ryan E. Walters
https://indiecinemaacademy.com/wp-content/uploads/2013/12/Indie_cinema_Logo_2color-MF-300x116-web.png
Ryan E. Walters2015-09-21 00:15:372016-01-10 21:42:57Lighting For Extreme Frame Rates (Cinematic Lighting Lesson 21)Leave a Reply
Want to join the discussion?Feel free to contribute!
Leave a Reply Cancel reply
You must be logged in to post a comment.
This site uses Akismet to reduce spam. Learn how your comment data is processed.

You don’t really explain what shutter angle is…
To learn more about shutter angles and how to convert to shutter speed, check out our lesson on the topic: Converting from Shutter Speed to Angles (Camera Lesson 03)