Your Guide To High Speed
Part 3: Camera Operation & Workflow
Summary: When you’re filming high speed events, how do you hit record at the right time? In Part 3 of our series on high speed videography, we explain how: loop record, trigger-point, and post-trigger. Then we cover storing and transferring the footage in various ways depending on your resources.
Length: 5:46 minutes
Introduction
With the amount of frames recorded every second in high speed video comes some unique issues when it comes to recording footage, triggering the camera, and on-set workflow. In this video we’ve partnered with Daniel at Via Films to show you how to overcome some of those challenges when it comes to recording and moving that footage.
Recording Modes & Trigger Points
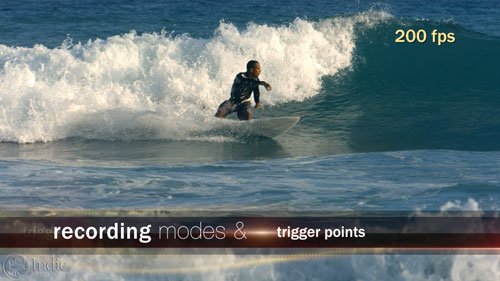
One of the big differences between dedicated slow motion cameras and normal cameras is the way they record and save data. Standard cameras typically only record once you hit the record button. With speciality high speed cameras like the Phantom Flex 4K, additional recording options become possible such as buffer and loop recording. These recording options are necessary because extremely high frame rates produce A LOT of data. To record that data, the camera usually captures to an extremely fast storage system or internal buffer. While this buffer is extremely fast, it is limited to the size of the installed memory, which is typically 16 or 32 gigabytes.
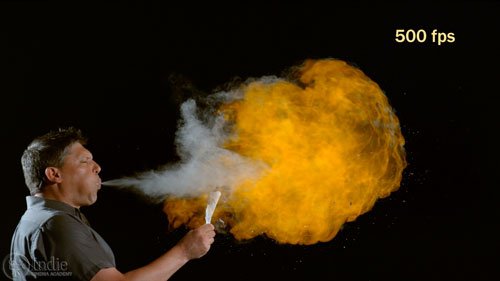
At high frame rates, even a large buffer of 32 gigs can fill up very quickly and limit you to only a few seconds of real time recording. Of course, when you’re playing back the footage, it may take anywhere from 3 – 7 minutes to play back. So if you can only record a few seconds, how do you time your shot so you actually record it? That’s where the loop recording comes in very handy.
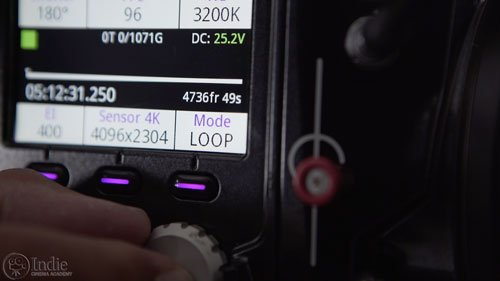
When the camera is put into loop mode, it continuously records and dumps the data on the internal buffer. Now all you have to do is to trigger the camera to save the data it has already recorded. That way you never miss the shot. Recording slow motion this way opens up new opportunities for you on set. On cameras like those in the Phantom family you can adjust the trigger point. For example, you could set the trigger point to 50%. What that means is that when the camera is triggered, it saves half of the data before the trigger point and half of the data after the trigger point. This is the most common way to trigger a shot, and is most useful when you have an action that happens before and after you hit record, like an explosion or something dropping.
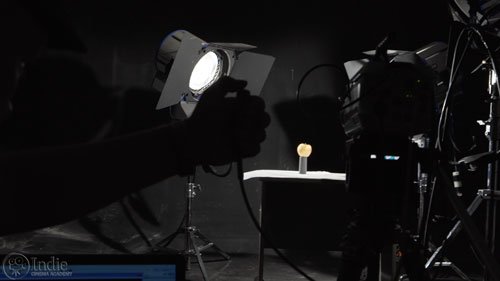
Another common method is a post trigger. With this method you wait until the action is finished and then you hit record and the camera saves all the data it just recorded and nothing more. You’ll use this trigger method less often than the 50% trigger, but you’ll find it helpful for action that are repetitive and you don’t know if the action is worth recording until it is complete. A great example is someone bouncing and doing a flip.
Playback, Trimming, Saving Selects
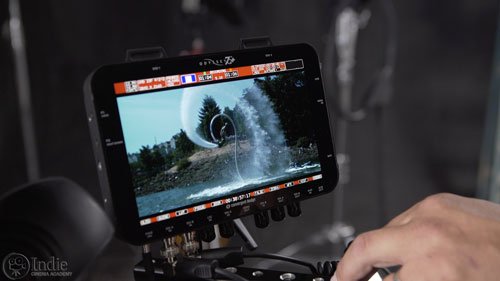
After triggering the camera to record to the internal buffer you still have a few options. You can play the shot back to review what you captured, or your can save it off to a secondary storage, either internal or external. This transfer takes some time, but fortunately you don’t have to move the full clip. When you playback the footage, it is possible to set trim marks on the shot and only save the parts you need. Trimming a shot will help you cut down on the transfer time to the external storage, which also helps you cut down on the storage space you need.
Common Workflows
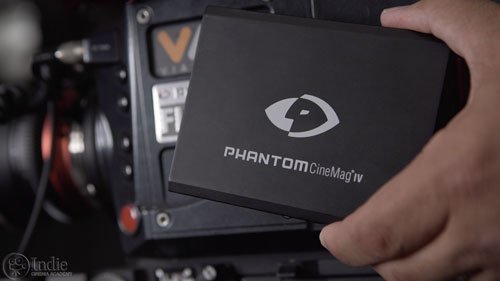
After a shot has been recorded there are three common workflows you can use to manage the footage depending on the equipment you have. If you want to extract the most amount of data at the highest quality possible, and you want to have the camera be completely portable, then you want to record in raw straight to the onboard storage or drive, often called the mag, which is short for magazine. This method takes all of the raw data from the buffer and saves it directly to the mag. If space is an issue for you, you can save the footage to the mag in a compressed format, which decreases the quality of the footage some.
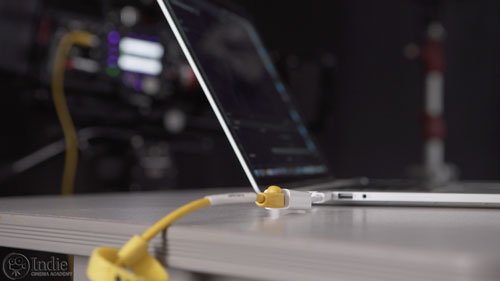
If you want to record the raw data, but can’t save to an internal mag, the next option is to record tethered. This method requires that you connect the camera to a computer, typically using an ethernet cable. Once connected the files are easily transferred directly to the computer, giving you a lot more storage space. However it does create a camera system that is less mobile.
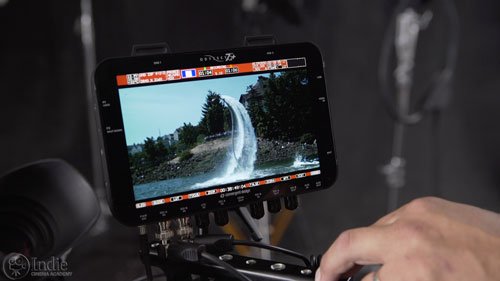
The last option, and possibly the most affordable due to the expensive cost of internal mags, involves recording to an external recorder through an SDI or HDMI cable. Although it is more affordable to record this way, it is also more time consuming. With this method, once the shot is recorded to the buffer you then play it back in real time. As the shot plays back you record it to an external recorder. Most of the time this means you are recording the shot in some kind of compressed format, like ProRes.
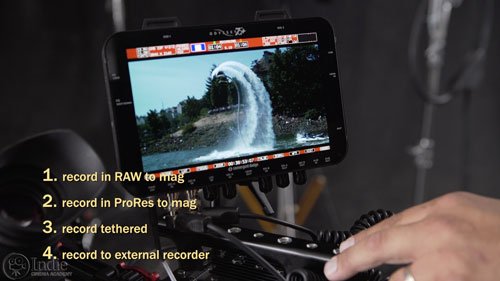
As with all workflows, there isn’t a best option. It all depends on your needs and budget. The most convenient and highest quality workflow is to record in raw to a mag. The next step down is to record in a compressed format like ProRes to a mag. ProRes will make the post workflow easier, but gives you less flexibility in the grade. If neither of those options are available to you, then look into recording tethered if you need the raw files, or using an external recorder if you need compressed files and are on a budget.
Final Thoughts
Most of the time when you’re shooting high speed video, you’ll be recording in loop mode with a 50% trigger. And if your budget can afford it, I’d highly recommend shooting in raw, and then using post-software to convert those files into ProRes. That way you always have the raw files to go back to if you need to make any adjustments or tweaks later on.
So what workflow appeals to you most and will you be using on your own productions? Is there something that I missed, or maybe a tip you’d like to share? Let me know by leaving a comment below. And if you have any questions, ask away, and I’ll be sure to respond.
Camera / Audio
High Speed Cameras
Interview Camera Package
- Sony Alpha a7S Mirrorless Digital Camera
- Canon EF 24-70mm f/2.8L II USM Lens
- Fotodiox Lens Mount Adapter – Canon EOS (EF / EF-s) to Sony E-Mount
- Bright Tangerine Misfit Matte Box
- Tilta FF-T03 15mm Follow Focus with Hard Stops
- Sachtler Panorama 7+7 Head 100mm (similar head: 1006 DV 10 SB Fluid Head)
- Sachtler Carbon Fiber Tripod (similar tripod: Carbon Fiber HD Tripod Legs)
- Movcam Cage for Sony A7S
- Sekonic L-758Cine DigitalMaster Light Meter
- Sekonic C-700 SpectroMaster Color Meter
- Wooden Camera A/B Gold-Mount Plate for Sony A7, A7r and A7s
- Audio Technica AT835b Shotgun Microphone
(similar microphone: Audio Technica BP4071 Shotgun Microphone)
- Wooden Camera DSLR A-Box
- Delkin Devices 64GB SDXC Memory Card 600x UHS-I
- DSC Labs One Shot Reference Chart (Matte Finish)
Behind the Scenes (BTS) Cameras
- GoPro Hero3 Black (similar camera: GoPro HERO4 Black)
- GoPro Hero4 Session
- GoPro HERO+ LCD
- Luxebell Aluminium Skeleton for GoPro Hero Black 4
- PolarPro ProGrip
- GoMount GoClamp
- Sony Alpha A7S Package (see interview camera above)
Lighting / Grip Gear
- ARRI ST5 Studio Fresnel – 5000 Watts, Stand Mount (120-230VAC)
- Aputure Light Storm LS1/2w
- Aputure Light Storm LS1
- Fill-Lite 200
- Fill-Lite Wall Soft Light
- Open End Scrim – 24×36″ – White Artificial Silk
- Solid Frame Scrim – 48×48″ – White Artificial Silk
- Pro Sun-Bounce Kit – Silver/White Screen (4 x 6′)
- 24×36″ – Black Double Net
- Matthews Century C Stand Grip Arm Kit – 10.5′ (3.2m)
- Master Combo HD Stand (11′)
- PBL Sandbags x4 bags
 https://indiecinemaacademy.com/wp-content/uploads/2016/01/LC120-CorporateVideo-Thumbnail-Web.jpg
450
800
Ryan E. Walters
https://indiecinemaacademy.com/wp-content/uploads/2013/12/Indie_cinema_Logo_2color-MF-300x116-web.png
Ryan E. Walters2016-01-11 00:15:082016-05-05 11:22:30How to Cinematically Light a Corporate Video (Cinematic Lighting Lesson 20)
 https://indiecinemaacademy.com/wp-content/uploads/2015/12/LC119-LightFast-Thumbnail.jpg
450
800
Ryan E. Walters
https://indiecinemaacademy.com/wp-content/uploads/2013/12/Indie_cinema_Logo_2color-MF-300x116-web.png
Ryan E. Walters2015-12-29 12:38:562016-01-10 21:42:39How To Light Quickly (Cinematic Lighting Lesson 19)
 https://indiecinemaacademy.com/wp-content/uploads/2015/12/CS006-HighSpeed-Part06-FREE-Thumbnail-Web.jpg
450
800
Ryan E. Walters
https://indiecinemaacademy.com/wp-content/uploads/2013/12/Indie_cinema_Logo_2color-MF-300x116-web.png
Ryan E. Walters2015-12-14 00:15:052015-12-29 13:20:06Your Guide To High Speed, Part 6: Five Tips For A Successful Shoot
 https://indiecinemaacademy.com/wp-content/uploads/2015/12/CS005-HighSpeed-Part05-FREE-Thumbnail-Web.jpg
450
800
Ryan E. Walters
https://indiecinemaacademy.com/wp-content/uploads/2013/12/Indie_cinema_Logo_2color-MF-300x116-web.png
Ryan E. Walters2015-11-30 09:00:282015-12-29 15:41:16Your Guide To High Speed, Part 5: Lighting Six High Speed Sets
 https://indiecinemaacademy.com/wp-content/uploads/2015/12/CS004-HighSpeed-Part04-FREE-Thumbnail-Web.jpg
450
800
Ryan E. Walters
https://indiecinemaacademy.com/wp-content/uploads/2013/12/Indie_cinema_Logo_2color-MF-300x116-web.png
Ryan E. Walters2015-11-16 00:15:182015-12-29 13:17:26Your Guide To High Speed, Part 4: Common Lighting Problems
 https://indiecinemaacademy.com/wp-content/uploads/2015/12/CS003-HighSpeed-Part03-FREE-Thumbnail-Web.jpg
450
800
Ryan E. Walters
https://indiecinemaacademy.com/wp-content/uploads/2013/12/Indie_cinema_Logo_2color-MF-300x116-web.png
Ryan E. Walters2015-11-02 00:15:272015-12-29 13:15:49Your Guide To High Speed, Part 3: Camera Operation & Workflow
 https://indiecinemaacademy.com/wp-content/uploads/2015/12/CS002-HighSpeed-Part02-FREE-Thumbnail-Web.jpg
450
800
Ryan E. Walters
https://indiecinemaacademy.com/wp-content/uploads/2013/12/Indie_cinema_Logo_2color-MF-300x116-web.png
Ryan E. Walters2015-10-19 12:25:282015-12-29 15:21:30Your Guide To High Speed, Part 2: Frame Rate
 https://indiecinemaacademy.com/wp-content/uploads/2015/12/CS001-HighSpeed-Part01-FREE-Thumbnail-Web.jpg
450
800
Ryan E. Walters
https://indiecinemaacademy.com/wp-content/uploads/2013/12/Indie_cinema_Logo_2color-MF-300x116-web.png
Ryan E. Walters2015-10-05 00:15:592015-12-29 13:20:38Your Guide To High Speed, Part 1: Introduction
 https://indiecinemaacademy.com/wp-content/uploads/2015/09/LC121_LightingHighSpeed-Thumbnail-Web.jpg
450
800
Ryan E. Walters
https://indiecinemaacademy.com/wp-content/uploads/2013/12/Indie_cinema_Logo_2color-MF-300x116-web.png
Ryan E. Walters2015-09-21 00:15:372016-01-10 21:42:57Lighting For Extreme Frame Rates (Cinematic Lighting Lesson 21)
Leave a Reply
Want to join the discussion?Feel free to contribute!