Your Guide To High Speed
Part 6: Five Tips For A Successful Shoot
Summary: Shooting high speed video is not quite as straightforward as a regular speed shoot. By following these five tips you’ll not only walk away with great looking footage, but you’ll stay on schedule: use a high speed technician, essential high speed accessories, black balance the camera, schedule additional time for the shoot, and consider post-production workflow before you shoot.
Length: 7:51 minutes
Introduction
Now that you know the lighting and technical considerations that go into shooting at high speed, it’s time to cover the five tips that will help you be successful on your next high speed shoot. I again want to thank Via Films for helping us make this series a reality. Cause quite frankly, it wouldn’t have happened without their help.
Tip 01: Use A Technician
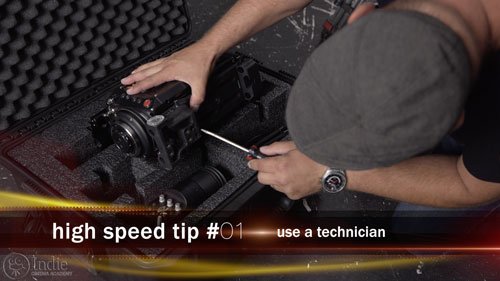
Top of the line high speed camera like the Phantom can cost as much as a house–seriously! It is a finely tuned, precision built supercomputer with a sensor and a lens. To ensure a successful shoot, most rental houses will send out a certified technician to accompany the camera. It is the job of the high speed technician to be so familiar with the camera that they can handle any issue that could arise during a shoot, along with knowing how to manage the shots, the memory, and the storage space. By handing off these responsibility from the DP or cinematographer, the DP can focus on lighting the set and working with the director rather than getting bogged down in tech issues.
So we strongly recommend taking the rental house up on supplying one. There are more important things that the DP and director should be focused on than the details we’re about to cover.
Tip 02: The Essential Accessories
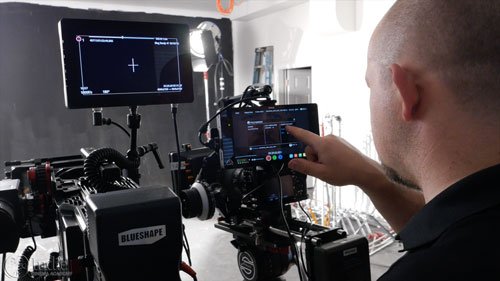
Most high frame rate cameras are very similar to their non-high speed counterparts. They have similar form factor and they can take most of the same accessories, like matte boxes, follow focuses, and monitors. But there are two unique accessories to the Phantom camera: the trigger switch and the ethernet cable.
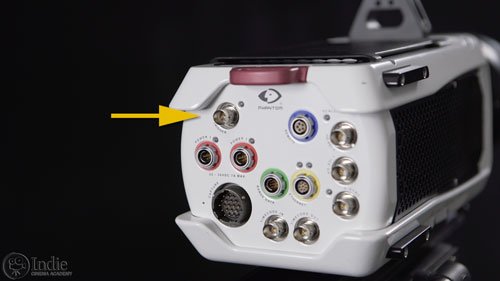
The trigger switch is an external switch that plugs into the camera for remote triggering. It’s necessary since sometimes the camera needs to be in an unusual place, or the ability to have a hand trigger can allow you more precise control of the camera. Remember: at high speeds, even a delay of one second can mean the difference of getting the shot or not.
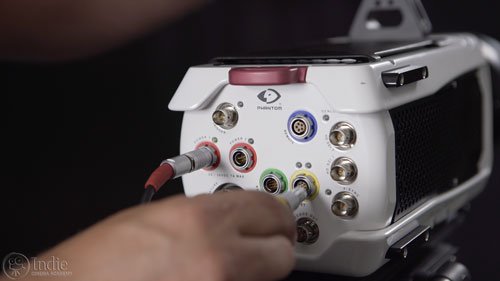
The ethernet cable serves two purposes. First, as we mentioned in the lesson on workflow, it allows you to record footage directly to a computer. The other reason is that you can remotely control the camera along with all of its settings. In fact, some of the high speed cameras like the v711 can only be controlled via an ethernet connection to a computer. If you will be using an ethernet cable to tether the camera to your computer, we highly recommend having multiple lengths of cable to ensure you can comfortably connect from wherever you set up your computer.
Tip 03: Black Balancing

Once your camera is built and ready to go, it is critical to black balance it. While most high end cinema cameras need to be black balanced, it is especially important to black balance high frame rate cameras due to the sensitivity of their sensors. If you don’t take the time to black balance, not only can your footage look noisy, but the colors can actually be significantly off giving you unsightly footage.

Specific best practices for black balancing your camera will depend on the camera you are using. In general, it is best to let the camera warm up in the same environment where you will be shooting and be on for 30 minutes prior to black balancing. This warm-up time acclimates the sensor and helps it get to its optimal operating temperature. Once at this temperature, black balancing the sensor will give you the cleanest and most accurate images the camera can deliver. If you rush this process or skip it, well, the results will be less than acceptable.

Most of the new high speed cameras offer automatic black balancing, which I wholeheartedly welcome. Older cameras not only require manually black balancing, but they also require you to black balance in-between shots as well as when you change camera settings like your frame rate. Again, having a dedicated high speed technician on-set means these types of things will be taken care of for you so that you can focus on the shoot.
Tip 04: Schedule Additional Time
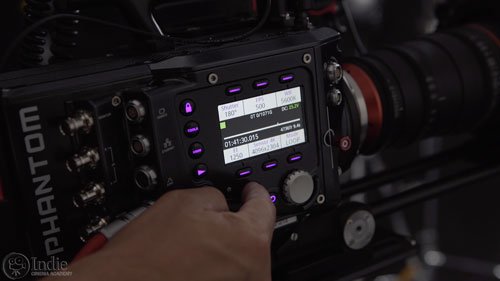
Once your camera is properly built, balanced, and black balanced it’s time to start filming. This process starts with choosing your frame rate, setting the trigger point, and pressing record. No surprise there. The difference when working on a high speed shoot comes once the footage has been recorded. Since the camera’s buffer has limited capacity, it is usually a good idea to review the shot, trim the footage down to the parts you want to keep, and then save it off to the internal or external storage.
(Watch Equipment Etiquette: Balancing The Camera to learn more!)

Pretty straightforward and simple. Nothing complex here. But here’s the catch those not used to high speed often overlook: the recording process for high speed is much more time consuming than a regular shoot. It isn’t just, “Shoot a three second shot and watch a three second shot play back.” Depending on the frame rate, that three second shot could last seven minutes! So you’ll want add extra time into your shooting schedule when planning out your high speed shoot. How much extra time really varies depending on what you are shooting, and how much playback you’ll be watching. Typically, I’ll plan on things taking 1.5 times to 2 times longer to complete than a regular speed shoot. But that’s my own personal rule of thumb.
Tip 05: Post Production
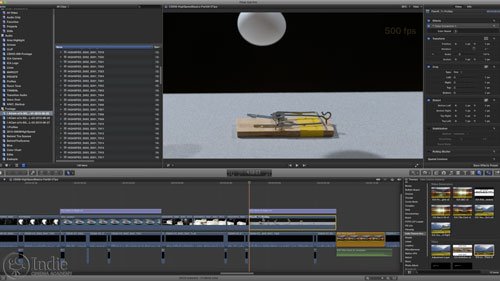
Post production may be the last step of the process for a high speed shoot, but in my opinion it should be one of the first things you think about, even before the day of the shoot. The format you shoot in will dramatically impact the difficulty of the post production workflow. Good news, though: technology is rapidly advancing so the post work is becoming easier and faster. And its constantly changing and improving.
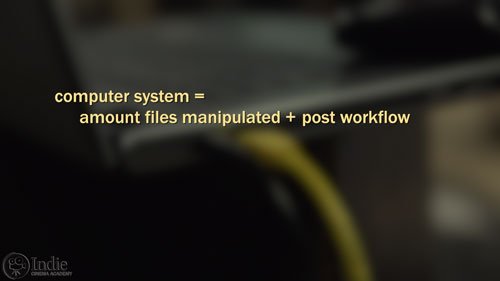
The biggest issue that affects the post process is the format that you have chosen to shoot in. If you shoot in raw you will get the highest quality images possible, and you’ll have the most flexibility in post. But that comes at the cost of speed. To process the raw files quickly, you need a fast and powerful computer. Don’t even bother using your laptop. What kind of computer system you need to use will depend on how much you are playing with the files and what your post workflow looks like. The good news is that there are several workflows to choose from. If you are working with a camera like the Phantom, you can download the software to work with the raw files directly from Vision Research. If that isn’t your style, you can use third party software like Glue Tools, Davinci Resolve, or even Adobe Premiere. Just make sure your computer has a lot of RAM, a powerful processor, and the best graphics card possible.
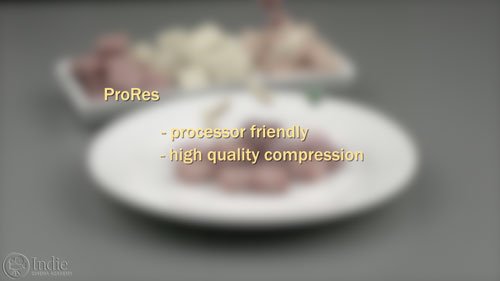
If you are looking for the fastest, and easiest post workflow, and you don’t need 100% flexibility with the footage because you know you’ve shot it correctly, then I’d suggest either recording the footage in a compressed format like ProRes, or converting the raw files to ProRes prior to editing. ProRes is a lot less processor intensive and still allows you to get great looking images all the way through to delivery. So if you are stuck using a slower computer in post, then ProRes may be your only realistic option if you have a tight schedule.
Final Thoughts
So as you can tell, shooting at high speeds doesn’t have to be a dark art. As long as you schedule for and plan for the additional considerations like black balancing, playback and triggering your camera, you should have a successful shoot. Again, I’d like to thank Daniel and Via Films for helping us make this series a reality. Without his ingenuity and creativity, it just wouldn’t have happened. If you haven’t done so already, I highly encourage you to jump over to his site and check out his work.
So what stood out to you about this lesson? Was there a new concept or idea you hadn’t thought about before? Or is there any tip or trick you’d like to add? Let me know by leaving a comment below. And as always, if you have any questions, ask away, and I’ll be sure to respond.
Camera / Audio
High Speed Cameras
Interview Camera Package
- Sony Alpha a7S Mirrorless Digital Camera
- Canon EF 24-70mm f/2.8L II USM Lens
- Fotodiox Lens Mount Adapter – Canon EOS (EF / EF-s) to Sony E-Mount
- Bright Tangerine Misfit Matte Box
- Tilta FF-T03 15mm Follow Focus with Hard Stops
- Sachtler Panorama 7+7 Head 100mm (similar head: 1006 DV 10 SB Fluid Head)
- Sachtler Carbon Fiber Tripod (similar tripod: Carbon Fiber HD Tripod Legs)
- Movcam Cage for Sony A7S
- Sekonic L-758Cine DigitalMaster Light Meter
- Sekonic C-700 SpectroMaster Color Meter
- Wooden Camera A/B Gold-Mount Plate for Sony A7, A7r and A7s
- Audio Technica AT835b Shotgun Microphone
(similar microphone: Audio Technica BP4071 Shotgun Microphone)
- Wooden Camera DSLR A-Box
- Delkin Devices 64GB SDXC Memory Card 600x UHS-I
- DSC Labs One Shot Reference Chart (Matte Finish)
Behind the Scenes (BTS) Cameras
- GoPro Hero3 Black (similar camera: GoPro HERO4 Black)
- GoPro Hero4 Session
- GoPro HERO+ LCD
- Luxebell Aluminium Skeleton for GoPro Hero Black 4
- PolarPro ProGrip
- GoMount GoClamp
- Sony Alpha A7S Package (see interview camera above)
Lighting / Grip Gear
- ARRI ST5 Studio Fresnel – 5000 Watts, Stand Mount (120-230VAC)
- Aputure Light Storm LS1/2w
- Aputure Light Storm LS1
- Fill-Lite 200
- Fill-Lite Wall Soft Light
- Open End Scrim – 24×36″ – White Artificial Silk
- Solid Frame Scrim – 48×48″ – White Artificial Silk
- Pro Sun-Bounce Kit – Silver/White Screen (4 x 6′)
- 24×36″ – Black Double Net
- Matthews Century C Stand Grip Arm Kit – 10.5′ (3.2m)
- Master Combo HD Stand (11′)
- PBL Sandbags x4 bags
 https://indiecinemaacademy.com/wp-content/uploads/2015/12/CS006-HighSpeed-Part06-FREE-Thumbnail-Web.jpg
450
800
Ryan E. Walters
https://indiecinemaacademy.com/wp-content/uploads/2013/12/Indie_cinema_Logo_2color-MF-300x116-web.png
Ryan E. Walters2015-12-14 00:15:052015-12-29 13:20:06Your Guide To High Speed, Part 6: Five Tips For A Successful Shoot
 https://indiecinemaacademy.com/wp-content/uploads/2015/12/CS005-HighSpeed-Part05-FREE-Thumbnail-Web.jpg
450
800
Ryan E. Walters
https://indiecinemaacademy.com/wp-content/uploads/2013/12/Indie_cinema_Logo_2color-MF-300x116-web.png
Ryan E. Walters2015-11-30 09:00:282015-12-29 15:41:16Your Guide To High Speed, Part 5: Lighting Six High Speed Sets
 https://indiecinemaacademy.com/wp-content/uploads/2015/12/CS004-HighSpeed-Part04-FREE-Thumbnail-Web.jpg
450
800
Ryan E. Walters
https://indiecinemaacademy.com/wp-content/uploads/2013/12/Indie_cinema_Logo_2color-MF-300x116-web.png
Ryan E. Walters2015-11-16 00:15:182015-12-29 13:17:26Your Guide To High Speed, Part 4: Common Lighting Problems
 https://indiecinemaacademy.com/wp-content/uploads/2015/12/CS003-HighSpeed-Part03-FREE-Thumbnail-Web.jpg
450
800
Ryan E. Walters
https://indiecinemaacademy.com/wp-content/uploads/2013/12/Indie_cinema_Logo_2color-MF-300x116-web.png
Ryan E. Walters2015-11-02 00:15:272015-12-29 13:15:49Your Guide To High Speed, Part 3: Camera Operation & Workflow
 https://indiecinemaacademy.com/wp-content/uploads/2015/12/CS002-HighSpeed-Part02-FREE-Thumbnail-Web.jpg
450
800
Ryan E. Walters
https://indiecinemaacademy.com/wp-content/uploads/2013/12/Indie_cinema_Logo_2color-MF-300x116-web.png
Ryan E. Walters2015-10-19 12:25:282015-12-29 15:21:30Your Guide To High Speed, Part 2: Frame Rate
 https://indiecinemaacademy.com/wp-content/uploads/2015/12/CS001-HighSpeed-Part01-FREE-Thumbnail-Web.jpg
450
800
Ryan E. Walters
https://indiecinemaacademy.com/wp-content/uploads/2013/12/Indie_cinema_Logo_2color-MF-300x116-web.png
Ryan E. Walters2015-10-05 00:15:592015-12-29 13:20:38Your Guide To High Speed, Part 1: Introduction
 https://indiecinemaacademy.com/wp-content/uploads/2015/09/LC121_LightingHighSpeed-Thumbnail-Web.jpg
450
800
Ryan E. Walters
https://indiecinemaacademy.com/wp-content/uploads/2013/12/Indie_cinema_Logo_2color-MF-300x116-web.png
Ryan E. Walters2015-09-21 00:15:372016-01-10 21:42:57Lighting For Extreme Frame Rates (Cinematic Lighting Lesson 21)
Leave a Reply
Want to join the discussion?Feel free to contribute!