How To Light A Small Commercial
(Cinematic Lighting Lesson 23)
Summary: Ryan takes you behind the scenes of a small budget commercial shoot, where he breaks down one of the scenes, explaining his process and lighting set-ups.
Length: 11:48 minutes
!! Want to see the whole video? Become a member !!
- If you are already a member, you can log in below.
Introduction
Small commercial projects can be a fun challenge to light and shoot. Typically you’ll have a larger crew and you’ll have more lights, which can be a lot of fun, but you’ll still be constrained by a smaller budget and a tight schedule. So in this video I’m going to take you behind the scenes on a video shoot we did for a local yoga studio. First let’s take a look at the highlight reel and then we’ll break it down shot by shot.
Yoga Footage Example Video
[A two-scene highlight reel is played.]
Creating The Look / Mood
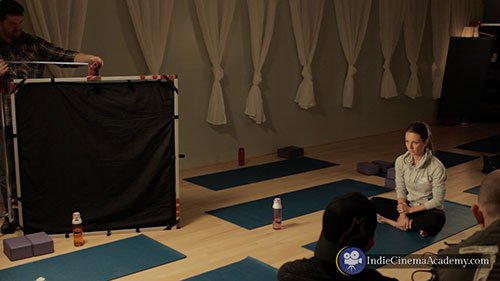
The fictitious backstory for the storyline involves the lead character coming to this yoga studio to escape from her hectic, isolating life. She is there to refocus and regroup, with support from her friends. It’s all about her journey and her experience at the yoga studio.
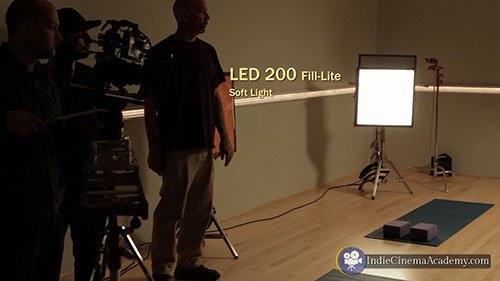
When it came to lighting this video, we wanted to evoke a feeling of warmth and calmness. We also wanted to play off of the idea of yin and yang, or opposites, by having areas of shadow and light. To get that look, I opted to go with soft lighting throughout the various scenes. Our lights of choice were Fill-Lite lights because they are soft and versatile. The only problem was that ours are daylight balanced. They have the light quality I wanted, they were just the wrong color temperature.
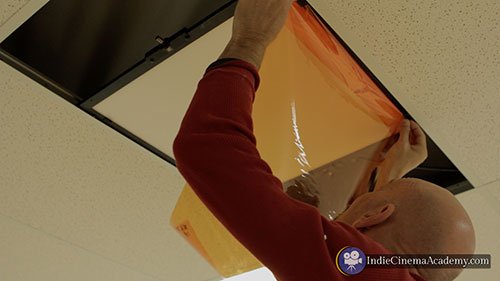
This wouldn’t have been a big deal if the rest of the practical lights were daylight balanced too, but they weren’t. We considered switching the practical bulbs out for daylight bulbs, but ran into a problem. The rope light which ran along the wall in one scene was tungsten balanced. The backup daylight balanced LED rope light couldn’t be used since it had an odd flicker and looked very blue. This pushed us to go tungsten with everything, so we gelled all of the lights to match.
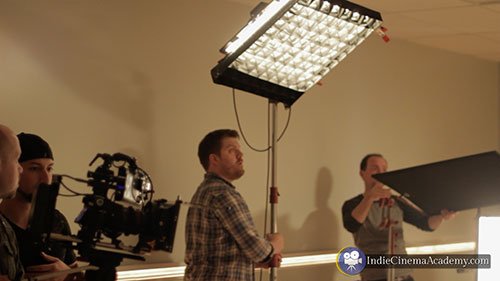
Now that we had our look figured out and the practical lights issue tackled, we moved on to actually lighting our set. I’ll cover these shots in the order that we filmed them so you can see how the lighting changes as we move throughout this first setup in the commercial.
The Wide Shot
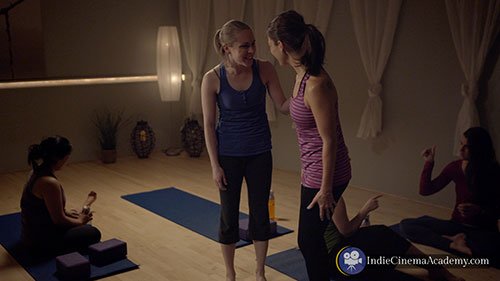
The wide is always where you have to compromise the most with lighting. The amount of space you have to light and the action that happens means that you’re not going to be able to place every light in the exact, ideal position you want. So try to get it about 80% of the way there. Don’t waste a lot of time trying to get everything perfect; save time for the other shots.
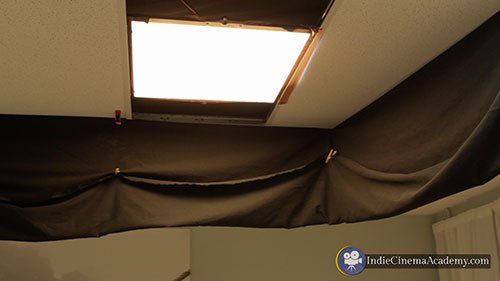
In this wide shot, we start with two people talking on the mats, we cut to our lead entering the frame, and then one of the friends gets up to talk with her. For this setup I used three lights. I placed one square…
** Want to read the rest of the transcript? Become a member. **
** Want to see the lighting diagrams? Become a member. **
Camera / Audio
- Sony Alpha a7S Mirrorless Digital Camera
- Canon EF 24-70mm f/2.8L II USM Lens
- Fotodiox Lens Mount Adapter – Canon EOS (EF / EF-s) to Sony E-Mount
- Bright Tangerine Misfit Matte Box
- Tilta FF-T03 15mm Follow Focus with Hard Stops
- Sachtler Panorama 7+7 Head 100mm (similar head: 1006 DV 10 SB Fluid Head)
- Sachtler Carbon Fiber Tripod (similar tripod: Carbon Fiber HD Tripod Legs)
- MYT Works 4′ Medium slider w/ HiHat
- Hollywood Beefy Baby Stand (8.5′) (two, to raise the MYT Works slider)
- Movcam Cage for Sony A7S
- Sekonic L-758Cine DigitalMaster Light Meter
- Sekonic C-700 SpectroMaster Color Meter
- Wooden Camera A/B Gold-Mount Plate for Sony A7, A7r and A7s
- Audio Technica AT835b Shotgun Microphone
(similar microphone: Audio Technica BP4071 Shotgun Microphone)
- Wooden Camera DSLR A-Box
- Delkin Devices 64GB SDXC Memory Card 600x UHS-I
- DSC Labs One Shot Reference Chart (Matte Finish)
Behind the Scenes (BTS) Cameras
- GoPro Hero3 Black (similar camera: GoPro HERO4 Black)
- Motrr Galileo: App-Driven Motorized Head w/ GoPro Mount
- Sony Alpha SLT-A57
- Filmcity DSLR Camera Cage Shoulder Rig kit (FC-03)
Lighting / Grip Gear
 https://indiecinemaacademy.com/wp-content/uploads/2016/01/LC120-CorporateVideo-Thumbnail-Web.jpg
450
800
Ryan E. Walters
https://indiecinemaacademy.com/wp-content/uploads/2013/12/Indie_cinema_Logo_2color-MF-300x116-web.png
Ryan E. Walters2016-01-11 00:15:082016-05-05 11:22:30How to Cinematically Light a Corporate Video (Cinematic Lighting Lesson 20)
 https://indiecinemaacademy.com/wp-content/uploads/2015/12/LC119-LightFast-Thumbnail.jpg
450
800
Ryan E. Walters
https://indiecinemaacademy.com/wp-content/uploads/2013/12/Indie_cinema_Logo_2color-MF-300x116-web.png
Ryan E. Walters2015-12-29 12:38:562016-01-10 21:42:39How To Light Quickly (Cinematic Lighting Lesson 19)
 https://indiecinemaacademy.com/wp-content/uploads/2015/09/LC121_LightingHighSpeed-Thumbnail-Web.jpg
450
800
Ryan E. Walters
https://indiecinemaacademy.com/wp-content/uploads/2013/12/Indie_cinema_Logo_2color-MF-300x116-web.png
Ryan E. Walters2015-09-21 00:15:372016-01-10 21:42:57Lighting For Extreme Frame Rates (Cinematic Lighting Lesson 21)
 https://indiecinemaacademy.com/wp-content/uploads/2015/09/LC115_12Questions-Thumbnail-Free-Web.jpg
450
800
Ryan E. Walters
https://indiecinemaacademy.com/wp-content/uploads/2013/12/Indie_cinema_Logo_2color-MF-300x116-web.png
Ryan E. Walters2015-09-07 00:30:532015-10-30 19:06:3612 Crucial Questions To Ask Before You Light Your Set (Cinematic Lighting Lesson 15)
 https://indiecinemaacademy.com/wp-content/uploads/2015/08/LC114-3StrLightingNghtExt-Thumbnail.jpg
450
800
Ryan E. Walters
https://indiecinemaacademy.com/wp-content/uploads/2013/12/Indie_cinema_Logo_2color-MF-300x116-web.png
Ryan E. Walters2015-08-24 00:30:112015-10-30 18:55:173 Strategies for Lighting Your Night Exteriors (Cinematic Lighting Lesson 14)
 https://indiecinemaacademy.com/wp-content/uploads/2015/08/LC112_5SratDayExt-Thumbnail-800x450-jpg-web.jpeg
450
800
Ryan E. Walters
https://indiecinemaacademy.com/wp-content/uploads/2013/12/Indie_cinema_Logo_2color-MF-300x116-web.png
Ryan E. Walters2015-08-10 00:15:422015-10-30 18:54:545 Essential Strategies To Lighting Day Exteriors (Cinematic Lighting Lesson 12)
 https://indiecinemaacademy.com/wp-content/uploads/2015/07/LC113-10TricksDayExt-Thumbnail-800x450-web-.jpg
450
800
Ryan E. Walters
https://indiecinemaacademy.com/wp-content/uploads/2013/12/Indie_cinema_Logo_2color-MF-300x116-web.png
Ryan E. Walters2015-07-27 00:15:252015-10-30 18:55:0310 Tips To Lighting Day Exteriors (Cinematic Lighting Lesson 13)
 https://indiecinemaacademy.com/wp-content/uploads/2015/07/LC123_SmallCommercial-thumbnail-800X450.jpg
450
800
Ryan E. Walters
https://indiecinemaacademy.com/wp-content/uploads/2013/12/Indie_cinema_Logo_2color-MF-300x116-web.png
Ryan E. Walters2015-07-13 14:24:582015-10-30 19:19:44How To Light A Small Commercial (Cinematic Lighting Lesson 23)
 https://indiecinemaacademy.com/wp-content/uploads/2015/06/LC118-WhereToBeginLighting-featured.jpg
450
800
Ryan E. Walters
https://indiecinemaacademy.com/wp-content/uploads/2013/12/Indie_cinema_Logo_2color-MF-300x116-web.png
Ryan E. Walters2015-06-29 00:30:302015-12-29 12:43:40Where To Begin Lighting Your Set (Cinematic Lighting Lesson 18)
https://indiecinemaacademy.com/wp-content/uploads/2015/06/LC118-WhereToBeginLighting-featured.jpg
450
800
Ryan E. Walters
https://indiecinemaacademy.com/wp-content/uploads/2013/12/Indie_cinema_Logo_2color-MF-300x116-web.png
Ryan E. Walters2015-06-29 00:30:302015-12-29 12:43:40Where To Begin Lighting Your Set (Cinematic Lighting Lesson 18)Leave a Reply
Want to join the discussion?Feel free to contribute!
Leave a Reply Cancel reply
You must be logged in to post a comment.
This site uses Akismet to reduce spam. Learn how your comment data is processed.

When you shoot using tungsten practical lights, do you shoot at 30 fps to avoid flicker?
Unless the project requires something else, we shoot everything at 24fps. Flicker from tungsten practicals have never been an issue.
In our lesson on lighting issues with high speed we bring up the issue of flicker from small tungsten bulbs. We noticed a slight flicker from 60W bulbs at 240 fps. But at standard frame rates (24 fps and 30 fps) you shouldn’t see any flicker.
Very informative article, but I have a suggestion since this tutorial has a huge work in shaping the light, why you do not show in the future the BTS behind the scene for the tutorials , to allow us to understand how you fine tune your work
I am shooting a model doing a standing movement, and I want legs and face evenly lit (ie. head to toe). The model might even hold her hand up higher than her head, and it also needs to be lit. I recently followed some advise on your site and bought an aputure light storm LED. However, it seems like I will actually need two of these to make my key light- one waist high and one shoulder high – to evenly light her from head to toe. (This is just the key light. I’m not even considering the fill and back lights.) Does two lights for a key light sound right?
Yes, that sounds about right. There are a lot of benefits of LEDs, but one downside is that they aren’t as bright. This means that many times multiple lights are needed.
What you will want to do is put a large diffuser in front of all the lights you use as a key, such as a 4′ x 4′, a 6′ x 6′, 8′ x 8′, etc. The larger the diffusion, the more your subject can move and raise their arms, and still be evenly lit with soft light. This way you can pound that diffusion with multiple lights and still make it feel like one light source. Just be sure to back the lights away from the diffusion so that the diffusion is also evenly lit. To see this in action, members can watch Lesson 4 in our Cinematic Lighting module, “Six Ways To Create Soft Light“. Large diffusion is around 3 minutes in, and an even softer method called a book light is around 6:30 minutes into the video.
Hi, I notice that in this cinematic lighting series that Lesson 22 and 24 seem to be missing, are they available elsewhere?
Thanks
Yeah, back when we created this series, we filmed the lessons out of order. Then we started rearranging some of the content which resulted in the material for lessons #22 and #24 being added to other lessons. As a result, there aren’t any #22 and #24. Great job in noticing that!