The Power Of X
A simple yet powerful lighting technique anyone can master in under a minute.
Yes! Send Me My Free Video

During the past decade digital cinema cameras seem to be more abundant than film cameras. Having a digital cameras with actual EI (exposure index) of 800, complete with clean useable images and 13-14 stops of dynamic range was unthinkable five years ago. However, now that we have easy access to digital cameras with these amazing specs, a new problem has (ironically) emerged: the images are actually too good. They are too clean. “Why is this a problem?” you may ask. Well, let me explain.
One reason why people–myself included–enjoy the aesthetics of film is due to the “organic” look it delivers. This is often a highbrow way of saying “technical imperfection” of film. Literal film is a very imprecise medium. For one it does not have hard cut off points in the highlights. Instead it gracefully rolls off. Digital, on the other hand, abruptly goes from very bright to blown out. This is partially from how a digital camera responds to light and partially how it stores the information as a bunch of exact ones and zeros. As a result, when it hits that clipping point in the highlights, all of the information is gone.
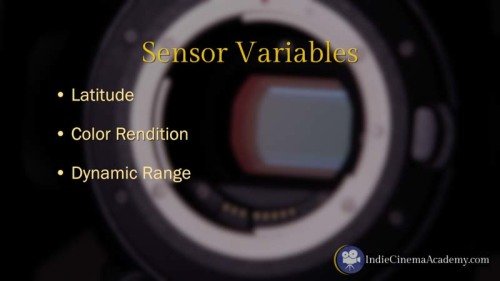
Another way that film feels more “organic” is because the literal film is made up of random crystals of silver halide on a thin membrane. The formation of these crystals is never exactly the same. This means that even in a completely static shot, every frame is unique as the film grain does not align itself in exactly the same pattern. Compare this with digital cameras where the pixels are laid out in a perfect grid matrix, storing the light as either a one or a zero. This level of digital precision removes a lot of the “organic” feel inherent with film. Add amazingly clean, high quality modern glass to this digital “problem,” the result is a technically pristine, clinical image free of character and free of life (in my opinion).
Camera manufacturers have attempted to correct this “problem” through the use of optical low-pass filters (OLPF). Having worked with the ARRI Alexa and the RED Epic quite a bit, I can say that the Alexa has a stronger OLPF than the Epic. While I haven’t done side by side testing to prove this (yet), I feel the highlights from the Alexa roll off and bloom much more pleasantly than the Epic’s less strong–and thus more precise–OLPF. From research and conversations with people in the know at RED and elsewhere, my understanding is that the stronger OLPF in the Alexa is contributing to part of the look of that camera. This brings up an interesting issue with the Blackmagic Cinema Camera. From the reports I’ve heard, Blackmagic is either using a very weak OLPF or not using one at all. This means a tack sharp pristine image.
Some people’s solution is just to stick with film. Yes, this is definitely an option. However, I’ve taken a different approach. My solution is a four-part mixture that breathes life and the organic feel back into my digital imagery. My recipe involves adjusting the lighting, lensing, filtration, and grading in specific ways that all support the story. (Some people add a fifth step by using smoke or “atmosphere” to add a type of on-set “grain.”)
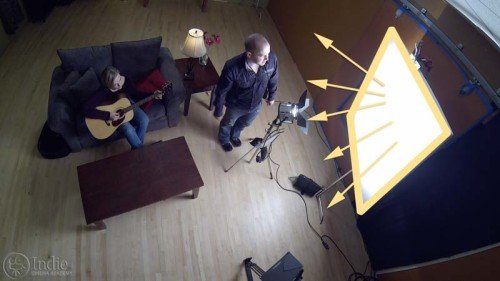
On my projects about 70-80% of the final look comes from my lighting. In my early days of cinematography, my focus was on the technical precision of my lighting, making sure my exposure was perfectly maintained through the frame. As I’ve grown in my profession, I’ve realized that great lighting is as much about the places in-between the light as it is about where the light exists. I’ve moved away from obsessing about every point in the frame being exact. This opens me up to more natural and organic lighting styles. However this should not be confused with being sloppy with lighting. I still meter my setups and make sure that I hit specific values within in my frame.
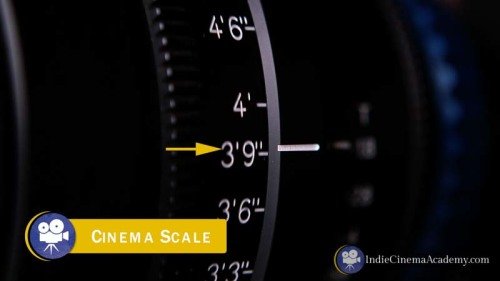
The next 10-20% of my look comes from my lens choices. I spend considerable time researching, testing, and evaluating various qualities and characteristics that different lenses bring to the final image. (Check out the Portland Lens Test for some side-by-side comparisons.) If appropriate for the project, one of my favorite combos these days is putting old lenses on digital cinema cameras. The imprecise optics of old lenses along with how their lens coatings degrade over the years adds life and personality back into an otherwise sterile image. Yes, it is ironic how flawed, aged, old tech gives new, cutting edge cameras life.
There is a time and place for modern glass, but nothing can replicate or replace the look an older lens brings to your footage. Often the soft optics of an older lens is the best solution to replicate that organic “film look.” The unique flares produced by these lenses also can add new dimension to the image. A great place to score deals on older lenses is Ebay, but as more savvy people realize this great source these once affordable lenses have started to increase in price. If Ebay doesn’t have what you need, another option is one of my favorite dealers in old cinema glass: Kevin Cameras. (Shhh…if word got out about this lens source, their prices would skyrocket! 😉 )

Old Angenieux 25mm-250mm on RED Epic
The lens for this frame is an old Angenieux 25mm-250mm on RED Epic. Vignetting is natural, all from the lens. Frame is from a short I shot for AJ Brooks, “The Butcher & The Fox.”
Another 10-20% of my personal aesthetic comes from filtration. Just like I test lenses, I’m always testing filtration to discover what looks I can create in-camera. (Hint: part of being a well versed cinematographer is to test EVERYTHING!) With every piece of glass added in front of the lens comes an additional element that changes and mars the image in unique ways. Sometimes this adds to the look, sometimes it distracts. So make sure that the changes compliment the story.
Filtration can be used to match modern lenses with the look of older lenses. When I shot the “Blackstar Warrior Trailer” (see video below), we were shooting on two Red One cameras, but I only had one adapter and one set of Cooke S2/S3 lenses. To make the set of Red Pro Primes lenses on the second camera match the Cooke lenses, I experimented with various filter combinations during preproduction testing. The Schneider 1/8 Classic Soft Filter combined with a 1/4 Coral Filter matched the Cooke S2/S3 lenses well. (Check out the second BTS video from that production.) As you watch the video, try to tell which shots were with the Cooke lenses and which were with the Red Pro Primes plus filtration.
(Funny Side Note: The green screen work was too good/clean. We actually had to go in and mess it up in post to achieve the lower quality effects/looks of the style that we were emulating.)
While grading is very important, I like to do most things in-camera and only plan on doing minor adjustments in post. This is why only the last 5-10% of my style comes from the final grade. This grading step is used to enhance what it already there. While the grade can be used extensively to create various looks and styles, to date none of it can come close to replicating the organic nature (“technical imprecision”) that I can achieve in-camera. For me, the grade is about finessing and unifying the look, rather than creating it from scratch.
One little trick I’ve done is to overlay actual film grain as the last step before outputting the final deliverable. This additional texture enhances that technical imprecision, err, I meant “organic-ness.” 😉 This should be done with a light touch, and it is best to use real film grain from people like Grain 35, Gorilla Grain, Film Convert, and RGrain. Digital film grain plugin generators tend to look fake, and just don’t work in my opinion. (Yes, RGrain is computer generated, but they are the exception to the rule.)
Aesthetic taste is a highly subjective thing, so feel free to experiment and find your own look and method; my approach may not be right for you because your story could easily be different than the stories I’m creating looks for. You may prefer the ultra pristine look that you can get from digital cameras. But if you are looking for ways to add some character and personality back into your footage, then I recommend starting with lighting, lensing, filtration, grading, and then season to taste. You will be well on your way to creating nuanced imagery that will have life pulsating through every frame.
Until Next Time – Get Out There And Shoot!
Ryan E. Walters, Cinematographer
 https://indiecinemaacademy.com/wp-content/uploads/2015/11/AlexaEpicBlackmagic-web.jpg
211
800
Ryan E. Walters
https://indiecinemaacademy.com/wp-content/uploads/2013/12/Indie_cinema_Logo_2color-MF-300x116-web.png
Ryan E. Walters2015-11-04 17:53:112018-01-25 10:53:37The Problem With The Digital Camera Look & My Solutions To Correcting It
 https://indiecinemaacademy.com/wp-content/uploads/2015/10/Thumbnail-EasyDay-01-web.jpg
337
800
Ryan E. Walters
https://indiecinemaacademy.com/wp-content/uploads/2013/12/Indie_cinema_Logo_2color-MF-300x116-web.png
Ryan E. Walters2015-10-14 00:15:332018-01-25 10:49:33Three Lighting Tips For Your Next Action Film
 https://indiecinemaacademy.com/wp-content/uploads/2015/09/LC115_12Questions-Thumbnail-Free-Web.jpg
450
800
Ryan E. Walters
https://indiecinemaacademy.com/wp-content/uploads/2013/12/Indie_cinema_Logo_2color-MF-300x116-web.png
Ryan E. Walters2015-09-07 00:30:532015-10-30 19:06:3612 Crucial Questions To Ask Before You Light Your Set (Cinematic Lighting Lesson 15)
 https://indiecinemaacademy.com/wp-content/uploads/2015/08/LC114-3StrLightingNghtExt-Thumbnail.jpg
450
800
Ryan E. Walters
https://indiecinemaacademy.com/wp-content/uploads/2013/12/Indie_cinema_Logo_2color-MF-300x116-web.png
Ryan E. Walters2015-08-24 00:30:112015-10-30 18:55:173 Strategies for Lighting Your Night Exteriors (Cinematic Lighting Lesson 14)
 https://indiecinemaacademy.com/wp-content/uploads/2015/08/LC112_5SratDayExt-Thumbnail-800x450-jpg-web.jpeg
450
800
Ryan E. Walters
https://indiecinemaacademy.com/wp-content/uploads/2013/12/Indie_cinema_Logo_2color-MF-300x116-web.png
Ryan E. Walters2015-08-10 00:15:422015-10-30 18:54:545 Essential Strategies To Lighting Day Exteriors (Cinematic Lighting Lesson 12)
 https://indiecinemaacademy.com/wp-content/uploads/2015/07/LC113-10TricksDayExt-Thumbnail-800x450-web-.jpg
450
800
Ryan E. Walters
https://indiecinemaacademy.com/wp-content/uploads/2013/12/Indie_cinema_Logo_2color-MF-300x116-web.png
Ryan E. Walters2015-07-27 00:15:252015-10-30 18:55:0310 Tips To Lighting Day Exteriors (Cinematic Lighting Lesson 13)
 https://indiecinemaacademy.com/wp-content/uploads/2015/07/LC123_SmallCommercial-thumbnail-800X450.jpg
450
800
Ryan E. Walters
https://indiecinemaacademy.com/wp-content/uploads/2013/12/Indie_cinema_Logo_2color-MF-300x116-web.png
Ryan E. Walters2015-07-13 14:24:582015-10-30 19:19:44How To Light A Small Commercial (Cinematic Lighting Lesson 23)
 https://indiecinemaacademy.com/wp-content/uploads/2015/07/AR015_LEDRuinProduction-Thumbnail-Web.jpg
450
800
Ryan E. Walters
https://indiecinemaacademy.com/wp-content/uploads/2013/12/Indie_cinema_Logo_2color-MF-300x116-web.png
Ryan E. Walters2015-07-06 01:00:122018-01-25 10:49:13Are LEDs Ruining Your Projects? [VIDEO]
 https://indiecinemaacademy.com/wp-content/uploads/2015/06/LC126_LightingShortFilm-Thumbnail-Web.jpg
450
800
Ryan E. Walters
https://indiecinemaacademy.com/wp-content/uploads/2013/12/Indie_cinema_Logo_2color-MF-300x116-web.png
Ryan E. Walters2015-06-15 12:00:042016-10-10 07:59:55How To Light A Narrative (Cinematic Lighting Lesson 26)
This site uses cookies. By continuing to browse the site, you are agreeing to our use of cookies.
AcceptHide notification onlySettingsWe may request cookies to be set on your device. We use cookies to let us know when you visit our websites, how you interact with us, to enrich your user experience, and to customize your relationship with our website.
Click on the different category headings to find out more. You can also change some of your preferences. Note that blocking some types of cookies may impact your experience on our websites and the services we are able to offer.
These cookies are strictly necessary to provide you with services available through our website and to use some of its features.
Because these cookies are strictly necessary to deliver the website, refusing them will have impact how our site functions. You always can block or delete cookies by changing your browser settings and force blocking all cookies on this website. But this will always prompt you to accept/refuse cookies when revisiting our site.
We fully respect if you want to refuse cookies but to avoid asking you again and again kindly allow us to store a cookie for that. You are free to opt out any time or opt in for other cookies to get a better experience. If you refuse cookies we will remove all set cookies in our domain.
We provide you with a list of stored cookies on your computer in our domain so you can check what we stored. Due to security reasons we are not able to show or modify cookies from other domains. You can check these in your browser security settings.
We also use different external services like Google Webfonts, Google Maps, and external Video providers. Since these providers may collect personal data like your IP address we allow you to block them here. Please be aware that this might heavily reduce the functionality and appearance of our site. Changes will take effect once you reload the page.
Google Webfont Settings:
Google Map Settings:
Google reCaptcha Settings:
Vimeo and Youtube video embeds:
You can read about our cookies and privacy settings in detail on our Privacy Policy Page.
Privacy Policy
Leave a Reply
Want to join the discussion?Feel free to contribute!