The Power Of X
A simple yet powerful lighting technique anyone can master in under a minute.
Yes! Send Me My Free Video
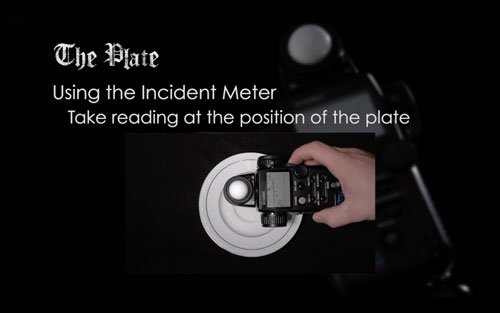
Last week we covered why a light meter is still crucial in today’s digital marketplace. This week we give you a video tutorial I created a few years ago that is still relevant today. (In fact, the Sekonic L758 Cine light meter is still my main meter on-set! And as for value, the price to buy this light meter new has been steady for the past 4 years (2011 to 2015), demonstrating its quality and value.
During the first few minutes of this video I quickly recap everything I discussed last week about why a light meter is a necessary tool for any cinematographer. Then I spend the rest of the video covering when to use an incident meter and when a spot meter is more appropriate. Then it’s demonstration time, using the meter in different ways to properly expose a white plate against a black background. Finally, I give you some tips and tricks on how to quickly determine the lighting ratios and range of your scene. Below are some of the tips in the video, along with a few more.
(While this video only covers the Sekonic 758 Cine light meter, many of these techniques can easily be applied to other meters. Even if you are on a budget, start using whatever light meter you can get your hands on and grow from there; I did!)
Quickly and easily determine what your aperture based off important highlight in the scene. When you expose at this value, the metered highlight will retain detail. Couldn’t be simpler!
How to do it:
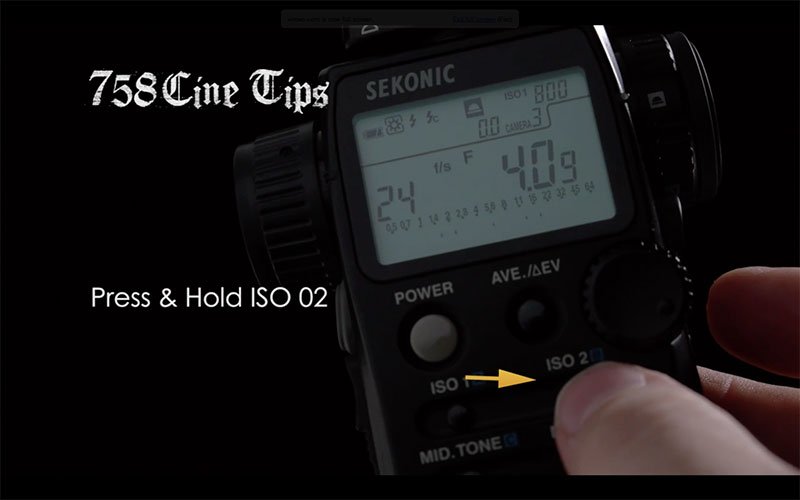
1. Set the Custom Setting #1 value to 1. This will make the ISO 2 button be a filter factor button. (With the meter off, press the MODE button while turning on the meter. “CS” will display in the upper right corner to let you know that you are now in the custom settings mode.) Power off the meter, and then turn it back on.
2. Determine the EV for when you are over-exposing your recording medium. (Measuring the EV from midtone to highlight.) The Sekonic Profile Chart II is a great tool for this.
3. With the meter set to the correct camera profile, press the ISO 2 button and rotate the jog wheel to the correct EV setting based off of step 2.
4. Take a spot reading of what you want to place at the top of the histogram / shoulder. This will be your brightest highlight.
5. Press and hold ISO 2. The result is a midtone reading that keeps your highlight at the top without clipping.
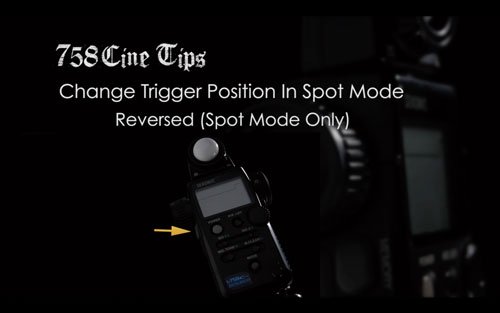
Take readings more ergonomically when in the spot mode of the 758 Cine. Has the added benefit of keeping you from mistakenly taking a false reading when in Incident Mode. (If the button stays the same in both modes and the meter is left in Spot Mode, you could potentially take a reading thinking you are using the incident meter, but instead getting a spot meter reading; that reading is going to be very VERY wrong!)
How to do it:
1. Start with the meter off and press the MODE button while turning the meter on. “CS” will display in the upper right corner showing you are now in the Custom Settings Mode.
2. Use the jog wheel to move to Setting #17. (This is the smaller of the two numbers in the center of the screen.)
3. Now press the MODE button until #2 is displayed. (This is the larger of the two numbers in the center of the screen.)
4. Press the POWER button to turn the meter off.
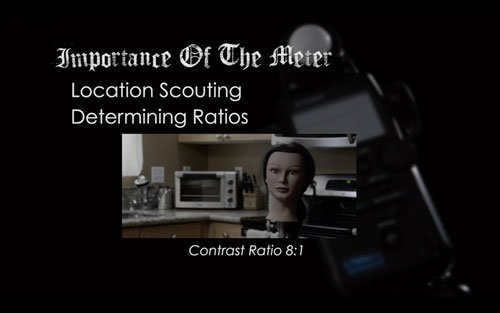
Quickly and easily determine the contrast ratio of important lights, having the meter doing all the math (No need to remember that T2.8 is 3 EV away from T8, which gives you a ratio of 8:1.)
Here is how you do it:
1. Using the incident mode take a reading of just the key light.
2. Press the AVE/EV button.
3. Now take a reading of any other light / area (The Fill light, for example).
4. The meter will now display the contrast ratio of the two lights.
*Additional suggestion: Make a label for the back of the meter that has the EV to Ratio conversions on it. Now you never have to remember an additional set of numbers. (EV 1 = 2:1 / EV 2 = 4:1 / EV 3 = 8:1 / EV 4 = 16:1)
|
Create separation and harness the power of shadows!
|
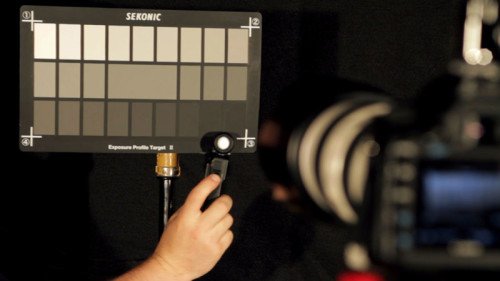
As dynamic range with digital cameras is continually getting broader, I don’t use this feature as often as I used to. However it is VERY useful for times I’m shooting in a format with limited dynamic range. This is a quick and simple way to determine the range of a scene so you can make any necessary adjustments.
How to do it:
1. In spot meter mode take a reading of the darkest area of the scene.
2. Press the AVE/EV button.
3. Next take a reading of the brightest area of the scene.
4. The meter will now display the total range of the scene.
If you can’t place a gray card in the key light, you can’t use your incident meter, and there isn’t anything in the scene that you recognize as midtone value, there is still a way to get your readings! This is a quick and easy way to determine your aperture in difficult situations. (I could have also used this tip in the Plate example I gave in the video.)
How to do it:
1. In spot meter mode take a reading of the darkest area of the scene, then press the memory button.
2. Next take a reading of the lightest area of the scene and then press the memory button.
3. Press the AVE/EV button.
4. The meter will now display the midtone value.
*Additional Suggestion: Still use this tip even when you are not stuck in a tough situation. This will train your eye to recognize what midtone is in every day scenes.
|
There’s more to life than three point lighting. Try these set-ups out:
|
Until Next Time – Get Out There And Shoot!
Ryan E. Walters, Cinematographer
 https://indiecinemaacademy.com/wp-content/uploads/2015/12/CS004-HighSpeed-Part04-FREE-Thumbnail-Web.jpg
450
800
Ryan E. Walters
https://indiecinemaacademy.com/wp-content/uploads/2013/12/Indie_cinema_Logo_2color-MF-300x116-web.png
Ryan E. Walters2015-11-16 00:15:182015-12-29 13:17:26Your Guide To High Speed, Part 4: Common Lighting Problems
 https://indiecinemaacademy.com/wp-content/uploads/2015/11/AlexaEpicBlackmagic-web.jpg
211
800
Ryan E. Walters
https://indiecinemaacademy.com/wp-content/uploads/2013/12/Indie_cinema_Logo_2color-MF-300x116-web.png
Ryan E. Walters2015-11-04 17:53:112018-01-25 10:53:37The Problem With The Digital Camera Look & My Solutions To Correcting It
 https://indiecinemaacademy.com/wp-content/uploads/2015/10/HowToLightMeter.jpg
500
800
Ryan E. Walters
https://indiecinemaacademy.com/wp-content/uploads/2013/12/Indie_cinema_Logo_2color-MF-300x116-web.png
Ryan E. Walters2015-10-28 00:15:322018-01-25 10:49:53How To Use A Light Meter: Overview
 https://indiecinemaacademy.com/wp-content/uploads/2015/10/MetersInDigitalAge-web.jpg
450
800
Ryan E. Walters
https://indiecinemaacademy.com/wp-content/uploads/2013/12/Indie_cinema_Logo_2color-MF-300x116-web.png
Ryan E. Walters2015-10-21 00:15:222018-01-25 10:49:42Why Use A Light Meter In The Digital Video Age?
 https://indiecinemaacademy.com/wp-content/uploads/2015/10/Thumbnail-EasyDay-01-web.jpg
337
800
Ryan E. Walters
https://indiecinemaacademy.com/wp-content/uploads/2013/12/Indie_cinema_Logo_2color-MF-300x116-web.png
Ryan E. Walters2015-10-14 00:15:332018-01-25 10:49:33Three Lighting Tips For Your Next Action Film
 https://indiecinemaacademy.com/wp-content/uploads/2015/09/LC121_LightingHighSpeed-Thumbnail-Web.jpg
450
800
Ryan E. Walters
https://indiecinemaacademy.com/wp-content/uploads/2013/12/Indie_cinema_Logo_2color-MF-300x116-web.png
Ryan E. Walters2015-09-21 00:15:372016-01-10 21:42:57Lighting For Extreme Frame Rates (Cinematic Lighting Lesson 21)
 https://indiecinemaacademy.com/wp-content/uploads/2015/09/LC115_12Questions-Thumbnail-Free-Web.jpg
450
800
Ryan E. Walters
https://indiecinemaacademy.com/wp-content/uploads/2013/12/Indie_cinema_Logo_2color-MF-300x116-web.png
Ryan E. Walters2015-09-07 00:30:532015-10-30 19:06:3612 Crucial Questions To Ask Before You Light Your Set (Cinematic Lighting Lesson 15)
 https://indiecinemaacademy.com/wp-content/uploads/2015/08/LC114-3StrLightingNghtExt-Thumbnail.jpg
450
800
Ryan E. Walters
https://indiecinemaacademy.com/wp-content/uploads/2013/12/Indie_cinema_Logo_2color-MF-300x116-web.png
Ryan E. Walters2015-08-24 00:30:112015-10-30 18:55:173 Strategies for Lighting Your Night Exteriors (Cinematic Lighting Lesson 14)
 https://indiecinemaacademy.com/wp-content/uploads/2015/08/LC112_5SratDayExt-Thumbnail-800x450-jpg-web.jpeg
450
800
Ryan E. Walters
https://indiecinemaacademy.com/wp-content/uploads/2013/12/Indie_cinema_Logo_2color-MF-300x116-web.png
Ryan E. Walters2015-08-10 00:15:422015-10-30 18:54:545 Essential Strategies To Lighting Day Exteriors (Cinematic Lighting Lesson 12)
https://indiecinemaacademy.com/wp-content/uploads/2015/08/LC112_5SratDayExt-Thumbnail-800x450-jpg-web.jpeg
450
800
Ryan E. Walters
https://indiecinemaacademy.com/wp-content/uploads/2013/12/Indie_cinema_Logo_2color-MF-300x116-web.png
Ryan E. Walters2015-08-10 00:15:422015-10-30 18:54:545 Essential Strategies To Lighting Day Exteriors (Cinematic Lighting Lesson 12)You must be logged in to post a comment.
This site uses Akismet to reduce spam. Learn how your comment data is processed.
This site uses cookies. By continuing to browse the site, you are agreeing to our use of cookies.
AcceptHide notification onlySettingsWe may request cookies to be set on your device. We use cookies to let us know when you visit our websites, how you interact with us, to enrich your user experience, and to customize your relationship with our website.
Click on the different category headings to find out more. You can also change some of your preferences. Note that blocking some types of cookies may impact your experience on our websites and the services we are able to offer.
These cookies are strictly necessary to provide you with services available through our website and to use some of its features.
Because these cookies are strictly necessary to deliver the website, refusing them will have impact how our site functions. You always can block or delete cookies by changing your browser settings and force blocking all cookies on this website. But this will always prompt you to accept/refuse cookies when revisiting our site.
We fully respect if you want to refuse cookies but to avoid asking you again and again kindly allow us to store a cookie for that. You are free to opt out any time or opt in for other cookies to get a better experience. If you refuse cookies we will remove all set cookies in our domain.
We provide you with a list of stored cookies on your computer in our domain so you can check what we stored. Due to security reasons we are not able to show or modify cookies from other domains. You can check these in your browser security settings.
We also use different external services like Google Webfonts, Google Maps, and external Video providers. Since these providers may collect personal data like your IP address we allow you to block them here. Please be aware that this might heavily reduce the functionality and appearance of our site. Changes will take effect once you reload the page.
Google Webfont Settings:
Google Map Settings:
Google reCaptcha Settings:
Vimeo and Youtube video embeds:
You can read about our cookies and privacy settings in detail on our Privacy Policy Page.
Privacy Policy
is there any update about the best light meter , like some new model that you recommend
We haven’t been staying up on the latest light meters. There aren’t really a lot of changes need with a light meter since its job is pretty straight forward. The Sekonic models we’ve previously recommend are still top notch!
thank you for replying