The Power Of X
A simple yet powerful lighting technique anyone can master in under a minute.
A simple yet powerful lighting technique anyone can master in under a minute.
Red Epic cameras provided by Isaac Marchionna & Shawn Nelson

** You must be an Advanced or Pro Access member for article video downloads. **
[mepr-s3-link bucket=”ica-blog-vids” path=”cam-test/DiffusionFiltDragonMX.zip” expires=”2:00:00″] >> Download Diffusion Filter Test R3Ds <<[/mepr-s3-link]
* (File size: 96 MB; Redcode .R3D (5k FF & 6k FF at 5:1); Compressed as a zip.)
NOTE: Tiffen Filters are only a “half-sized” filter and only cover the center of the frame.
[mepr-s3-link bucket=”ica-blog-vids” path=”cam-test/IRFiltrationDragonMX.zip” expires=”2:00:00″]>> Download IR Filter Test R3Ds <<[/mepr-s3-link]
* (File size: 200 MB; Redcode .R3D (5k FF & 6k FF at 5:1); Compressed as a zip.)
!! Links expires 2 hours from when page loads. For information about downloads: FAQ downloads !!
In part two of this three part series of our look at Red’s new Dragon Sensor we are going to see how diffusion and IR [infrared] filtration effect the dragon and MX chip. You may be delightfully surprised with the results from the IR test; at least I know I am. As with the last video, I’m only going to touch on the highlights of what you need to know from these tests. If you want to pixel peep and see every frame in their 5k & 6k goodness, then download the R3Ds that you can find in the links below this video.
And if you are interested in learning more about filtration and how you can use it to benefit your own productions, then follow the smart side link to our free series on camera filtration.
And with that let’s get on to the results.
Alright so as we dive into taking a look at these diffusion filters that I used on both the Dragon and MX, I’m only going to show you the Dragon results because I really couldn’t see any huge difference between the Dragon and the MX sensor, so it doesn’t make much sense to show you the MX test results. If you want to ale a look at them, you can download them below this video. Instead, we are going to step through and take a look at these diffusion filters.
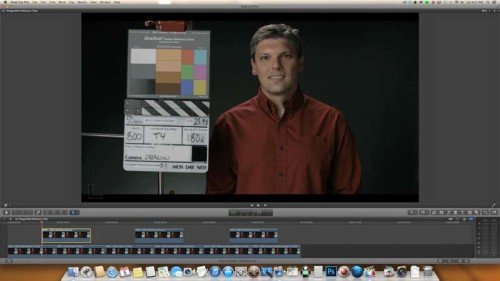
So we’re starting off with our full frame image here. And we’ve got our control frame here.
As I step through this, take a look at this slate, so pay attention to the borders here, and you can also look at this white chip here. But really, it’s more about the border on the slate. That will show more of the halation that is going on. Unfortunately, I didn’t place like bulb right here, or over here. That would have been a lot more effective to see the different halation properties. Unfortunately, I was trying to get through a battery of tests, and that key element slipped my mind. So I apologize about that. But fortunately we can still see some of those results in this slate here.
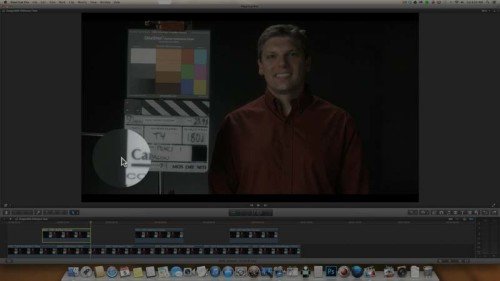
So lets continue on. Here is the control frame, we’ll quickly go over to the Pearlesent. And as I snap back and forth here, you’ll quickly notice that our slate is starting to glow and there is some halation going on around the slate. And then also up here in the chart, you’ll notice that it is loosing some contrast, which is typical for diffusion filtration. That is kind of the byproducts of diffusion filters. So look at this glowing area down here. [Bottom of the slate] It definitely halates. So any highlight you have, or any point source in the frame is going to have a glow if you use the Pearlescent Filter.

We’ll jump on over to the Hollywood Black Magic 1/4, it definitely has some halation in it. So as we take a look around. Here is our control frame, and then looking at the 1/4, just barely on the edge here we are getting just a touch of halation. The slate is just starting to glow a little bit. And it becomes more noticeable when we jump over to the 1/2. So now we have the Hollywood Black Magic Half here. And we’ll take a look at that edge. And that is looking like there is some halation going on. I will switch over to the control frame. So it goes away, and there it is.

And just for comparison, here is the Tiffen Pearlescent, and then going back to the half. So the hollywood Black Magic 1/2 has less halation going on, the 1/4 is even less then that, and the Pearlescent definitely has the most. Granted the Hollywood Black Magic is a lighter grade then the Pearlescent.

If you are curious about the Satin and the Black Satin, we’ll quickly take a look at those. There is not a whole to going on here, there is just a touch of halation on the edge of the Satin. And you can see it disappear as we take a look at the control frame. As we look at the Black Satin and the control frame, there isn’t a lot of halation going on here either. Which is nice.
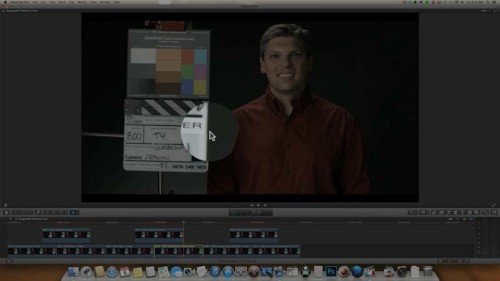
And looking at the Schneider Classic Soft 1/8. So this is definitely the lightest grade of anything we are looking at. And again not a whole lot of halation going on here. So really if you are worried about halation, like I am, then you’ll want to stay away from the Pearlescent. It definitely has the strongest amount of halation going on. And the Hollywood Black Magic has some as well, but it is softer then what we see going on with the Pearlescent. So that is what is going on in a full frame view, let’s jump into some close ups.

And this isn’t actually a close up, rather what I did, is I just blew up that same frame that we were just looking at. So this is almost, or I believe it is a one for one pixel look. But any way I blew it up, and let’s take a closer look and see how the diffusion is treating Tim’s face. And I apologize Tim, we didn’t give you makeup, but that is kind of the point of this test. So let’s take a look to see what’s going on. As we look at these frames pay attention to the wrinkles in the forehead, and the blemishes in the skin. That’s where we’ll see the biggest difference.

So we’re looking at our control image, and then jump on over to the Black Satin. As we look at the Black Satin, we see those wrinkles and blemishes have not completely vanished, but they have been highly reduced. And that is a great way to make your talent look even better. The Black Satin is doing a good job with the skin, it looks nice and soft and very attractive. So I like what’s going on, the eyes still feel sharp, they aren’t overly diffuse, so we are still retaining detail. So here is a back and forth. Not diffusion, and Black Satin.
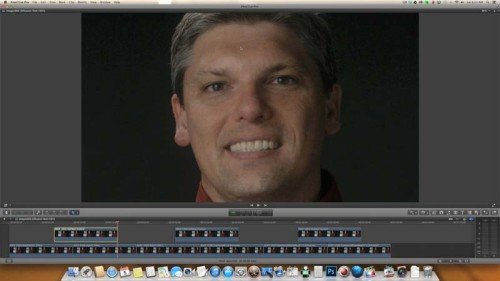
Now we’ll jump on over to the Pearlescent.So the Pearlescent is definitely a look filter. So here is Pearlescent, and here is none. It is doing a great job at hiding these wrinkles and removing the blemished and smoothing the skin. Which looks great on talent. It is also adding a glowing quality to the skin. It is almost as if he is radiating some light. So here it is on, and here it is off. So it is doing a great job at diffusing the image.
For me, personally, this is a little heavy handed. So I’d be interested in trying out lighter grades. I like diffusion in my image, I like to soften it up a bit and make it feel less digital, but I don’t like a heavy handed approach. And at least at this grade, with a 1 in there, it feels a little heavy handed. I can tell that there is diffusion being used. So I prefer to stay away from that kind of look. But if I was shooting some beauty shot, or something where I really wanted the actress to just glow and really look her best, like maybe a fashion shoot, then I’d definitely choose this filter for that kind of look.

Moving on to the Satin, here is out control frame and back over to the Satin. Again it’s removing these wrinkles and the blemishes. Smoothing out his skin. It looks really great as far as I’m concerned. It’s a nice way to soften up the image and make your talent look attractive.
If you are wondering what the difference between the Satin and the Black Satin is, hopefully it comes across in the video here, if not, you’ll want to download the frames. What’s going on in my eye, and how I see it, is that the Satin is a lot cleaner then the Black Satin. So if I want a diffused look that has a cleaner look to it, then I’m going to go with the Satin. The Black Satin if feels just a bit more textured. And so if I want something that has a bit more texture to my diffusion, I’d go with the Black Satin. And if I want something with a cleaner look to it then I’d go with the Satin. That’s what I’m seeing here on my end.
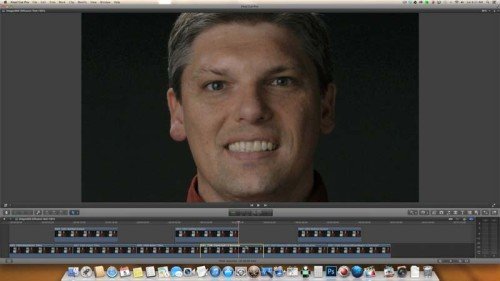
Now going over to the Classic Soft 1/8. Here we are with it on, and off. So no filtration, and filtration.Again, this is the weakest grade that we have in this test. There is not a lot of halation, and it is doing an ok job at removing blemishes. It is so light there there is not a ton of difference, but you can see that the wrinkles are diminished when we look at the 1/8. This is the 1/8, no 1/8, 1/8, no 1/8, and back to the 1/8. So it is removing blemishes and making Tim’s skin look nice with a subtle touch.

Here is the Hollywood Black Magic 1/4. What I do like about these Hollywood Black Magic filters is that they retain nice rich blacks and color saturation. The black frost part of these filters helps mitigate some of that reduction in contrast that diffusion filters typically add. So that’s why they have been my favorite filters for the last couple of years when it comes to diffusion filters. So here is no diffusion, and then with the Hollywood Black Magic 1/4. None, and with it back on. You can see that the blemishes are being diminished. And the skin looks nice and attractive.
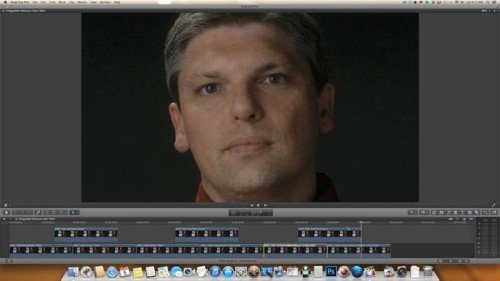
As we jump on over to the half, so here is the half, and here is none. Again, his blemishes are being dramatically reduced. Which makes the skin look that much more attractive. Personally for me and my own likes, a half strength is pushing the limits for me. At this grade, I’m just being able to start to see and feel that filtration is being used. And I like to be a little more subtle, So a half is as strong as I personally like to go. I’ll use this a lot on interviews with women, or any time I want my lead actress to look her best- then I’ll throw in a half. And I’ll generally tend to use a quarter on my male talent. Just to make them look that much more attractive. Unless there is some stylistic reason why I choose to go with the half, I generally tend to favor the quarter. Jumping over to the Pearlescent, both the Pearlescent and the Hollywood Black Magic Half to my eye I can tell that a little bit of filtration is being used. And I like to stay away from the heavy handed look.
So that’s what is going on with these six diffusion filters. Hopefully, that enlightens you a little about what’s going on with some filters and how you can use them. If you want to learn more about different types of filters and how to create looks, I highly recommend that you check out the smart side link that goes to our whole series on filtration.
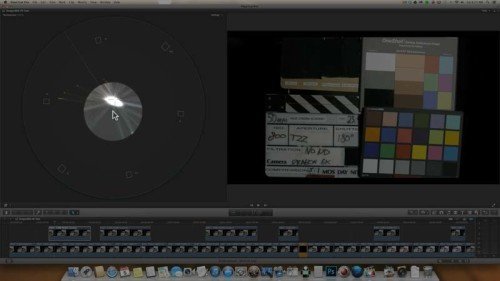
So we are back in Final Cut Pro X here, and as we step through these test, what I want to direct your attention to is this white dot here in the center of this vectorscope. That is going to be the easiest way to see what kind of color shift is going on. And that white dot actually corresponds to all of these black and white parts of the image. So these chips here, and these chips here, and this slate, and the background. So anything without color is what this dot here in the center represents because there is no color, not saturation. All of these other dots represent all of the color bits of these color charts. So pay attention to that and you’ll be able to see how things shift, it is easier to pay attention to this little dot, and watch that dance around to get a clear idea of what direction the image is shifting towards.
So as we step through these test I’m going to start with the Dragon footage, and the biggest surprise to me was actually that there are no IR problems with the Dragon sensor. So rather then go through a lot of tests that show you that there are no problems, I’m going to step through to show you some differences between ND filtration because I tend to find that a little bit more interesting then taking a look at results that show you there are no problems.
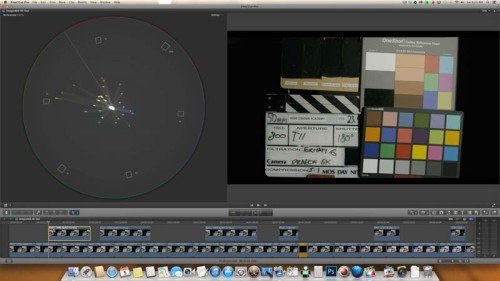
Let’s take a look at our control frame here. Pay attention to the white dot. So no filtration, and now the Formatt at a 0.6. So as we take a look at this white dot, notice how it shifts towards yellow. So it goes towards that yellow vector. So everything is moving in that direction. So it is not completely neutral and there is a definite shift going on. towards yellow.
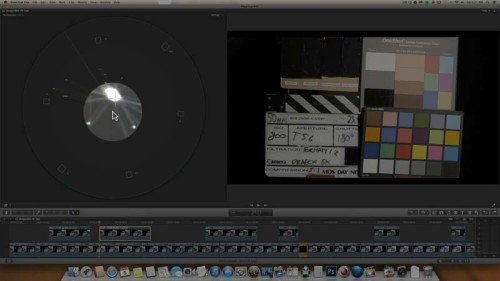
As we step on over to the 12, os here is our control frame, and we’ll watch the little dot here, and now we are on the 12, and that is making a large shift towards red. So the Formatt 12, or 1.2 goes towards red. Not the same direction that are 0.6 was, that was going towards yellow, and 1.2 is towards red.
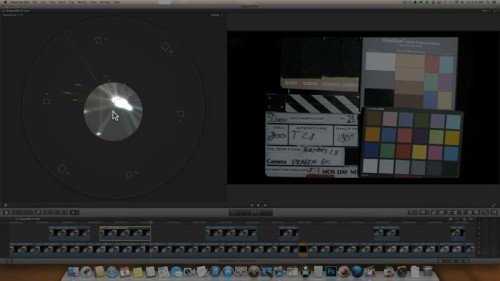
Now we’ll jump over to the 18, or 1.8. And watch this, it dramatically shifts towards blue. So now we go from yellow, to red, and now at the 18 we are looking at blue. So that is a noticeable jump in a completely different direction. Again, that is not IR, that is actually the color balance of the filter. So these Formatt filters, while they are reducing the light, they are not completely neutral. They do have some color shifts going on. It is particular hard to do a neutral ND especially as you get to stronger strengths.
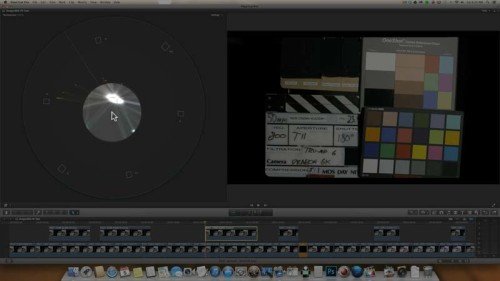
We’ll jump over to the TruND, and the TruND actually lives up to its name, so nice job. We are here on the control frame, and we’ll go over to the 0.6. And as we take a look at this there is just a sneeze of a movement. So next to no movement at all. A slight sneeze of a move towards yellow. But nothing anywhere close to what Formatt was doing. So next to no changes there.

And now we will go to the 12. And watch this, our control frame, and 12, control frame and 12. And agin, next to no movement. Just a sneeze of a movement. And that is really what we want to see with our ND, it helps keep our images a lot more consistent shot to shot.
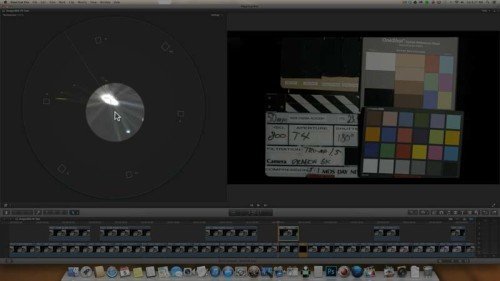
And just so we can see the strongest grade that I have on hand here. This is the 15. So our control frame, and the 15. And just a sneeze of a movement. Next to no movement at all when it comes to the TruND’s. Which is really great, it makes shot matching a lot easier, especially if your working outside and you have clouds coming in and out and you’re constantly changing ND strengths. Working with a set that is like this is definitely beneficial. It makes grading and matching your shots in post a lot easier. But we’re not here to talk about ND’s, we’re here to talk about IR. So lets take a closer look at where the really IR problems are.
Again the Dragon there are no IR problems that I was able to see even up to 1.8 with the Formatt filters. we’re at a 1.8 here and there is no IR pollution, are blacks are nice and rich. Everything looks how it should. The only problem is that there is a color shift. But that is due to the Formatt filter, there are no IR issues with the Dragon.

Let’s take a look at the MX, which does show IR problems. We are starting at a 0.9ND. So here is our control frame and back over to 0.9. Control, 0.9. We can see a color shift going on in our vector scope, but most of that is due to the color shift of the filter. What you need to pay attention to is this rayon chip, or this rayon cloth rather. So watch this as it- it is purple- we have purple blacks, and now this is what it should look like. It should look nice and black, and rich and black. Unfortunately there is some IR contamination going on. It is minor, you might be able to grade it out, but it is there. These blacks should not look purple, they should look black. So we have IR issues at a 0.9ND.
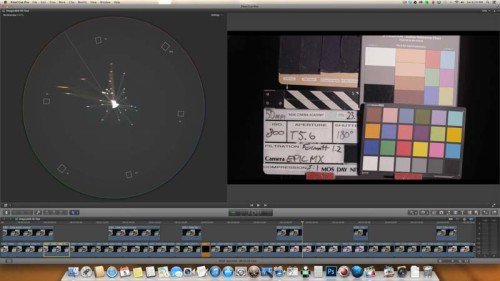
Now we go to our 12. And it is easily discernible here. So black, and now we have purple black. We don’t like purple blacks. We want black. So we have issues there.
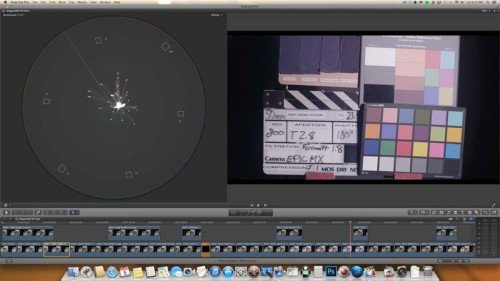
Jumping on to the 18, now we are into all kinds of gross colors which may not even be salvageable. I personally wouldn’t use this. 1.8 is looking horrible. You definitely need IR filtration on the MX. Otherwise you’ll get these nasty color shifts in your image.
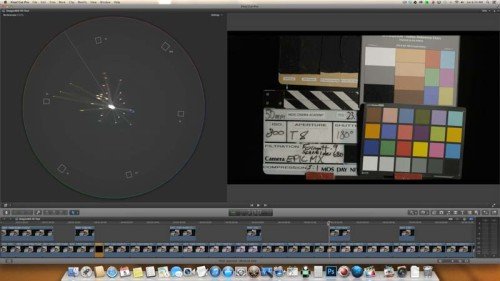
Now as a point of reference, I added a Schneider 680 filter to the Formatt filters. So that is blocking light at 680nm. So looking at these results, oops, maybe I can press the button correctly, there we go. Okay. So here is no filtration, and then with filtration. The 680 has really cleaned up the blacks and removed contamination that we were seeing earlier. Which is great and what we want to see happen. So now there is just the color shift that the Formatt filter introduces.
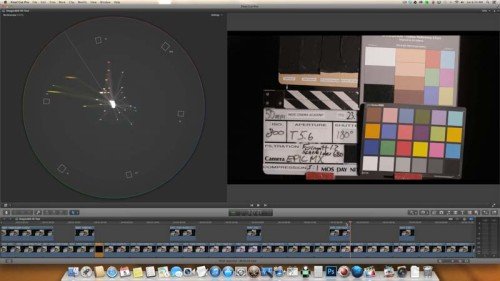
Let’s jump on over to the 12. And now we start to see the IR start to contaminate our image again. So here is a 12, and no ND which is black. But with the ND we are turning a purple brown color. That’s not what we want, we want to be nice, rich and black. So the 680 combined with a 1.2, there needs to be some stronger IR blocking going on.
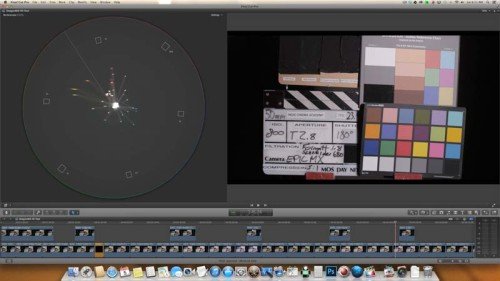
Jump on over to the 18. The 18just continues to worsen. So here is the 1.8 along with the Schneider 680 and our blacks are a little bit brown purple, they should be black like this.
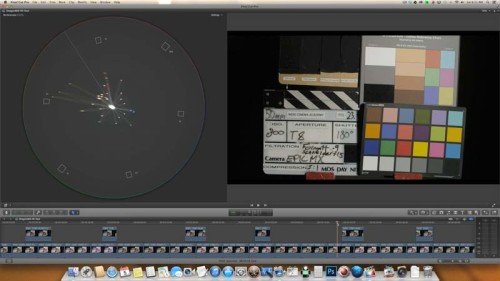
Moving on to the 715. So this is a Schneider 715 IR blocking filter combined with a Formatt 0.9. It’s removed IR , so great we don’t have those same issues. we still have nice strong blacks, so that’s all looking good. We do have the color shift, but that is coming from the Formatt filter, not from the IR.
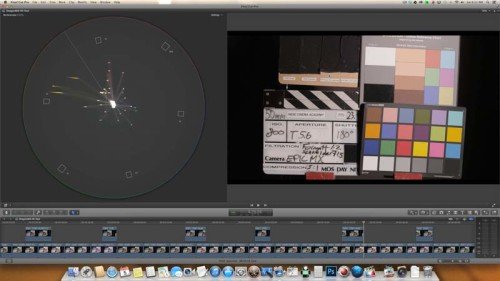
Let’s take a look at our 12 again. And we can see that the IR is starting to come back into the image. we are getting that purple look to our blacks. Not what we want to see. So we need some stronger IR filtration.

And jumping over to our 18, just for grins and giggles, it is easy to see here. This is our control frame, and then here it is with our IR. Our blacks are turning purple brown. Not the direction we want to be seeing. But it is looking better then the 680 was, so that’s nice, but we still need some other solution.
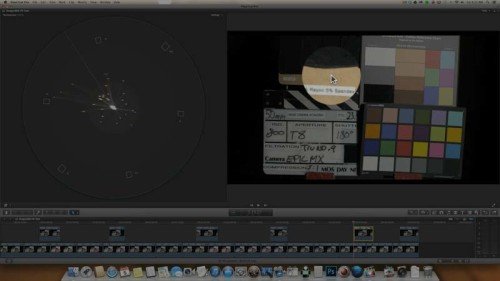
Jumping over to the TruND. The TruND is blocking IR at 750nm, so lets take a look at how that is performing. As we can see here not only is there minimal to no color shift going on, but we have cleaned up our blacks. So our blacks are nice and rich, and actually black, which is how we want them. There is just a touch of an increase of saturation. So these dots are moving along their same intended vectors. So we’re not seeing a color shift, we’re just seeing a slight increase in saturation.
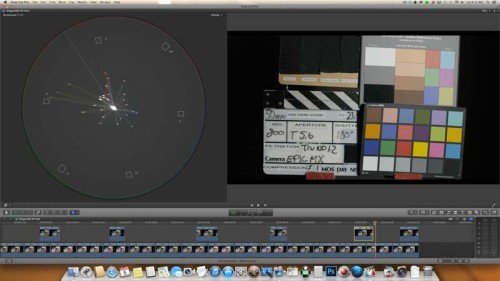
Just for grins and giggles, here is the 12. And the 12 is still looking good. Again, our blacks are still black, which is what we want.
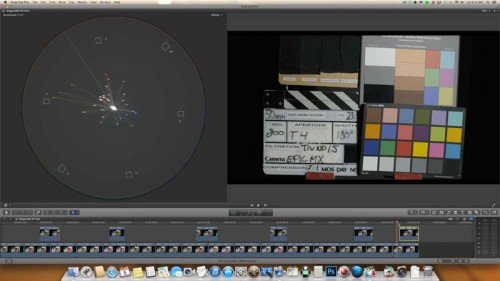
And then we are on to the 15. So our 1.5, again same thing, blacks are nice and rich and everything looks as it should. So if you are using the MX sensor I definitely recommend IR filtration starting at a 0.9. As you increase up from there you’ll definitely want to have IR blocking at 750nm. If you are working with the Dragon, don’t worry about it. I’m not seeing any issues at all with the IR in the dragon sensor. What you are going to need to worry about now with the Dragon sensor isn’t IR but with the color fidelity of your ND filters.
So I highly recommend that you invest in some ND’s filters that do not have color shifts going on. It is going to make post a lot easier, it is going to make your colors look consistent from shot to shot. And just make life a whole lot better for you. Especially if you are working outside in a cloudy environment where you are having to change ND filtration a lot.
So that’s what’s going on with IR with the Dragon and the MX.
As a quick recap, I think it is highly beneficial to use diffusion filtration on both the Epic MX and Epic Dragon. It will help take some of that sharp digital edge off of your imagery. What filters you use will really depend on your taste. For myself, I like the lighter strengths of the Schnedier Hollywood Black Magic, as well as the Tiffen Satin filters.
When it comes to IR, when you’re shooting with the older MX sensor you’ll need IR filtration starting at a nine, and if you are using the Dragon, you no longer need to worry about IR. But in either case, to get the best looking images, I recommend using a color balanced set of ND’s, like those from TruND.
If you have any comments or questions, leave them in the comment section below, and then come join me in the next video.
You must be logged in to post a comment.
This site uses Akismet to reduce spam. Learn how your comment data is processed.
This site uses cookies. By continuing to browse the site, you are agreeing to our use of cookies.
AcceptHide notification onlySettingsWe may request cookies to be set on your device. We use cookies to let us know when you visit our websites, how you interact with us, to enrich your user experience, and to customize your relationship with our website.
Click on the different category headings to find out more. You can also change some of your preferences. Note that blocking some types of cookies may impact your experience on our websites and the services we are able to offer.
These cookies are strictly necessary to provide you with services available through our website and to use some of its features.
Because these cookies are strictly necessary to deliver the website, refusing them will have impact how our site functions. You always can block or delete cookies by changing your browser settings and force blocking all cookies on this website. But this will always prompt you to accept/refuse cookies when revisiting our site.
We fully respect if you want to refuse cookies but to avoid asking you again and again kindly allow us to store a cookie for that. You are free to opt out any time or opt in for other cookies to get a better experience. If you refuse cookies we will remove all set cookies in our domain.
We provide you with a list of stored cookies on your computer in our domain so you can check what we stored. Due to security reasons we are not able to show or modify cookies from other domains. You can check these in your browser security settings.
We also use different external services like Google Webfonts, Google Maps, and external Video providers. Since these providers may collect personal data like your IP address we allow you to block them here. Please be aware that this might heavily reduce the functionality and appearance of our site. Changes will take effect once you reload the page.
Google Webfont Settings:
Google Map Settings:
Google reCaptcha Settings:
Vimeo and Youtube video embeds:
You can read about our cookies and privacy settings in detail on our Privacy Policy Page.
Privacy Policy
What version of Formatt filters did you use? Normal or the Prostop IRNDs?
The normal Formatt filters- no IR built in.