The Power Of X
A simple yet powerful lighting technique anyone can master in under a minute.
Yes! Send Me My Free Video
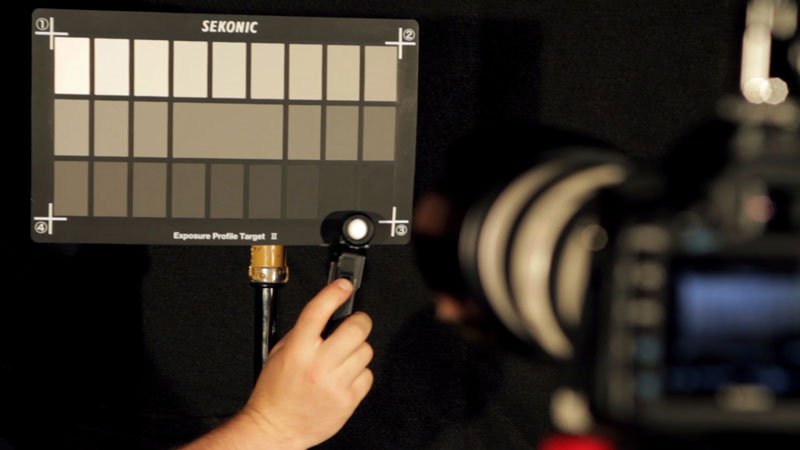
As digital cinema cameras become the norm on set, people often ask, “Do cinematographers really need a light meter? Isn’t digital imagery simply ‘What You See Is What You Get?’” While a case can be made for this point-of-view, I believe methods of digital filmmaking which cut light meters from the tool kit also miss out on the power, efficiency, and knowledge meters add to your project and skill set. For me, the light meter is a critical tool to use with digital cinema cameras.
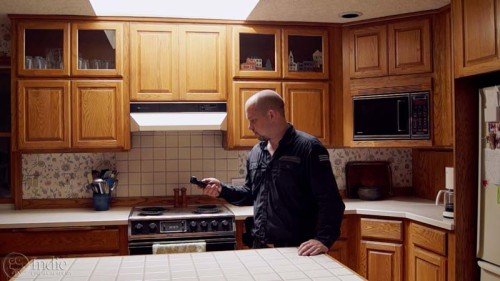
Great lighting doesn’t simply happen by accident or by throwing lights everywhere and then recording it. Effective lighting happens by accurately controlling the light. If you want your images to stand out, you need to be purposeful and intentional with your lighting. This means knowing how your camera responds to light, deciding how bright you want various parts of your scene, then placing those values in the frame through careful lighting. The only way to know exactly where those values fall is with a light meter. Waveforms and histograms are good at giving you an overview of light levels in a scene, but they won’t, for example, show you that 15 more foot candles of light is needed or that there needs to be a stop less light. Histograms and waveforms can only vaguely tell you that you need more or less light.
I have worked on several projects that required various scenes be shot over many months in different locations, yet production expected the look throughout the project to stay consistent. By documenting light values from my light meter, the end result looked and felt like it was all shot in the same place, using the same location. (This is especially helpful for interviews for documentaries). Without my light meter this would at best taken a lot of work, and at worst simply not been possible.
This is why I emphasize that knowing and documenting light levels for a given scene is an important habit for every director of photography. Production might say that you won’t need to come back and shoot pickup shots weeks or months later, but what happens if this plan changes? By taking a few extra minutes to record the measurements from your light meter, you will save hours when lighting reshoots, ensuring they go a lot smoother. This is true even if you end up using different lighting modifiers than on the original shoot. You can even make completely different locations match the original location through lighting and creative camera work as long as you’ve already taken readings with your light meter.
Current digital cameras offer a lot of flexibility when creating different looks, both in-camera and during the final grade. During preproduction, if a cinematographer tests various looks, she can transfer the information gathered during prep to her meter by creating profiles. Then by taking readings on-set she has an accurate way to know for sure if highlight or shadow detail will hold up after the shot has gone through the final grade. This is really necessary during scenes that need a really dark look, or scenes that have a full range of light levels throughout the scene. Having the power to know how far you can push your image in advance is a lot more affordable than realizing the image just fell apart during the grade and needs to be reshot. Or these mistakes might force production to take the final look of the project in a completely different direction. Not exactly something a director of photography wants on his resume.
|
Check out:
|

These days there is a constant push to work faster, go bigger, and accomplish more done in a day. This means that efficiency can often make or break you. I constantly am on the lookout for tools that allow me streamline processes while still delivering the quality imagery I desire. My light meter does just that. With it I can take light readings to know exactly what changes are needed. No guessing. It also gives me a clear and accurate way to communicate those changes. Informing my gaffer that I need, for example, 19 foot candles of light at a certain location clearly and quickly tells him what he needs to know.
Or I can tell him I need a double scrim in a light, and that’s all it takes. During preproduction, I can tell my gaffer how I want my key to be at T4 @ ISO 800 and 24 fps, my fill at T1.4, and my kicker at T8. If instead I say I want the key to fill ratio to be 8:1, he knows what I mean and can get it done. My gaffer can then make informed suggestions on what type of lighting units we should use to get my desired results. Instead if I were to vaguely say, “I need more light here and less light here,” work would be slower, there would be some misunderstanding, and most likely several adjustments will need to be made to get to the correct levels. Why take this approach, when using a light meter makes the whole process so much easier and professional? Exactly.
Schlepping your camera system around as you light scenes is not only extra work, but also increases costs and time since you now have to rent the camera more days and pay a crew to move it. You’re also basically using the camera as your light meter, which is like using a Porsche’s headlights to be your flashlight. Instead use the right tool for the job.
If you know how your camera system responds to light, your light meter is all you need to light your scene. Better yet, you can use the meter to light a secondary set while you are shooting on the first set. Or you can light the scene the day before, making the shoot day go smoother and quicker.
One project I was on needed shots in four locations all in one day. The budget couldn’t afford to rent four different camera systems, and there was no time to transfer the camera around to each location to preview each scene. There also was no money to rent the camera for the pre-light day. However, I lit each set and was ready to go before the camera even arrived, which allowed us to make our day and keep the budget reasonable. That’s the power of a light meter. (Hint: even if you can’t afford a light meter, it’s far cheaper to rent it than a camera.)
Maintaining consistent light levels within a scene means grading the footage won’t involve nearly as much tweaking and shot-matching between individual shots. This speeds up the grading process, giving you more time to finesse and grade the footage instead of correcting and balancing it. This also means post production costs are greatly reduced. That’s a win-win all the way around.
The turnaround on some of my projects was so tight that there wasn’t time to do any grading or correction. The end deliverable had to be a straight edit of the footage. Since I had controlled the light levels using my meter and maintained a consistent look shot-to-shot, post production was a snap and no one ever knew the footage was not color corrected or graded.
|
Check out:
|

Mid-tone is mid-tone, right? Well, not according to every camera. Digital cinema cameras seem to place mid-tone at different values. Depending on your camera and recording format, mid-tone can be anywhere from 38% IRE up to 55% IRE. That’s a big difference and you may or may not like where mid-tone falls with your camera. By using your meter as you test your camera system, you can accurately determine how that camera responds to light. Then, by using a program such as the DTS software, you can map the camera response to the meter. (Examples of different mid-tone values can be seen in the Best Practices section.)
During location scouts, your meter lets you know exactly what the ambient light levels are and what it will take to get your exposure to the levels you need. It can also help you determine what lighting challenges the location presents. Knowing this information ahead gives you a leg up in prepping for that location, and saves you a lot of time and stress during the shoot.
The more you work with a light meter, the more you’ll train your eye to see what various light levels and lighting ratios look like. You will also learn to “see” what lighting requirements are needed to get there. The end result is you will light faster and make more informed lighting choices. At some point, you may even get so good at evaluating light that you can light a scene completely by eye and no longer even need a meter. You will just walk into a location and know that what you need, such as a Tweenie bounced into a 4×4 card from camera left about 4 feet away from the talents position.
Personally, I use a meter in the digital age to take my lighting skills and knowledge to the next level. Lighting with a monitor, via the histogram, or off the waveform does not allow me the same power, efficiencies, or knowledge that I get from using a meter. You can light using those other tools, and many people do. But those tools do not offer the same benefits that my meter gives me.
Learn more about how to use a light meter or how to profile a camera on my Sekonic Page. I also have a review of the Sekonic 478D, as well as information on the urban legend of 18% gray.
What are your thoughts on light meters? Antiquated piece of kit best left for those who shoot on film? Or do you agree with me and see the light meter as a powerful tool even for digital cinematographers? If you haven’t used a meter before, what are your reasons? And how do you prefer to light a set and set your exposure?
Until Next Time – Get Out There And Shoot!
Ryan E. Walters, Cinematographer
 https://indiecinemaacademy.com/wp-content/uploads/2016/10/ICA_DoF02_Distance_and_ND_Filters-Thumbnail_web.jpg
450
800
Tim
https://indiecinemaacademy.com/wp-content/uploads/2013/12/Indie_cinema_Logo_2color-MF-300x116-web.png
Tim2016-10-24 08:00:022025-03-11 14:48:27Depth of Field Part 2: How Focal Length, Distance, and ND Affect Depth of Field
 https://indiecinemaacademy.com/wp-content/uploads/2016/10/ICA_DoF01_How_Aperture_and_ISO_Affects_Focus-Thumbnail-web.jpg
450
800
Tim
https://indiecinemaacademy.com/wp-content/uploads/2013/12/Indie_cinema_Logo_2color-MF-300x116-web.png
Tim2016-10-10 00:15:202025-03-11 14:46:47Depth of Field, Part 1: How Aperture and ISO Affect Focus
 https://indiecinemaacademy.com/wp-content/uploads/2016/07/Complexities-Bicolor-LED-Featured.jpg
450
800
Tim
https://indiecinemaacademy.com/wp-content/uploads/2013/12/Indie_cinema_Logo_2color-MF-300x116-web.png
Tim2016-07-13 14:06:532018-09-12 10:21:41Complexities of Bicolor LED Lights: An Extensive Color Analysis
 https://indiecinemaacademy.com/wp-content/uploads/2016/07/Tungsten-Daylight-600.jpg
516
600
Tim
https://indiecinemaacademy.com/wp-content/uploads/2013/12/Indie_cinema_Logo_2color-MF-300x116-web.png
Tim2016-07-08 12:54:512019-06-13 16:20:20Understanding the Complete LED Database: Testing Procedures
https://indiecinemaacademy.com/wp-content/uploads/2016/07/Tungsten-Daylight-600.jpg
516
600
Tim
https://indiecinemaacademy.com/wp-content/uploads/2013/12/Indie_cinema_Logo_2color-MF-300x116-web.png
Tim2016-07-08 12:54:512019-06-13 16:20:20Understanding the Complete LED Database: Testing Procedures![Newest Aputure LEDs: Review of the COB120T and M9 [Video]](https://indiecinemaacademy.com/wp-content/uploads/2016/06/AR018-Title-Web-330x185.jpg) https://indiecinemaacademy.com/wp-content/uploads/2016/06/AR018-Title-Web.jpg
450
800
Tim
https://indiecinemaacademy.com/wp-content/uploads/2013/12/Indie_cinema_Logo_2color-MF-300x116-web.png
Tim2016-06-14 00:10:592018-01-25 10:52:19New Aputure LEDs: Review of the COB120T and M9 [Video]
https://indiecinemaacademy.com/wp-content/uploads/2016/06/AR018-Title-Web.jpg
450
800
Tim
https://indiecinemaacademy.com/wp-content/uploads/2013/12/Indie_cinema_Logo_2color-MF-300x116-web.png
Tim2016-06-14 00:10:592018-01-25 10:52:19New Aputure LEDs: Review of the COB120T and M9 [Video] https://indiecinemaacademy.com/wp-content/uploads/2016/01/LC120-CorporateVideo-Thumbnail-Web.jpg
450
800
Ryan E. Walters
https://indiecinemaacademy.com/wp-content/uploads/2013/12/Indie_cinema_Logo_2color-MF-300x116-web.png
Ryan E. Walters2016-01-11 00:15:082016-05-05 11:22:30How to Cinematically Light a Corporate Video (Cinematic Lighting Lesson 20)
 https://indiecinemaacademy.com/wp-content/uploads/2016/01/AR026-AputureReview-Thumbnail2.jpg
450
800
Ryan E. Walters
https://indiecinemaacademy.com/wp-content/uploads/2013/12/Indie_cinema_Logo_2color-MF-300x116-web.png
Ryan E. Walters2016-01-07 01:10:402018-01-25 10:51:58Aputure LED Light Review: High Quality & Affordable? [VIDEO]
 https://indiecinemaacademy.com/wp-content/uploads/2015/12/LC119-LightFast-Thumbnail.jpg
450
800
Ryan E. Walters
https://indiecinemaacademy.com/wp-content/uploads/2013/12/Indie_cinema_Logo_2color-MF-300x116-web.png
Ryan E. Walters2015-12-29 12:38:562016-01-10 21:42:39How To Light Quickly (Cinematic Lighting Lesson 19)
 https://indiecinemaacademy.com/wp-content/uploads/2015/12/CS005-HighSpeed-Part05-FREE-Thumbnail-Web.jpg
450
800
Ryan E. Walters
https://indiecinemaacademy.com/wp-content/uploads/2013/12/Indie_cinema_Logo_2color-MF-300x116-web.png
Ryan E. Walters2015-11-30 09:00:282015-12-29 15:41:16Your Guide To High Speed, Part 5: Lighting Six High Speed Sets
 How To Use A Light Meter: Overview
This site uses cookies. By continuing to browse the site, you are agreeing to our use of cookies.
AcceptHide notification onlySettingsWe may request cookies to be set on your device. We use cookies to let us know when you visit our websites, how you interact with us, to enrich your user experience, and to customize your relationship with our website.
Click on the different category headings to find out more. You can also change some of your preferences. Note that blocking some types of cookies may impact your experience on our websites and the services we are able to offer.
These cookies are strictly necessary to provide you with services available through our website and to use some of its features.
Because these cookies are strictly necessary to deliver the website, refusing them will have impact how our site functions. You always can block or delete cookies by changing your browser settings and force blocking all cookies on this website. But this will always prompt you to accept/refuse cookies when revisiting our site.
We fully respect if you want to refuse cookies but to avoid asking you again and again kindly allow us to store a cookie for that. You are free to opt out any time or opt in for other cookies to get a better experience. If you refuse cookies we will remove all set cookies in our domain.
We provide you with a list of stored cookies on your computer in our domain so you can check what we stored. Due to security reasons we are not able to show or modify cookies from other domains. You can check these in your browser security settings.
We also use different external services like Google Webfonts, Google Maps, and external Video providers. Since these providers may collect personal data like your IP address we allow you to block them here. Please be aware that this might heavily reduce the functionality and appearance of our site. Changes will take effect once you reload the page.
Google Webfont Settings:
Google Map Settings:
Google reCaptcha Settings:
Vimeo and Youtube video embeds:
You can read about our cookies and privacy settings in detail on our Privacy Policy Page.
Privacy Policy
Leave a Reply
Want to join the discussion?Feel free to contribute!