The Power Of X
A simple yet powerful lighting technique anyone can master in under a minute.
Yes! Send Me My Free Video
Summary: Did you know that LEDs lights may actually be ruining the look of your productions? And no, this problem can’t be fixed in the grade. We put seven different brands of LEDs lights to the test, capturing with a Red Epic Dragon camera. Then we discuss the results and how they’re going to affect the creative choices that you make on set.
Length: 12:41 minutes

** You must be an Advanced or Pro Access member for article video downloads. **
* Red Epic 5k R3D stills that have been manually white balanced
(File size: 216 MB; Redcode .R3D; Compressed as a zip.)
[mepr-s3-link bucket=”ar-articles” path=”AR015_LEDTest-Manual-WB-R3D.zip” expires=”4:00:00″] [/mepr-s3-link]
* Red Epic 5k R3D stills that have been white balanced with the meter
(File size: 216 MB; Redcode .R3D; Compressed as a zip.)
[mepr-s3-link bucket=”ar-articles” path=”AR015_LEDTest-Meter-WB-R3D.zip” expires=”4:00:00″] [/mepr-s3-link]
* Red Epic 5k R3D stills
(File size: 13 MB; Redcode .R3D; Compressed as a zip.)
[mepr-s3-link bucket=”ar-articles” path=”AR015_MixedLEDTest.zip” expires=”4:00:00″] [/mepr-s3-link]
LEDs are amazing right? They’re small, lightweight, and they don’t draw a lot of power. You can even get them in bi-color so you don’t have to gel them. But did you know that they may be actually ruining the look of your productions? And it’s not necessarily something that you can fix in the grade. Well in this video we’re going to put seven different brands of LEDs to the test and I’ll show those results and how they’re going to affect the creative choices that you make on set.
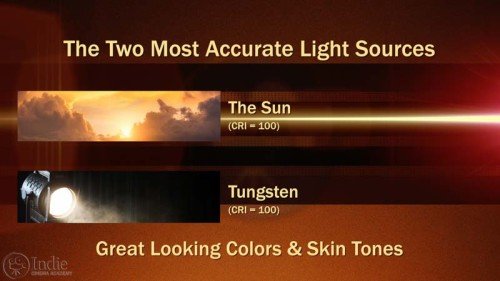
The sun and tungsten lights are the two most accurate sources of light. Use either of them to light your films and not only will you walk away with accurate colors, but also good looking skin tones. If all you ever use are daylight balanced lights and incandescent bulbs, you’re fine. But the reality is LEDs are quickly becoming the de facto light source on a lot of projects. If you’re not using them now, you will eventually. Some LED brands claim to have a great color rendering index rating, or CRI. But chances are you’ll be let down since CRI doesn’t work well with light from LEDs. If you want to get into the details of why CRI is a faulty standard and what to do about it, then check out our video “Why CRI Is Irrelevant.” The short answer is it doesn’t include three crucial readings, R9 which is saturated red, along with R13 and R15 which are skin tone values. In my opinion, those are the key readings we need to know if we want our colors–especially our skin tones–to look good on camera.
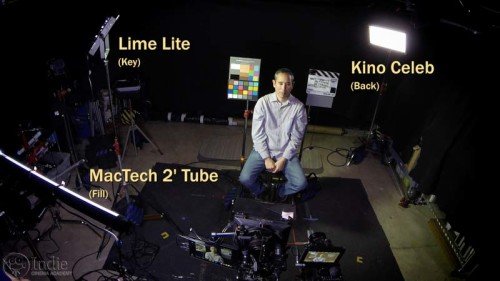
Here is an example of what I’m talking about. This shot was lit with all daylight LEDs using the Key-Side Fill approach, which I cover in our lighting series. As you can clearly see in this image, even though the shot has been properly white balanced using the white chip on the DSC Labs One Shot Chart the colors are inconsistent throughout the image.
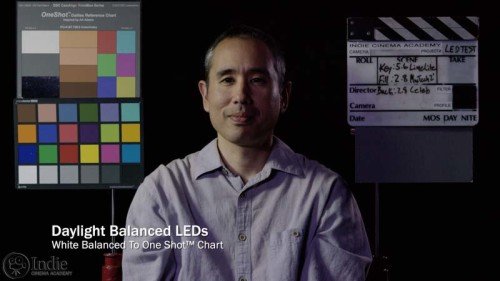
The shadow side of the face has blue cast to it, and the highlights from the backlight are tinting magenta. The slate is also blue when it should be white, and the light lavender shirt is now multicolored. It goes from an almost gray color to a saturated purplish blue. I shot this on the Red Epic Dragon, so if you want to play with the RAW file yourself, the link to download it is below this video.

There is obviously a lot going on here, so let’s back up and take a quick look at the individual test result of each light. I’ll keep it short and summarize what I noticed from each test.
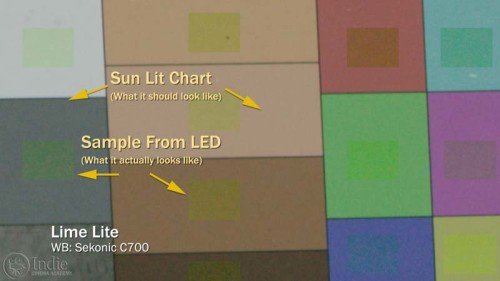
Starting with the Limelite it is easy to see that this light has a noticeable green cast to it, which is noticeable to the naked eye. This shot was white balanced by dialing in the color temp that I got from the Sekonic C-700 Color Meter
. When I took my reading, I got a color temp of 5015 kelvin, which was about 600 kelvin off of the 5600 kelvin the light was set to; so it is warmer than advertised. After the shot is manually white balanced using the white chip of the DSC One Shot Chart, the green cast is neutralized pretty well. But if you look at the skin tones, they still feel a bit yellow to me; they’ve lost their warmth.
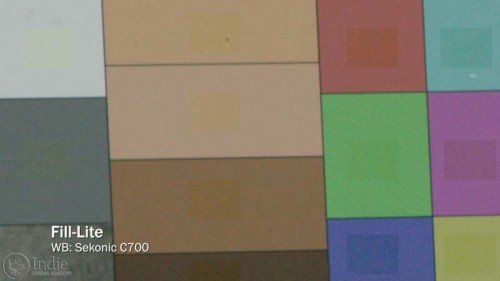
Moving on to the Fill-Lite, we can see there is a very slight shift towards yellow when the shot is balanced using the C-700 reading. If you’re having trouble seeing that small shift, take a look at the white and gray patches. The vectorscope also shows a small push towards yellow. Once the shot is manually white balanced, the shift is completely neutralized and the white, gray, and skin tone patches line up perfectly, making them look very natural and pleasing. This light advertises a color temp of 5,000 kelvin, and it came in at 4,988; that’s pretty impressive if you ask me.
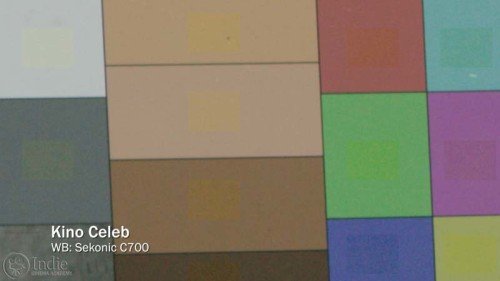
The Kino Flo Celeb has a stronger push towards yellow than the Fill-Lite, which is easy to see in all of the patches except the blue one. When I took my meter reading, the color temp came in at 6,671 kelvin even though the light was set to 5,500. That’s almost 1,200 degrees cooler than advertised, which is quite a jump. As soon as the image is manually white balanced, the white, gray, and skin tone patches line up almost perfectly, again making the skin tones look good on camera.
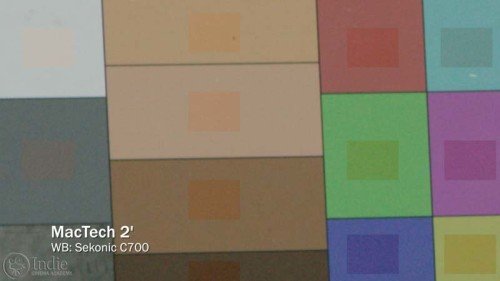
We also tested three lengths of MacTech tubes: 1 foot, 2 foot, and 4 foot lengths. All three tubes shift toward the yellow and red vectors, giving the image a salmon color cast. The 2 foot tube has the strongest color cast to it, followed by the 4 foot and then the 1 foot. Color balance between the three lights was not consistent at all. All of the lights were advertised as daylight, or 5,500 degrees kelvin. The 1 foot tube came in at 6,308, the 4 foot at 6,548, and the 2 foot at 7,402, which is a lot bluer than daylight. And a 1,900 degree shift from daylight it is nearly the same color shift as it is between daylight and tungsten lights. Fortunately, once the image is white balanced, all three tubes perform well. The white, gray, and skin tone patches line up, and the red patch is almost an exact match. So the resulting skin tones look natural on camera.
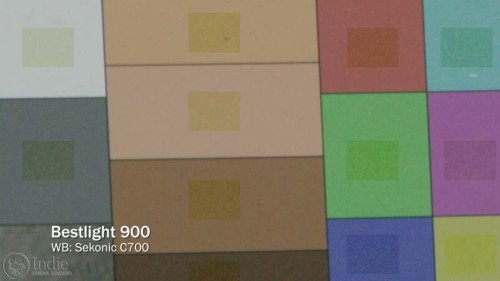
I was also curious how some ultra affordable LEDs stacked up, so I started with the Bestlight® 900. As you can see in this image, there is a noticeable yellow shift. This light is advertized at 5600, but it came in at 6,347, so about 700 degrees cooler. Once the image is manually white balanced the yellow color shift is neutralized, and the color patches line up decently. Nowhere near as good as the Fill-Lite or the Celeb, but a lot better than I would have expected from such an inexpensive light.
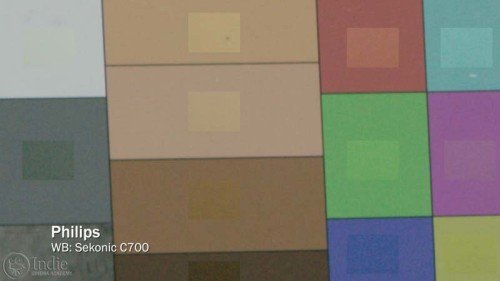
I also ran to my local hardware store to pick up some off the shelf LEDs. The first one I tested was from Philips (60W Equivalent Daylight; 5000K). As you can see in this image there is a noticeable green cast to it. The skin tones do feel sickly, but not as bad as some other lights. The light is advertized at 5,000 degrees, and my meter reading came in at 5,533. So it was off by about 500 kelvin; not bad for an off the shelf LED. When the image is manually white balanced the color shift is neutralized, but the colors don’t match as well as the higher end LED do.
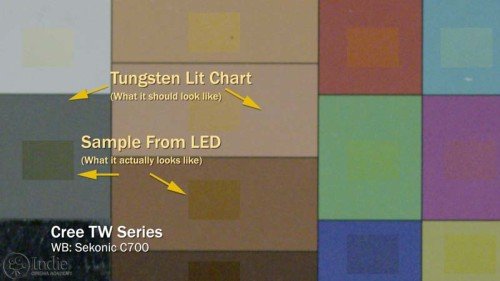
The other off the shelf LED I picked up was a Cree TW bulb (60W Equivalent Soft White; 2700K). According to Cree, this is their true white series and is supposed to render color accurately. Since this was a tungsten equivalent, I compared it to a 300w Fresnel. As you can see in the image, there is a noticeable shift toward yellow in all of the color patches. The light is advertized as being 2700 degrees kelvin, and my C-700 color meter said it was 2,744. Now that’s impressive that it came in so close to what it said. The Fill-Lite was the only other light that actually came close to what it advertised. When the image is white balanced, the yellow shift it almost completely removed, but you can see there is still a slight yellow shift.
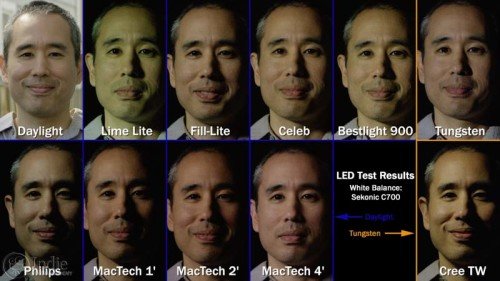
So what does all of this mean? Well, as we take a look at all of these lights side by side we can see that even though these LEDs say they’re daylight, and most of them tout their high CRI rating, each light produces very different results on skin tone. Some render skin tone in a pleasing way, and some, well, not so much. You may be thinking to yourself, “Well, I’ll just manually white balance my camera and that will solve the issue.” Or “I’m shooting in raw, so I can just fix it in post.” Not so fast; neither solutions will work. Remember the example from the start of this video? Well, let’s take a closer look at it.

In our Key-Side Fill set-up we used the LimeLite as our key. As you remember from the test footage, it came in at about 5,000 kelvin, and it had a strong green cast to it. That means when we white balance the image, magenta is added to counteract the green. This pushes all of the other lights toward magenta, which we can see in the highlights. For our fill light we used the 2 foot MacTech tube, and even though it renders colors a lot better than the Limelite, it came in at 7,400 degrees, which is 2,400 degrees cooler than our key. So though both lights are supposedly daylight balanced, I may as well be using a daylight colored light and a tungsten colored light- there is that big of a color shift between these two supposedly daylight balanced lights. That’s why everything is turning blue. Then there is our backlight, the Kino Celeb. Again, another quality light, but it is somewhere in-between color temperatures at almost 6700. This is a great example of a mixed lighting scenario. As soon as we try to compensate for one light with our white balance, it changes the look of everything else. White balance can’t save us here.
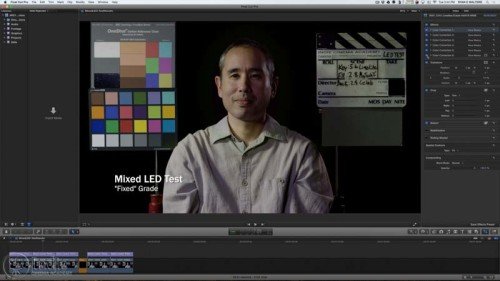
What about shooting raw and fixing it in the grade? Well here is my attempt to do just that, and why it didn’t work. First off, I freely acknowledge I am not a colorist and I don’t play one on TV. I’m sure a skilled colorist could do a better job and get closer, but they will still be fighting the same issues. With this example it took me six layers of correction to get to a barely fixed image.
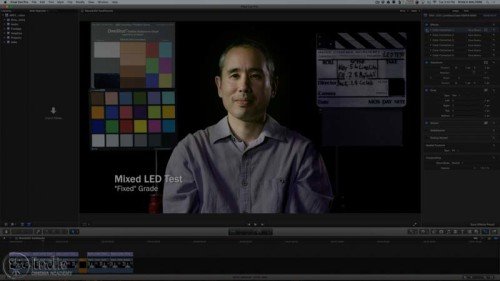
The first correction neutralized the blue and magenta cast in the shadows and the mid tones. The magenta cast in the highlights was tougher to get rid of, so I needed a separate correction to do that. With the third correction I fixed the blue cast in the slate, and the fourth fixed the color cast in the shirt making it closer to the lavender color it should be. Correction Five fixed the gray card, and Correction Six fixed the green transition line in the skin tones on the face.
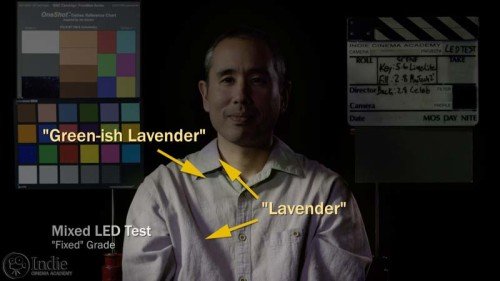
That’s six corrections to get the image back to an almost decent starting place, and I haven’t even begun to grade yet, I’m just fixing problems. The sad part is that there are still issues with this image. Take a look at the shirt. Even though I’ve kind of brought it back, it is still multicolored. Two different LEDs hit the shirt and mixed. As I correct for one, the other changes. Then there is the skin: it still has magenta spots from trying to balance out the key light. Try as I might, I can’t fix this image completely, I can only make it look less horrible.
Fortunately, there are solutions. Let’s take a look at them.
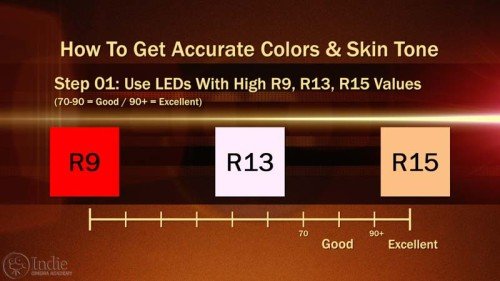
The first step to getting great looking colors and skin tones with LEDs is to only use LEDs that have high rating for R9, R13, and R15 colors. If those values fall in the 70 – 90 range you’ll get good results; if they are in the 90+ range you’ll get excellent results. It just so happens that we have built a database with over 40 different LEDs that give you those key readings. The link to that database is below this video.
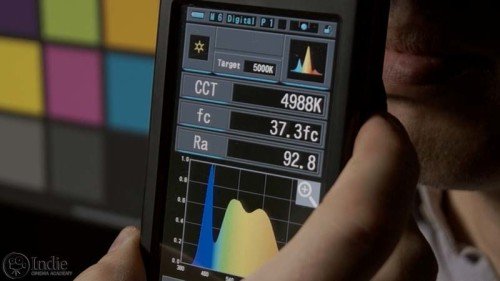
The second part of the solution is to match all of your lights using a color meter. I know this may sound archaic in today’s digital age, but as the test showed, a light that’s labelled daylight isn’t necessarily daylight balanced. And some of them shift towards green. And mismatched lights cause a world of hurt in the grade. So by using your color meter you can accurately know what their color balance is and what gel you need to use to correct for it. This is one of the reasons why I like the C-700; it tells me the exact Rosco or Lee gel
combinations I need to use to balance my lights.
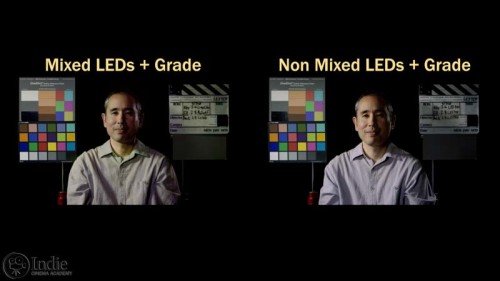
The third part of the solution is to use all the same brand of LEDs in your project, and make sure they’re matched to begin with. If you use exactly the same LEDs for your whole production–even if they are lower quality LEDs–when it comes time to grade the image you’ll be able to push the image in the same direction, which means you will not be fighting a mixed light setup. As you can see in this example that I lit using all Bestlight 900s, since they all matched I wasn’t fighting anything in the grade, and I was able to create a basic look using only 3 corrections. To get a similar look with the mixed light example, it took nine corrections, and it doesn’t even look close to what I created in my basic look grade.
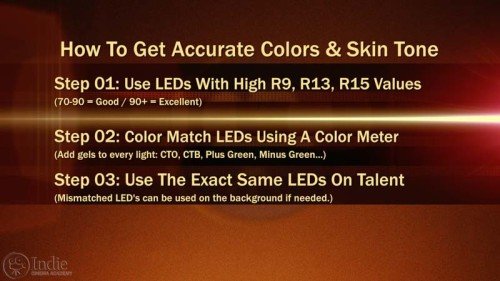
So to recap, if you want great colors and accurate skin tones: use quality LED that have high R9, R13, and R15 ratings. Match the color temperature of your lights using a meter. Or at the very least, make sure your LEDs are from the same brand and are color matched to begin with.
As you experiment with LEDs just remember this, garbage in, garbage out. If you want quality results, you’ll have to use a quality light source. But using a quality light is just the beginning. From there it is all about placement and supporting the story. And we cover that in detail over on the membership side.
So which LEDs have you been using? And have you been happy with those results? Are there any LEDs that you would recommend buying? Or recommend avoiding? I want to know, so leave a comment below. And if you have any questions, ask away, and I’ll be sure to respond.
You must be logged in to post a comment.
This site uses Akismet to reduce spam. Learn how your comment data is processed.
This site uses cookies. By continuing to browse the site, you are agreeing to our use of cookies.
AcceptHide notification onlySettingsWe may request cookies to be set on your device. We use cookies to let us know when you visit our websites, how you interact with us, to enrich your user experience, and to customize your relationship with our website.
Click on the different category headings to find out more. You can also change some of your preferences. Note that blocking some types of cookies may impact your experience on our websites and the services we are able to offer.
These cookies are strictly necessary to provide you with services available through our website and to use some of its features.
Because these cookies are strictly necessary to deliver the website, refusing them will have impact how our site functions. You always can block or delete cookies by changing your browser settings and force blocking all cookies on this website. But this will always prompt you to accept/refuse cookies when revisiting our site.
We fully respect if you want to refuse cookies but to avoid asking you again and again kindly allow us to store a cookie for that. You are free to opt out any time or opt in for other cookies to get a better experience. If you refuse cookies we will remove all set cookies in our domain.
We provide you with a list of stored cookies on your computer in our domain so you can check what we stored. Due to security reasons we are not able to show or modify cookies from other domains. You can check these in your browser security settings.
We also use different external services like Google Webfonts, Google Maps, and external Video providers. Since these providers may collect personal data like your IP address we allow you to block them here. Please be aware that this might heavily reduce the functionality and appearance of our site. Changes will take effect once you reload the page.
Google Webfont Settings:
Google Map Settings:
Google reCaptcha Settings:
Vimeo and Youtube video embeds:
You can read about our cookies and privacy settings in detail on our Privacy Policy Page.
Privacy Policy
I love what you and your team produce. Thanks for the hard work. My question is can you create a video that covers the light meter and chip chart? These are often used in your videos but I’m not always sure what I am to be looking for when you reference them.
Thanks in advance
Ron Saunders
http://www.cinema-styles.com
Thanks, Ron.
Yes, knowing how to use a light meter is very important. We are going to cover light meters in our Lighting Foundations series, which we won’t start posting until late-fall/early-winter. Did you have a chance to check out Ryan’s post about Sekonic profiles? http://www.ryanewalters.com/SP/sekonicprofiles.html While it focuses on Sekonic light meters, there is a lot of useful info about how to use a light meter, specifically in this video: https://vimeo.com/32496718
Hope this helps until we create our lesson on using a light meter.
Thanks Tim, I’ll give it a view!
Ron, We also show and talk about the One Shot chart in this article on getting great looking video: https://indiecinemaacademy.com/3-essentials-great-looking-video/
Hope that helps. 🙂
I just recently built a kit of a Westcott’s super thin LED Flex Lights. I would be interested to know how they hold up in terms of color accuracy. For most other characteristics such as build quality, output, weight and cost I’ve been very pleased. Especially since they’re running a 40% off deal right now!
They hold up pretty well. 🙂 (Better than some other widely used name brand LEDs out there.) They are in our LED database which goes live on the 13th.
Hi Ryan
great video.
I could not find the link to the database with over 40 different LEDs you mentioned.
Thanks, Ricky
Hi Ricky,
The database is going to go up on Monday, July 13. Stay tuned!
The graphic above will take you to the database now. 🙂 And here is a link too: https://indiecinemaacademy.com/led-color-rendering-database-testing-procedures/
My first time here. Great article / video. Interesting, but a shame you didn’t show more of the complete LED range by Mole Richardson. I would also liked to have seen Rotolight and the DMG Lumiers in there. Would love it if CQS had been mentioned. Before this I got my LED info from the UK National Gallery. http://research.ng-london.org.uk/scientific/spd/?page=info In the metric tab it lists CQS for various bulbs and emitters. If there is one thing I have learnt it is that a high CRI value does not guarantee that a light is capable of reproducing all colours “accurately”, only that it will perform as well as a matching ideal light source.
Thank you Jay for your insight! We cover some of your questions in some of our other articles: we talk about the limitations of CRI as well as introduce CQS in our article on whether CRI is still relevant with LEDs and we cover CRI values for a range of LED brands in our LED database.
When we started building our LED database, we decided for our first pass to cover as many brands as possible since many brands use the same LED emitters in many of their product lines. As we build upon the database we will be refining it to include these various product lines.
We collect all of our own color meter readings using the same color meter units so that all measurements can be compared across the board as well as remove all bias. This means that, while other organizations may also have extensive databases covering a variety of color scales (e.g. CQS), we only report our own readings.
We use the Sekonic C700 color meter and the AsenseTek Lighting Passport concurrently, again to remove bias.
Much more to come. We’re currently doing much more detailed reviews of specific lights, such as those from Aputure, like their LS 1/2w Light Storm (amazing lights, and inexpensive too!); and the Yuji VTC line of LED emitters (the extended CRI on these are heavenly, with spectacular R9 values).
Great overview of the subject. I’m left wondering about one issue. Is there any raw data in the spectrometer’s results that can be used for deciding on plus minus green filtration when trying to match different lights. Sekonic gives the recommendation. How about Lighting Passport? Is there any measurement parameter for the green magenta axis like the CCT for the blue – orange axis?
The Sekonic C700 lets you know green-magenta axis info and blue-orange axis info. It then tells you the exact gel to use (example: Lee Filters L285 3/4 CTO) to correct the color. I don’t see that feature on the Lighting Passport. However, Lighting Passport feeds all its data to the smartphone app so I wouldn’t be surprised if this feature is added in future updates to the app.
Plus green and minus green are very helpful for correction, but I’ve been learning something very interesting when it comes to correction gels for LEDs: They don’t always work. The standard correction gels were made for full spectrum lights (like tungsten units). LED’s are not full spectrum, which means that correction gels may or may not work as expected on them. Because of that, I’m not entirely positive that you can take one parameter and then say that a plus green or minus green gel would work. It may actually take a combination of gels to not only correct for the shift, but also get the other colors back in line…
I’ve heard that gel companies are working on make gels for LED’s because they are a different kind of light, but we’ll see what happens.
As Tim said, the Sekonic C700 is the meter you want to use as it will tell you what kind of combination of gels to use to get to where you want to go.
Greetings and thanks for nice review…i’m about to buy the Bestlight 900 that you have reviewed here. Does this light produce and rolling bar/flicker to the image (especially in higher frame rates like 50fps/100 shutter) ? Thank you
We ran a test at various shutter speeds and did notice a very slight flicker at 1/100 second shutter. But we’ve shot plenty at slower shutters (mainly 1/48 sec and 1/50 sec) and had no problems.
That’s great advice about sticking with one brand of LEDs to minimize white balancing and color correction issue. But it also makes buying lights more of a decision; it’s a lot like buying into a camera system.
So in your opinion, do any of these lights give the same beautiful rendition as actual tungsten filament bulbs?
Yes, it does create more of a dilemma. Really only your key and fill need to be the same brand. Background and effects lighting doesn’t have to be exact.
We stick to daylight balanced lights, so I’m not sure of tungsten balanced LEDs. I do know that you should never use the hard plastic orange “gel” that comes with some daylight balanced LEDs to mimic tungsten. I have yet to find one that resulted in high CRI. If you want to make a daylight light balanced for tungsten, go with real gels from Rosco or Lee or similar brands.
Thanks for this video! I don’t see the iKan 1500’s on your list of tested lights. Have you tried them?
Thanks!
LR
We haven’t tried them. I’m here at NAB and didn’t see them either. The ones I tested yesterday were the Rayden, the Lyra, and the Milo lines. They also implied they are going away from numbering series, hence the new names.
I am a newbie and looking for a inexpensive led lights for a step and repeat banner, I was looking at the Bestlight 900 leds, it does not state the CRI but there are decent reviews, what do you think?
We bought three BestLight 900 LED lights two years ago, but since the color quality isn’t the best we stopped using them as key or fill lights and save them for background lights. They aren’t terrible, they just lack saturated red (the R9 value). This affects skin tones, and red objects such as tomatoes, strawberries, flowers, stop signs, etc. These end up looking a bit dull and gray. If what you’re using it for doesn’t have much red in it, you should be fine.
All of this assumes that BestLight hasn’t improved the color quality since we bought them (December 2014).
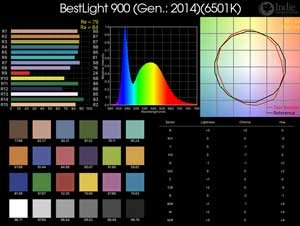
Below are the spectra and graphs from testing our lights just now. The R9 value is 24, which honestly is terrible. The other colors are adequate, but not great. The spectra shows a bad valley in the cyan area, and tail of the spectra (red region) drops off very quickly. In the TLCI graphic (lower left) all of the colors appear to be similar except for any of the red hues (Moderate Red, Purple, Red, and Magenta), with Red being the worst. The TLCI suggested corrections (lower right) shows that a lot has to be corrected in order to match this light.
(For explanations of these graphs, check out our article “Understanding the Complete LED Database: Testing Procedures.” To compare with other lights, check out our LED database.)
A very good light that is in a similar price range and shape is the Aputure Amaran. It is $100 more than the BestLight 900, but I would say it is well worth the added cost. Another option in that price range that is a different shape, although also has excellent color is the Quasar Science Q-LINE Q50X, which has the added benefit of being bicolor. We use both brands of lights and love them both.
(Click to enlarge)
These type of videos are not helpful, the CCT your meter is reading cannot may not be accurate because it’s not a spectrometer, that is the sekoni only has about 3 photo cell receptors, so there is no diffraction grating.
The point is that CCT means nothing without the Duv / Delta in the green and magenta areas of the CIE graph.