The Power Of X
A simple yet powerful lighting technique anyone can master in under a minute.
A simple yet powerful lighting technique anyone can master in under a minute.

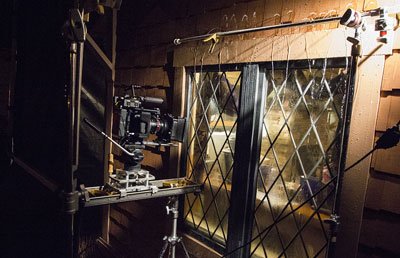
It is all of the little details in an image that add up to make it standout, and give it that polished and professional feel. In part 08 of our series on bringing a cinematic look to our productions, we reveal how we did just that by adding rain to one of our shots by building a rain bar.
(This series was originally produced in partnership with Zacuto)
Part 01: How To Create A Cinematic Look On A Small Budget
Part 02: Budgeting And Proposals
Part 03: How To Location Scout
Part 04: Storyboarding On A Small Budget
Part 05: Creating A Lighting Diagram
Part 06: Scheduling And Creating A Call Sheet
Part 07: Conducting A Camera Test
Part 08: Building A Rain Bar On A Budget
Part 09: Data Management On A Budget
Part 10: How To Blackout A House On A Budget
On to Part 08: How To Build A Rain Bar …
[iframe height=”600″ width=”100%” scrolling=”yes” allowtransparency=”true” src=”http://www.zacuto.com/cinematic-look-small-budget-commercial-part-8″]
This site uses cookies. By continuing to browse the site, you are agreeing to our use of cookies.
AcceptHide notification onlySettingsWe may request cookies to be set on your device. We use cookies to let us know when you visit our websites, how you interact with us, to enrich your user experience, and to customize your relationship with our website.
Click on the different category headings to find out more. You can also change some of your preferences. Note that blocking some types of cookies may impact your experience on our websites and the services we are able to offer.
These cookies are strictly necessary to provide you with services available through our website and to use some of its features.
Because these cookies are strictly necessary to deliver the website, refusing them will have impact how our site functions. You always can block or delete cookies by changing your browser settings and force blocking all cookies on this website. But this will always prompt you to accept/refuse cookies when revisiting our site.
We fully respect if you want to refuse cookies but to avoid asking you again and again kindly allow us to store a cookie for that. You are free to opt out any time or opt in for other cookies to get a better experience. If you refuse cookies we will remove all set cookies in our domain.
We provide you with a list of stored cookies on your computer in our domain so you can check what we stored. Due to security reasons we are not able to show or modify cookies from other domains. You can check these in your browser security settings.
We also use different external services like Google Webfonts, Google Maps, and external Video providers. Since these providers may collect personal data like your IP address we allow you to block them here. Please be aware that this might heavily reduce the functionality and appearance of our site. Changes will take effect once you reload the page.
Google Webfont Settings:
Google Map Settings:
Google reCaptcha Settings:
Vimeo and Youtube video embeds:
You can read about our cookies and privacy settings in detail on our Privacy Policy Page.
Privacy Policy
Leave a Reply
Want to join the discussion?Feel free to contribute!