The Power Of X
A simple yet powerful lighting technique anyone can master in under a minute.
A simple yet powerful lighting technique anyone can master in under a minute.
Summary: Ryan takes you step by step through his system for creating camera profiles for your Sekonic light meters. He also created light meter profiles for you to download for free: an Arri Alexa profile, a Canon C100/C300/C500 profile, a Red Epic profile, and a Sony F65 profile.
Length: 29:50 minutes
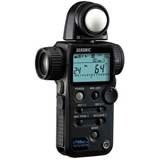 |
Sekonic 758Cine (Recommended) |
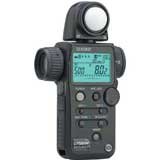 |
Sekonic 758DR |
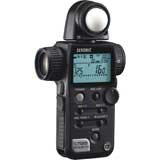 |
Sekonic 758D |
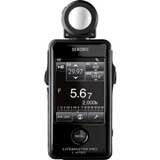 |
Sekonic 478D (Recommended) |
 |
Sekonic Exposure Profile Target II (Recommended) |
 |
Sekonic Exposure Profile Target |
 |
X-Rite Color Checker |
 |
X-Rite Color Checker Passport |
 |
Sekonic DTS Software |

** You must be an Advanced or Pro Access member for article video downloads. **
Note: Some people have reported problems downloading these profiles. If you are having any difficulties, please email us and we will send the profiles directly to you: info@indiecinemaacademy.com
* For information about downloads: FAQ downloads *
Alexa (Cooke Panchro /i 75mm T2.8) [Log C]
– Be sure to read the READ ME FIRST document before using these profiles.
– Profile (43 kb)
– Stills (27 MB)
– Video (311 MB)
Cinema Camera EF Mount (Cooke Varotal 20-100mm T3.1) [Film / RAW]
– Profile (2 kb)
– JPG Stills (5.3 MB)
– DNG Stills (25 MB)
C100 (Rokinon 85mm 1.5) [Canon Log, FilmConvert 5207, 2393 LUT]
– Be sure to read the READ ME FIRST document before using these profiles. The custom profiles are contained in the Profile Download.
– Log Profile (59 kb)
– Log w/5207 Profile (59 kb)
– Log w/2393 Profile (59 kb)
– Stills (12 MB)
– Be sure to read the READ ME FIRST document before using these profiles. The custom profiles are contained in the Profile Download.
– Profile (59 kb)
– Stills (16 MB)
– Be sure to read the READ ME FIRST document before using these profiles.
– Profile (47 kb)
– Stills (21 MB)
– Video (81 MB)
– Be sure to read the READ ME FIRST document before using these profiles.
– Profile (50 kb)
– Stills (6 MB)
– Video (101 MB)
AF100 (Cooke Panchro /i 32mm T2.8) [Ryan’s Custom Cine-D]
– Be sure to read the READ ME FIRST document before using these profiles.
– Profile (47 kb)
– Stills (2 MB)
– Video (12 MB)
GH2 (Cooke Panchro /i 32mm T2.8) [Driftwood Hack using Smooth & Nostalgic] – THIS IS FOR VIDEO MODE ONLY
– Be sure to read the READ ME FIRST document before using these profiles.
– Profile (50 kb)
– Stills (11 MB)
– Video (545 MB)
Epic / Scarlet (Cooke Panchro /i 32mm T2.8) [RedLogFilm]
– Be sure to read the READ ME FIRST document before using these profiles.
– Profile (45 kb)
– Stills (45 MB) (JPG’s only, as TIFF’s would have made the file 800MB)
– Video (30 MB) (5k R3D’s)
RedCine-X Pro (Software to view and export R3D’s)
(The Epic & Scarlet use the same sensor; the only difference currently is the feature set. This profile is based off of the base sensor without any HDRx)
F65 (Zeiss Ultra Prime 85mm T1.9) [S-Log] – Thanks to Tal Lazar & American Film Institute Conservatory for providing the files.
– Be sure to read the READ ME FIRST document before using these profiles.
– Profile (46 kb)
– 16 Bit DPX Files (180 MB)
– JPG Files (21 MB)
Now that you’ve shot your exposures using the Sekonic Profile Chart, it’s time to create your profile and calibrate your meter. In this video I’ll show you the process that I go through, step by step.
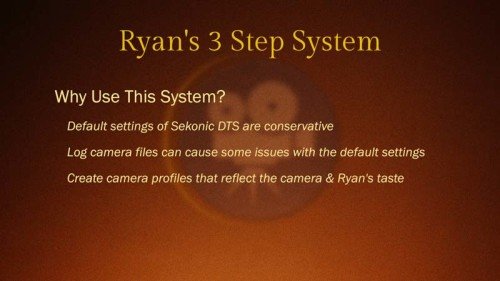
I’ve noticed that the Sekonic DTS software tends to be a little conservative in how it processes files and it also has some difficulty processing log based files. And more cameras these days shoot log and if you are using a camera that shoots in raw, generally, you want to start out grading using the log profiles that you can access within those raw cameras. And the Sekonic DTS software is not setup well to work with those types of files.So I’ve developed a three step system that allows me to use those log files and develop profiles that I feel accurately reflect how the camera performs.
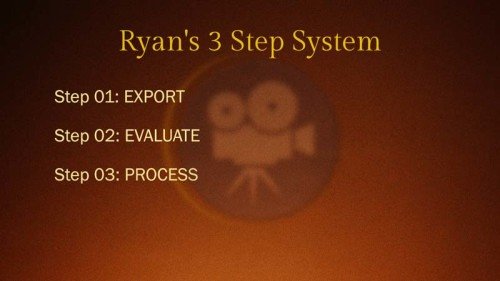
Sekonic DTS Profile For Your Light Meter- 3 Steps
And the three step process that I use involves exporting, evaluating, and processing the files. For the exporting step I’m just exporting out the stills from a number of different applications. And I’ll export out JPEG’s or TIFF’s. If I export out a TIFF it will be 8-bit, uncompressed. And as I export out my stills, a little tip that I think is important to mention is that you should implement as well is to put the camera settings in the file name. This will come up later in the training – it just makes it a lot easier to remember the exposure settings if you’ve lost your notes, or as you are inputting different values in the Sekonic DTS software. If the exposure is in the file name, then you don’t have to pull up any notes, you’ll be all ready to go.
If you are using a raw camera, a Red Epic, a Red Scarlet, a Blackmagic Cinema Camera, there is a number of them out there. Anyway, I highly recommend that you export out the files using the software that is supplied by the camera manufacture. So for example, if you are shooting with a Red, use RedCine-X Pro, if you’re using the Blackmagic camera, use DaVinci Resolve. You want to limit the number of times things are being exported, compressed, and re-compressed. So use whatever software the camera manufacture supplies to export out the highest quality images that you can from these tests.
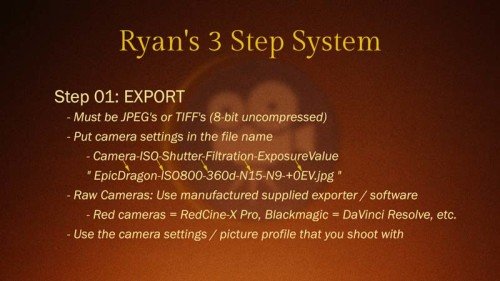
And as you export out those images, make sure that you use whatever camera settings that you prefer to use with that camera. So for example, if you want the widest dynamic range, then chances are you are going to export out a file that is in the log format. Or maybe you have a specific picture profile that you have created for your camera and you really like how it looks, and that’s how you use it most often, then export out still images from that camera using the profile. That way the end profile that you create will reflect how you use the camera.
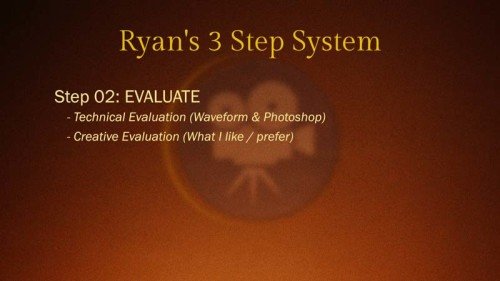
Then, after you have exported out your still frames, now it is time to evaluate them. Even though that is kind of the point of the DTS software, to evaluate it. I’ve found that there can be a difference between the technical evaluation, and the creative evaluation. So I go in and evaluate things form a technical standpoint, and also from a creative standpoint. By a creative stand point I mean, what are my own personal preferences and likes, and how does that influence how I develop my own profiles. Something may be technically one way, but I may not aesthetically like it. So that is where the creative element comes in. And that’s why I evaluate things.
Then I’ll finally go in and process the files using the Sekonic DTS software. And using this three step process allows me to create files that let me know where the technical limits are, and also let me create a profile that fits my personal aesthetic and preferences.
So let’s dive on in here and see how this process works. Now I’ve already exported out these stills, they came out from RedCine-X Pro and we are going to use them directly in the Sekonic DTS software. But however, even though these came from the Dragon, I’m going to quickly throw them up here in Final Cut Pro X so that you can see some technical details, but I’m not re-exporting them out from here. That’s already been done.
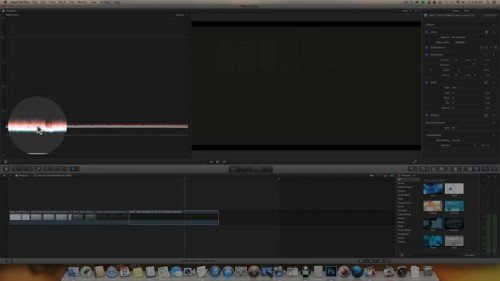
Looking at our -8 exposure here, as we take a look on the waveform, we can see that there is pretty much nothing here. It’s all just barely above the noise floor. I’d even say this is the noise floor. There is nothing technically here. As I take a look at the screen, however, I can see all of these chips. So even though everything is technically in the noise floor, there is still recoverable information. Not that I would ever use it, because it is horrendously in the noise floor. But it is technically there.
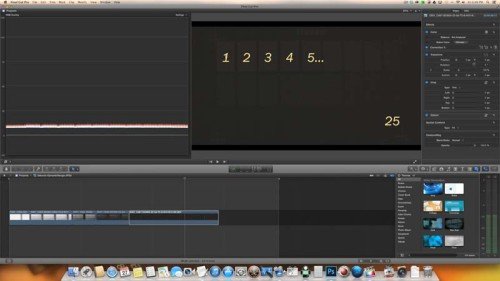
So what I’m going to do is to number these chips. This is Chip #1, #2, #3, #4, #5 and so on until Chip #25 here in the bottom. So we’ll call Chip #1 just barely out of the noise floor. And visually, I can see all the way down to Chip #19. And I’ve already created a text document, but as I go through this on a normal shoot, I create this text document to keep notes along the way. And so I’ve got my -8 exposure right here, and the waveform tells me that Chip #1 is at or just barely above the noise floor. And then by eye, I can go down to Chip #19. So that’s what those numbers are about.
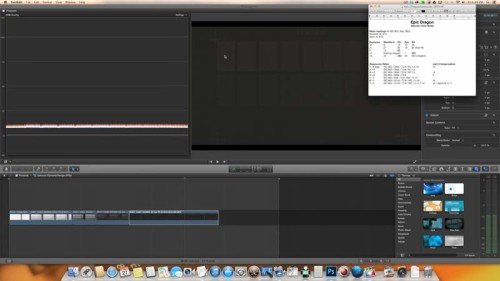
Sekonic DTS Profile For Your Light Meter-ScreenCapture3
And now I’m going to go to exposure -4 and I can see everything clearly here, from Chip #25 unto Chip #1. So aesthetically there is a lot going on. But technically let’s take a look at the waveform. And it looks like the waveform again is telling me something just a little different. It looks like everything is down where there isn’t a whole heck of a lot of information until I get to Chip #21, which is just barely above the noise floor. And then Chip #20, and Chip #19. So we’ll call Chip #21 at the bottom end. And I personally am a little bit more conservative with noise, so I’m also going to go with Chip #19. So we will mark those in my document.
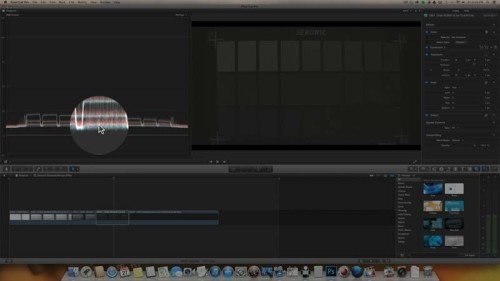
So we are here at -4, and at Chip #21 the waveform says it is technically there, and then Chip #19 is where I feel more comfortable by eye. So that’s my own personal preference right there for the bottom of the exposure range. Oh, and just in case you are wondering what in the world I am doing here, I am looking for the bottom of the dynamic range from both a technical standpoint and from an aesthetic or creative stand point. So the technical stand point is the waveform. And the creative is what I’m judging by my eye. So we’ve got our middle exposure, we don’t need to worry about that at this point.
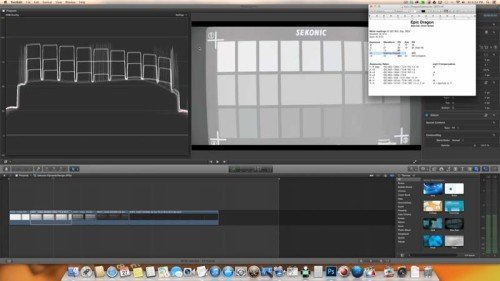
Our +4 exposure, looks like I can see all of our chips from #25 to #1. And based off of this gradient I have going on here, it looks like Chip #1 hasn’t clipped yet, but it is getting close. I’ve got texture and detail all along the way. And I still have texture here [in Chip #1] but it is starting to get close to not having texture. So if you’re used to the zone system, this would be getting close to Zone 9. So I’m going to mark that one. We’ll go over here and mark that nothing is clipped. But I among going to choose Chip #1 by eye. So that’s where the upper end is going to start for my personal preference.
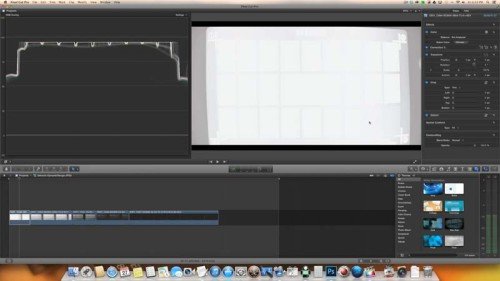
And then we are over to the +8 exposure. And as you can see here, everything is pretty much overexposed and clipped. Except we have Chip #25, and Chip #24, where there does appear to be some tone and texture. And then Chip #23 that is definitely gone. From Chip #23 and up is gone. And let’s take a look at the technical readings. I do have some detail here in Chip #25, also a tad of detail in Chip #24, but it’s almost blown out. And then we’ve definitely lost detail here in Chip #23. So that’s what is going on in the over-exposure from a technical standpoint and my own personal preference. So I will mark that as well in my text document. So +8, Chip #23 is where things are clipped. And by eye, it also looks like things are clipped at Chip #23.
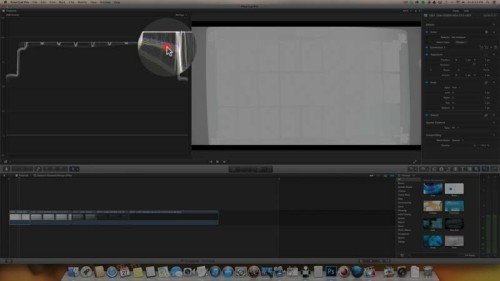
So now we know from a technical and aesthetic point of view where things are at, now we need to get values to use in the Sekonic DTS software because it is going to ask me for some 8-bit codes. So now I have previously loaded in those same exposures into Photoshop here. And now I’m looking at the -8 exposure. And again going back to my notes to reference those, I want to look at Chip #1 as well as Chip #19.
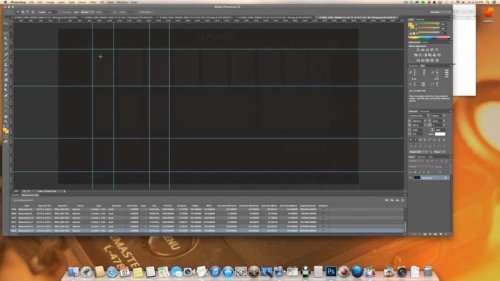
So Chip #1 here, I’ve created guides here to make it easier for me to make an accurate selection. If you are wondering on how to create those guides, you just click up here, hold and drag down. And that is nice and handy. I did that to make a box around chip 1 and chip 19. Now choose the selection tool. Make my selection of Chip #1 and now I go into Image => Analysis => Record Measurement. Or I can do Shift-Command-M. So as I take a measurement, it gives me these numbers down here.
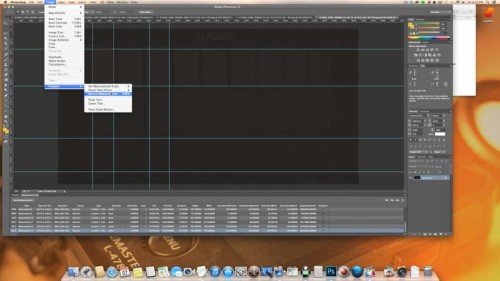
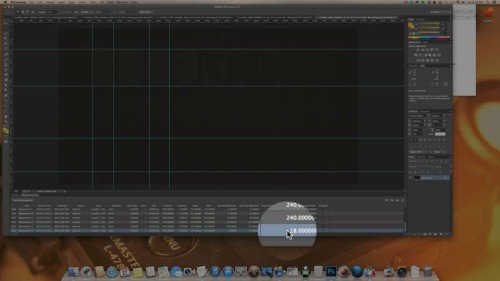
So this is 18, so Chip #1 is at 18, which I’ll document in my file here. So I put 18 here in the PS column. PS stands for Photoshop, so that’s the Photoshop value of Chip #1. And now I’ll do the same for Chip #19. And I’ll do Shift-Command-M to get another measurement. It looks like that says 15. So I’ll add 15 to my document. And now I’ll go though and do the same thing for the rest of these exposures. I’m not going to bore you with that. So I do the same for -4, 0, +4, and +8. And it is key to get the center reading, Chip #13 of the 0 exposure for the mid tone value.
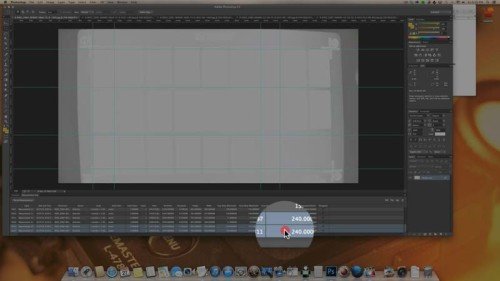
One little note about my +8 exposure is that I want to make sure that I can suck everything I can out of my over-exposure range. So what I will do is first I’ll take a measurement of what I think is over-exposed. So shift-command-M. And then I’ll take a reading of something that is definitely overexposed and clipped. On this exposure, Chip #1 is at 10 stops overexposed. So I’m going to go Shift-Command-M. And now I’ll compare these two values. So the one I thought was clipped is at 240, and the one that is definitely over exposed is also at 240. So I am good to go now that I know both those chips are over-exposed and clipped. I know that I am going to be getting all the detail I can out of my camera.
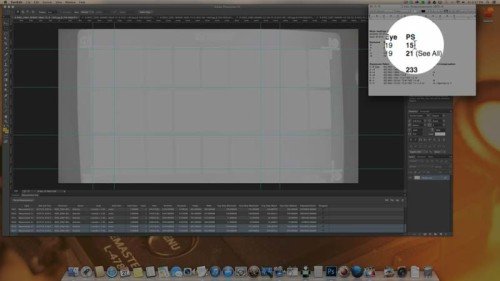
Then I write all of those settings down- all of those values that I have gotten, I put them in my Photoshop column. And now what I’ll do is I’ll go back and highlight where my extremes are. The lowest extreme is 15. That’s the lowest Photoshop value I got. Then my own personal preference, even though technically I might be able to go that low, personally I don’t want to. So I’m going to put 21, as my personal bottom range. So 15 is technical, 21 is my own preference. And then 83 is my mid tone. And then the next one up, where clipping starts to happen, is at 233, which is my own personal preference. It’s where I want to give myself some buffer. And then we’re off to 240 which is the absolute technical top end.
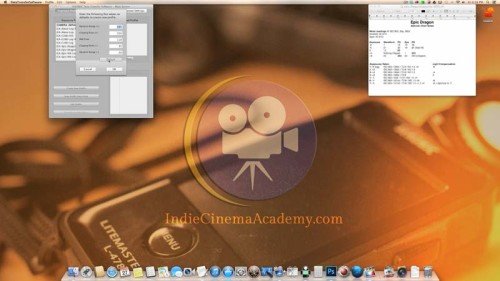
So now I can go in and hide Photshop. And I’ve got the Sekonic software preloaded here. So now all those funny readings I had you take, this is where this is going to make a little more sense.
So we go into our options and choose the Dynamic Range Clipping Point Values. Oops, sorry about that [Pressed Cancel] wrong button. Okay, so the default values are at 245 and you can read the rest here for yourself. And these work great for other cameras, but for log values, or log profiles, all these values are different as you just saw. And so if I were to use these defaults, the profile I would get wouldn’t be as accurate as I need it to be.
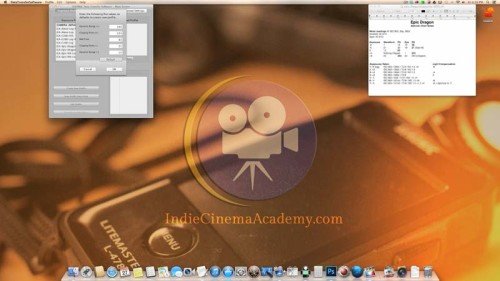
So that’s why I took all of those Photoshop values. So we can start plugging those in. My top range is at 240, my clipping point is at 233, which is where it starts to roll off into over-exposure. The mid tone value is at 83. And the clipping point minus is… And that’s where I decided that my personal preference is at 21, so I’ll put that here. And then the dynamic range minus, so that’s the last value that is able to be recorded, which was 15. So again, the 240 is the technically precise number, and the 15 is another technically precise number, that’s the lowest and highest it would go. This clipping point plus and minus is more personal preference kind of stuff. So now we click ok.
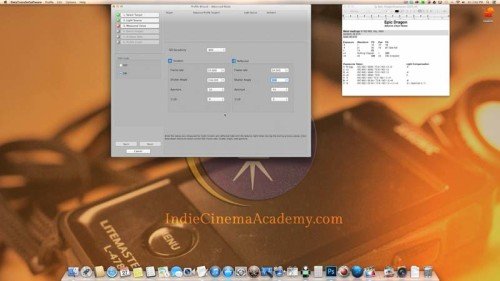
Now we’ll go in and create our new profile. We’ll go to Advanced Mode because we’re advanced here. And then I’l choose the Exposure Profile Target II Chart, since that’s what I shot the exposures with. And because I’m working with a camera that has a wider dynamic range, something that is more then 10 stops, I’m going to use extended mode. If you are working on a more limited camera, like a DSLR, or and older camera, you are going to use the normal mode. Take your three exposures, your +3, 0, and -3, and use that. However, I have a camera with a wider dynamic range so I use the extended mode. And now I’ll click next.
I’ve got ambient mode selected, since that what this was shot in. Click next. Now you may end up with cine mode off. If you do it will be a little confusing for you because this is all in photography terms. If you’re a photographer, then it will not be confusing to you. But I’m not a photographer, so this makes more sense to what I’m used to working with. So now we need to input the light readings we took during our shoot. So as you can see, this is where the notes come in handy yet again.
And I’ve got all my readings right here, so sensitivity goes to 800, frame rate is at 24, Shutter angle is at 358. Yes, I know it says 358, not 360. Where did those two extra degrees go? I don’t know, I don’t know why they don’t allow you to put 360 on that. I think that is kind of silly. But those two extra degrees are not going to make a difference. Maybe you can sneeze on your light meter and then everything will be accurate. But don’t sweat over that. And 358 over here. And for the incident mode we’ve got 32 and 9 tenths. And the reflected reading is at 45 and 3 tenths.
And now we have our incident and reflected readings in. The whole reason why we are doing this here is that this will help the profile to calibrate the spot meter to the incident meter. So that they will all match up. Which is actually really handy. That means you don’t have to send your meter in to be calibrated. This whole process here calibrates your meter for you. And we’ll click next.
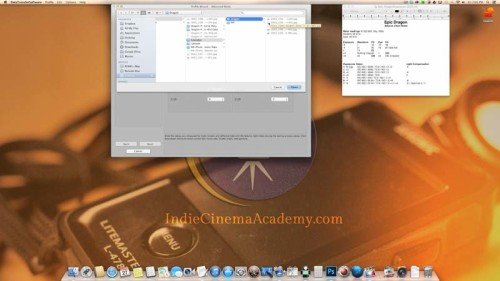
We are looking for our exposures as you can see I’ve got them all organized here into my JPEG folder within my extended folder. This is using the Dragon Sensor. And I have all, 1, 2, 3, 4, 5 exposures here. I did take 7 exposures. So I did the +3 and -3 exposures just incase I was wrong about the dynamic range of the camera. So I just get rid of those 2 exposures and put them up a level, and keep the 5 exposures in this folder. Now I’ll click open.
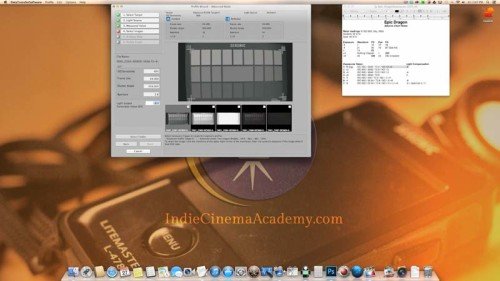
Unfortunately, since this is video, there isn’t any metadata, so we all cry and weep a little, because now we have to enter the data ourselves. So we click this little box here. And we change our shutter angle to 358. And now we change our aperture to, oh, it was already input for me because I already did this. Anyway, so we change our aperture to 2.8. Which is rather handy because if I didn’t know what it was, it’s right here in the file name. So that is nice and handy. Click okay.
Now we enter our light output correction value. The reason why I need to do that is because of these notes I took here. So the light compensation value is -8. The reason why it is -8 is because I was using 8 stops of ND filtration. The reason why i chose to do that is so that I could keep my aperture consistent throughout this entire test. A lot of lenses get more contrasty or less contrasty depending on how much you stop down or open up. So the aperture can actually effect the dynamic range just a little bit. So I prefer to shoot at a constant aperture. I also like to shoot my films at a constant aperture. So anyway, sorry for that little sidebar. But that’s what the -8 is about.
So I need to add a -8 light compensation. Now the software knows that this is my mid tone or normal exposure. Now I go on to my +4, hit that little box. What shutter angle? Oh yeah 358 degrees right there. That comes in handy again. 358. Aperture’s already set. Now I click ok. Take a look at my notes, the +4, the light compensation is -4. So now I go -4, enter. And I’m on to my +8 value. I change this to 358, and there we go. Light compensation stays at 0, because I took all of the ND out of the lens. That made it super easy to shoot this profile.
Now I’m on to my -4 profile. I’ll check that little box, and leave that at 2.8, because it is still at 2.8. However, my shutter has changed to 22.5. So now I’ll scroll on down to 22.5 and I hit Okay. And I still have the same ND in the lens, so I need to do -8 and hit Enter.
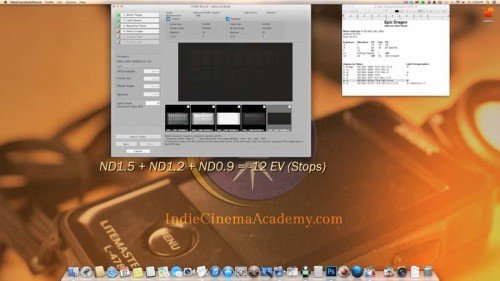
And now I am on my last exposure. A quick little note about this, I think I can only go to -10. Nope, just kidding. So maybe -9. Ah-hah. Okay. So the lowest that it will let me go is -9. However as you can see, I have a light output correction value of -12. So what do we do? Well we are going to do a little Tom Foolery here. So we are going to make that a -8, which gets me almost there. And then we’ll change this. We’re still at 22.5, so I’ll find that for the shutter. Our aperture is at 2.8. So if I were to click Okay here, I would get a wrong profile created because this is now the same exposure as the -4. So I need 4 more stops to get me to where I need to be at. So let’s change the aperture. Let’s go 1, 2, 3, 4 stops down. So now I am 8 stops under for this exposure. I hit Okay. Now all my exposures and metadata are correct. Click Next.
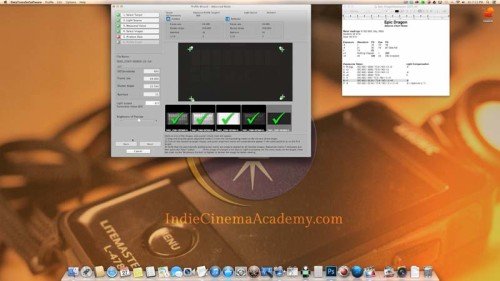
Now we go to, drag and drop, yada, yada. If you’re lucky the software will automatically find this for you. But I’m not lucky that often, so I usually have to do this all manually, which you get to enjoy watching. La, la, la. And there we go. And now were on to… Hopefully you shot all of this with a tripod which makes the rest of this really easy. If you didn’t you are going to have to adjust these with every frame. But I was on a tripod so I don’t need to worry about that. Now we’ll click Next.
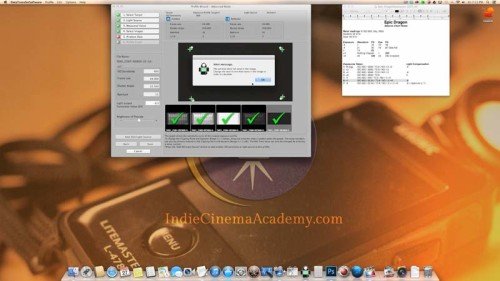
Now it’s measuring and calculating. And here is a little funny thing. This little alert – I have yet to be able to create a profile that’s been shot in log without this alert coming up. So it is basically telling me that the levels that I set earlier don’t really exist. And yada, yada, help me out a little… anyway, all that to say ignore this. All the profiles that I have created and used over the years using a log format with this profile system has worked well for me. And that little alert, even though it can’t find it, everything works anyway. So just ignore it.
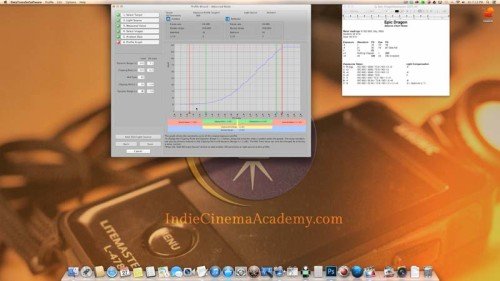
We will take a look at what’s been created here. So those values that I entered in earlier, 240, 233. Take a look at them over here. So my levels 240, 233, and then 26 is actually the lowest that it could find on it’s own. So those other values of 15 and 21 got nixed out since it couldn’t find those values in there. However, that’s not a problem for me. What I want to do now is a bit of customization. So this is what the software created based off of the information that I gave it. However, I want to tweak it a little bit further.
So the response here always stays the same. So there is nothing I can do about that. But what I can change are these goal posts.This red goals post is where it has absolutely clipped. And this green arrow is what I’m going to use to give myself a little bit of protection in the highlights, so that they roll-off just a bit smoother. And I can have a bit more of a filmic image if I make sure I expose correctly. So I’m going to lower that down a touch here. So this gives me a bit of a softer roll off here. If I move this up and I have all my highlights in this little range there isn’t a ton of roll-off room. So I like to build in a little more protection. So that’s why I move this guy down.
On the other end, I also like to know where the lowest value is in my exposure range. So I’ll take my green arrow here and I’m going to move that to -5. So right here, yeah, there is a lot more room in the shadow area. I could bring up those values if I wanted, but they are too noisy for me. So I’m going to build in some extra protection by putting this at -5. And I’m actually going to move this guy here. I’ll move him to -7. To give myself even more protection. Yeah, sure it’s technically there, but it’s not usable at all. At least I don’t think it is.
So I have now adjusted these to fit my own personal preferences. So when I go in and use my light meter to expose my image, now what I’ll do is I’ll make sure that all the important information that I need detail in is within -5 to just over 6 stops. So as long as all of my crucial information that I want texture and detail in is in there then I know I’ll get a nice, beautiful looking image. I will have additional room in the shadows, and I should also have a nice roll off into the highlight area. So yeah, there is a lot more dynamic range between the red posts, but the green posts keep me safe as far as the crucial detail. So what’s important in-between the green, and everything else is additional gravy that makes it look that much better. And then I’ll click Save.
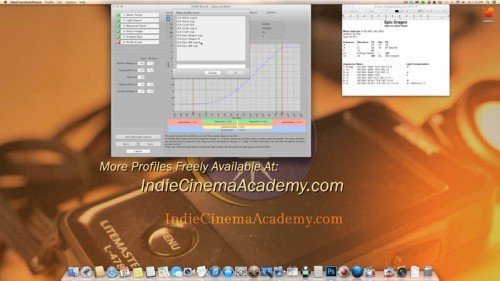
And if you download any of the profiles that I’ve created from my site that have log in the name, or rather the ones that do not end in “-R” are just the default profiles that the software created. The ones that end in “-R” are the ones that I’ve modified. You may or may not agree with my own modifications. So modify at your own will. I like the profiles I created, so those are the ones that I use. So that’s pretty much how you go about creating and using the Sekonic DTS software.
Now that you’ve created a custom profile for your meter, not only have you calibrated your camera to your light meter, but you’ve also calibrated your meter. So you don’t need to bother with sending it in to the factory to have it calibrated. Which is great because you always know that you have a reliable light meter to take your exposure readings or to prelight your set.
If you have any comments or questions, leave them in the comment section below. And then come join me in the next video.
You must be logged in to post a comment.
This site uses Akismet to reduce spam. Learn how your comment data is processed.
This site uses cookies. By continuing to browse the site, you are agreeing to our use of cookies.
AcceptHide notification onlySettingsWe may request cookies to be set on your device. We use cookies to let us know when you visit our websites, how you interact with us, to enrich your user experience, and to customize your relationship with our website.
Click on the different category headings to find out more. You can also change some of your preferences. Note that blocking some types of cookies may impact your experience on our websites and the services we are able to offer.
These cookies are strictly necessary to provide you with services available through our website and to use some of its features.
Because these cookies are strictly necessary to deliver the website, refusing them will have impact how our site functions. You always can block or delete cookies by changing your browser settings and force blocking all cookies on this website. But this will always prompt you to accept/refuse cookies when revisiting our site.
We fully respect if you want to refuse cookies but to avoid asking you again and again kindly allow us to store a cookie for that. You are free to opt out any time or opt in for other cookies to get a better experience. If you refuse cookies we will remove all set cookies in our domain.
We provide you with a list of stored cookies on your computer in our domain so you can check what we stored. Due to security reasons we are not able to show or modify cookies from other domains. You can check these in your browser security settings.
We also use different external services like Google Webfonts, Google Maps, and external Video providers. Since these providers may collect personal data like your IP address we allow you to block them here. Please be aware that this might heavily reduce the functionality and appearance of our site. Changes will take effect once you reload the page.
Google Webfont Settings:
Google Map Settings:
Google reCaptcha Settings:
Vimeo and Youtube video embeds:
You can read about our cookies and privacy settings in detail on our Privacy Policy Page.
Privacy Policy
Hey Ryan,
Do you by chance have a Sekonic profile for the Panasonic GH4?
Unfortunately not at this time. As soon as I have a project that I need that camera for, or I get my hands on one, I’ll gladly create a profile for it. 🙂
I can’t wrap my head around taking chart readings with a lens that’s 2.8-22. I get the 0, +-4 but not +-8.
Jake,
Yeah, the +/- 8 is tricky for sure. 🙂 That is where you’ll need to use other exposure controls, like the shutter, add in Neutral density filters, or a combination of both.
Sometimes, what I’ll do is have my 0 exposure not be the standard 24 fps, 1/48 (180d), F5.6. I might do something like this:
0 = 24 fps, 1/48, F2.8 + 8 Stops of ND
-4 = 24 fps, 1/48, F11 + 8 Stops of ND
+4 = 24 fps, 1/48, F2.8 + 4 Stops of ND
-8 = 24 fps, 1/768, F11 + 8 Stops of ND
+8 = 24 fps, 1/48, F2.8 + NO ND
(I just made that example up off the top of my head, but it should still illustrate what I’m talking about.)
Hope that helps. 🙂
Does this mean I have to light the chip chart to a f-45 for the 0 exposure?
In this specific example, yes. The point is you can place your 0 exposure anywhere you want as long as you have the controls (shutter, aperture, ND filters, etc) to accurately get to your -8 and +8.
Hello Ryan,
thank you for this awesome tutorial.
I found out that Median Grey Value in photoshop change dramaticaly depending of the color setting of (Edit–> Color Setting)
Do you have some recommandation for the correct color setting ?
Thank you 🙂
Omar
Thanks Omar, I’m glad you found it helpful. 🙂 You are correct that the Median Grey value can change depending on the setting you use. I recommend using the default settings and not changing anything. The only time I would change anything, is if I was planning on changing it during the post process. So if you plan on changing / processing the footage that way, then change it to whatever setting you will be using. Otherwise, stick with the default settings.
Hope that helps. 🙂
I also tried to convert the value of Middle grey SLOG 2 from my A7s (IRE 32) to RGB, it give me a value of 72 and put it into the sekonic as middle grey is it correct ?
Unless you will be working in RGB for your post pipeline, I wouldn’t convert the file to RGB. When you export out the still from the editor you are using, it should export it out in its source color profile, and Photoshop should recognize that.
For some odd reason I dont have selected profiles to the right in my software and cant transfer my profile to light meter
Sounds like something didn’t get installed correctly. I’d try re-installing the software, and if the problem continues, contact Sekonic for support to find out what is going on… that is really odd…
(I’d love to be able to help you out more, unfortunately I’m not a software guy- I’m a camera guy, so I can only help with the pieces that work…)
I am having the same issue. Has anyone been able to find a solution?
Hi Donald, we weren’t able to recreate this problem so we don’t have a solution. I’d recommend reinstalling your software and trying again. If that doesn’t work, contact Sekonic; they are normally very responsive and are good at finding a solution.
Hi Ryan. I notice that your downloadable profile links are broken. Any chance you can provide a working link for the C100 mark ii profile?
To be clear, the C100 profile is for the mki camera, not the mkii.
Thanks Ryan. Do you have any suggestions/tips for taking the three exposures? I’m confused how to get the exposures correct given that my lens doesn’t have the 3+ and 3- latitude in the aperture range. I really need a tutorial on exactly how to expose for these with the camera. All the tutorials just assume this is simple/obvious. Im stuck.
What lens are you using? Most lenses that I’m aware of should have the ability to go 3+/3- on the aperture. For example, if you 0 is at 5.6 then you have to open up to 2 (+3) and close down to 16 (-3).
If you can’t do that, then take a look at my reply to Jake above. You’ll need to use other settings to get those exposures.
Happy Shooting!
Peter, the links should be working now. Please try the downloads again and let me know if they work for you.
Great work Ryan! Do you have a downloadable prores profile or Blackmagic pocket camera? Would RAW be a separate profile on the meters well?
All of the profiles I have available for download are on this page. (download section) So if it isn’t there, then I haven’t tested / created a profile for that camera.
When creating a profile for cameras, I’ll create a profile for the format I’m shooting in. So if it is RAW, I’ll shoot in RAW, if it is ProRes, I’ll shoot in ProRes. That way I know for sure that the profile matches what the camera is delivering.
Happy Shooting!
Ryan, I’m looking into buying my first light meter, but am having a hard time deciding. I’ve been reading a lot about the L-758Cine and the L-478D. Would you recommend one over the other, and why?
My perfect meter would be a blend between the two meters. Which one you choose really depends on your needs and style of using a meter. Personally, I really like using my spot meter, because of that, I’d go with the 758-Cine. (I’m not a fan of the spot meter attachment on the 478D. It is big, bulky, and not as accurate as the one on the 758-Cine.)
If you are only going to use the incident meter, than go with the 478. If you want to use both, than the 758-Cine is the meter to get.
Here is a write up that I did on the 478 that should help you out: http://www.ryanewalters.com/Blog/blog.php?id=7895130764209546506
Happy Shooting!
Ryan, I wrote you a few days ago about the BMCC profile for Sekonic DTS. You told me to come here. It appears that you no longer have the BMCC DTS Profile available here for download. Is this something that you can post?
Thanks Ryan, I await it with eager anticipation. I have tried to make my own but something tells me the BMCC doesn’t have 5 stops of DR. LOL
I’m pretty sure the BMCC has more than 5 stops of DR… I don’t know that it has the 13 that is claimed, but most cameras in the last 10 years have at least 6 stops, if not closer to 10 stops…
Burnprocessmedia, the links should be working now. Please try the downloads again and let me know if they work for you.
Great resources Ryan! Thanks for your work here. I would love to download the Arri Alexa camera profile but it keeps telling me it has failed because of a Server Problem. I tried what Tim said above and it didint make a difference. Any help here would be appreciated!
Jon
Thanks- I’m glad you found it helpful.
Hey Jon, the links should be working now. Please try the downloads again and let me know if they work for you.
Ryan, I am trying to do a BMCC profile. I cannot get the camera to go +8 ev. I have managed to over expose by roughly 5.3 stops at the most with a Sigma 18-35mm F/1.8. Settings are 1.8, 24fps, 360. Any tips? I can’t really adjust my frame rate to compensate. Thanks!
Jake (post towards the top) had the same question. Checkout my reply to him for an example. Basically you have to figure out a way to increase and decrease light levels. That might be at the source of the light (using scrims & nets) or using the camera. (ND’s).
Happy filming!
Hi Ryan,
Have Bought L-478DR and X-rite Colorchecker Passport. For my Still life shooting. Having Canon 5D Mk-3 with 24-105 (f4.0). Have tried many time for building camera exposure profile, but could’t make it. sowing me wrong figures on my meter. could u please help me with this. or is there ready to use profile available. i really want to do it. please…… help me with this.
ThanX
Himanshu,
Unfortunately I haven’t found that the x-rite color checker to be that reliable when creating a profile. I HIGHLY recommend using the Exposure Profile Target II. Yes it is more money, but it works and is simple to use.
Hi Ryan
I made a few dts profiles for the bmcc and some lenses. i looked at the 0EV pictures in Photoshop like you recomended for the middle value readout of the middle grey patern on the exposure target II card. the values are quiet diferent. from 103 to 81 depends on which lens is on. i changed this value “middle tone” in the dts software for each profile. Now if i meter the same spot with the diferent profiles set in the meter, every metering is exactly the same. do i understand something wrong? or does it look like i did it wrong with the dts profiles? shouldn’t the meter give me diferent f-stops so the diferent lenses have the same exposure in middle grey?
Thanks for your Help
Stefan
Stefan,
First thing I would do is to make sure the numbers are entered into their correct fields. (I know I’ve mistakenly input numbers into the wrong fields before.) Assuming that is correctly done, then yes, I would expect the results to behave like you assume. There will be different readings for different lenses. However, the differences may not be big enough for you to notice depending on how your meter is set up. If you have it set to display in 1/10 of a stop, then one reading might be 2.8 3/10 and another reading might be 2.8 5/10. If you meter is setup to display in 1/3 of a stop or 1 full stop differences, then you would not see a change in the reading. In either case, the differences should not be that huge- I would be surprised if one reading was 2.5 and another reading was 5.6…
Hope that helps clear it up.
Ryan
Hi Ryan
Can not download profiles from your site. Is this compatibles with any lenses, I’m interesting about BMPCC?
Hey Artyom, the links should be working now. Please try the downloads again and let me know if they work for you.
Great lesson Ryan. I’ve read your other comments about how to shoot the scene and get the full +/- 8EV. While your previous comments makes sense, I wish that you would do a separate video/post describing how you do that; especially since there’s a billion photography ones but yours is the only CINE one I’ve found. Things like what kind of lighting, deciding what to start with for your 0EV exposure, calculating combos for EV changes and other random Ryan expertise would be a great compliment to this video.
Check out these other lessons Ryan created a few years back before we started Indie Cinema Academy:
* Lighting 101: Using The Meter: http://www.ryanewalters.com/Blog/blog.php?id=5855694556099186053
* Sekonic Profiles: http://www.ryanewalters.com/SP/sekonicprofiles.html
* How To Use Custom Sekonic Profiles: http://www.ryanewalters.com/Blog/blog.php?id=7572552678543049759
Tim, thank you for your reply. I’ve actually been following Ryan’s blog before this site was created and I’ve read/seen all of these. They all contain wonderful material but none of them really address the actual setup and shooting for creating the profiles, it jumps right into evaluating the shots. Some of the replies from Ryan in this post do talk a little about it in more detail, like the reply to Jake from Aug 19 2015. That’s perfect, but I want to see how the decision process worked for this, i.e. how much light, where to choose 0EV point to get the +/- 8EV, etc. I just want to see more of how you work that process. For example, I’m working with the BMPC 4K and am trying to create a profile but I’m finding it very difficult to do the +/- 8EV’s. I did the normal on +/- 3EV and it leaves much to be desired is obviously not correct.
I finally found Ryan’s video on how to shoot the exposures. Why has no one referenced it yet? Is it no longer accurate? https://www.youtube.com/watch?v=W4qsYQPOkVg
Yes, that video is a great explainer. For more on light meters, check out this Sekonic page on Ryan’s old blog. Obviously there is some redundancy with info here on Indie Cinema Academy. Ryan stopped updating his old blog once we joined forced on this site.
Earlier in the posts Ryan mentions using all of the tools available to achieve the +/- 8EV. I can do it with the combinations of shutter, ISO, f-stops and fps and even ND if I have to. However, is there one of these variables that is better to remain constant so you get a better reading of what your camera can do?
That is very good question. It all depends on the quality of your instruments. It is normally safe to assume that shutter, ISO and fps are very exact. Your f-stop should be just as exact, but it is possible that lower quality lenses might not be as accurate. Same goes with ND filters: there is the possibility that cheaper ones might not be as exact.
You can run a little experiment on your system to see how precise it is by only changing something you know is exact (such as shutter or ISO) and graphing the resulting brightness values. Then keep that constant, but change something you don’t know if it is accurate, such as f-stop or ND filtration. Both graphs should overlap exactly. The lower quality the lens or filtration, the more the second graph will “wobble” from the first graph.
Do you happen to have a profile for the Nikon D750? I have the sekonic 478DR. Thanks
Sorry, we don’t have a profile for that camera.
Hey, just having an issue downloading the jpgs… tried several different ones to see if it was isolated but none of the links are working… Just updating my dragon dynamic range.
Sorry you are having problems downloading the files. Our host server had a major meltdown, and I think there were lingering glitches after everything got restored. I just double checked all the links, both in Chrome and Safari, and they seem to be working now. If you continue to have problems, I will rebuild all the links.
I just downloaded them and I’m still having problems. They don’t seem to be unzipping. And they’re totally not downloading at all in Safari.
That is strange. I emailed you just now, and will send the profiles you need.
Hi Ryan
I have L-758cine and D810 nikon
My question which card Sekonic exposure target II or x-rite colorchecker passport GIVES ME BETTER RESULT to make a profile? because L758 has 1 degree spot meter which allow me to pointed the gray icon on colorchecker? i’m really confused!
thank you
Hi Wael, It all depends how accurate you want your profile to be. To create a very accurate profile you really need to use the Exposure Profile Target II, or a similar product. If being exactly right with your exposure isn’t as important (which is fine, especially with current camera and grading tools that are much more forgiving), then the ColorChecker Passport Video is fine.
These two tools were designed for different purposes, so maybe that is what is causing the confusing. The Sekonic Exposure Target II isn’t meant to be used regularly on set; it is only to test your camera’s sensor and calibrate you light meter. Once that is done, you put the chart away. However the X-Rite Color Checker Passport is meant to create a color and white balance reference for each time you shoot something. This way the editor and color grader can better dial in the colors and exposure in post. It will work for creating a profile for your light meter, but it isn’t the best tool for this. Since the Sekonic chart has so many gradations, moving in 1/6th stop increments, it is much more precise. If there was an issue during calibration, it would be easier to fix with the Sekonic chart than the X-Rite chart because of these additional gray chips.
Where is the “READ ME FIRST document” for Blackmagic DNG files?
That is a very good question. I’m not sure; it should have been in the profile download. I’ll look through our files and get back to you.
I looked through our easily accessible archives and those also are missing the “READ ME FIRST” file. It is possible that we never created it. (OOPS!) I will look in our “not easily accessible archives” when I get the chance, but I’m guessing they will also lack the file. Sorry.
Hey Ryan,
I have just purchased the Sekonic 858 and I’m wanting to add several profiles to it. Am I still able to use your profiles created with the 758 or is it a case of starting from scratch?
Thanks,
Simon
You should be able to still use the same profiles, but I haven’t tried with with Sekonic 858 meter. My logic is that the meter is actually never used in making the profile, so it shouldn’t matter which meter you upload the profile to. (Remember the workflow: bracketed images are taken with the specific camera, images are measured within Photoshop, measurements are entered into the Sekonic DTS software to make the profile, profile is uploaded to the meter.) My only word of caution is that the DTS software might tweak things depending on the meter. So worst case is to take our measurements and re-enter them into the DTS software and re-create the profile.
Awesome!
Thanks Tim
Hello,
Great work!
I am wondering if perhaps you have a profile for nikon D610.
Hello Andrei, Thanks! Unfortunately, we do not have a profile for the Nikon D610. We really recommend you to go through the steps in our lesson to create your own profile for your camera since you will learn A LOT about your camera and your meter in the process. There are no short cuts in learning 😉 Best!
Hello,
Thank you guys for sharing this wonderful tutorial. I have been wondering since the meter was not calibrated to the camera previously, how can the readout of the meter be used on the camera to get a correct exposure in the first place for carrying out the DTS profile process? Is there a calibration that needs to be done for the meter to match the camera in terms of reading the 18% gray card before doing the DTS profile? Please correct me if I am wrong on this. Thank you so much.
That is a very good question! What you are doing when you create a profile is creating a comparison between what the meter thinks the camera sees and what the camera actually sees. Before you calibrate the meter, the meter may say that 18% gray is 20. (I made up that number.) If the meter is working properly, it will always measure the 18% gray card under the same lighting conditions as 20. Later, when you create the profile, the software may determine that the camera sees that 20 as 25. So the software tells the meter that every time it sees 20, it should interpret it as 25. This is continued with all levels of brightness. In the end the meter is calibrated to convert every light reading it gets into the light reading that the camera sees.
Hi Tim,
Thank you for the explanation. It helps a lot.
Hi – thanks for the tutorial. Very helpful ! I recently purchased the Sekonic L858-DU and I’m not able to transfer the custom profile to the meter. The ‘transfer to meter’ button is grayed out. I’ve tried uninstalling/reinstalling DTS and different cables, but I still can’t get the DTS software to ‘see’ the meter. I have used the DTS software successfully with the Sekonic L758, but for some reason DTS doesn’t detect the L858 meter. I was wondering if you’ve encountered this with the L858 meter? Any help is appreciated
Glad you enjoyed the tutorial!
You mentioned uninstalling then reinstalling DTS: did you reinstall with version 5.11 or newer? As you probably know, grayed-out options often mean that that feature isn’t compatible in some way. If you have the current version of DTS, my next question is did you have your firewall and anti-virus turned off when you installed DTS?
My above comments are based on reading through the new DTS update procedures, since it appears some coding changes in the new software has required old software to be completely removed prior to installing the new update. Quoted from the Sekonic DTS download page: “Version 5.11 is newly compatible with L-858 series in addition to L-758 and L-478 series. Version 5.01 or earlier is compatible with only L-758 and L-478 series.” https://www.sekonic.com/united-states/support/downloads/dtssoftwareformacandwindows.aspx
Also for others who are new to the L-858: note that you need a USB(A) male to male micro cable instead of previous Sekonic meters that needed a USB(A) male to male mini cable.
Let me know if this works for you!
If I shoot using a Sony camera in S-Log 2 and I am told that I should be shooting around 2 stops over exposed, is that my ‘correctly exposed’ middle shot when I export my frames, or am I supposed to use 0 eV (as shown in my camera sensor) as my correctly ‘exposed’ middle shot?
When you are creating a Sekonic DTS profile, ignore the “2 stops over-exposed” advice. The “2 stops over-exposed” advice is to optimize your dynamic range and to reduce noise in your blacks. This is a stylistic choice, but your Sekonic DTS profile is just hard facts regarding exposures.
Hi Ryan, thanks for this tremendous walkthrough. I have a Panasonic GH5s and a Sony A7 III. It doesn’t seem like Panasonic has software to pair with the camera, and the native Sony software (Catalyst Browse) exports S-LOG2 JPEGS with an sRGB profile. Do you have any suggestions? Thanks again!
Hi Mike, It is when you are shooting RAW that you want to export with the software supplied by the camera manufacturer because it will view the files as natively as possible, to avoid artifacts from compression and file conversion. If you are shooting RAW and the camera manufacturer doesn’t have software, then go with DaVince Resolve. The end goal is to get JPEGS or TIFFs that are uncompressed (or in the case with JPEGS, as uncompressed as possible). Do the best you can if this step is tricky. Small compromises at this step won’t be a big deal, since once you finally create the profile you’ll do test runs to confirm everything. If there is an issue, you’ll just compensate a little when you use the meter. If it is too bad, you’ll just go back to the original footage and export it another way. You’ll already have the template built into Photoshop, so using a different JPEG or TIFF will not require as much work. Hope this helps!
Since Sekonic NO LONGER makes the chart you need for creating profiles and you buy it anywhere; what are some alternatives? It’s incredibly frustrating to have gotten this expensive meter and can’t use is properly because of the company that make it.
Oof! Very strange and unfortunate that Sekonic discontinued making this chart! Here are some options off the top of my head:
1) Maybe a photo rental company might have charts for rent;
2) Look at other companies who might sell something similar:
* Kodak: https://www.bhphotovideo.com/c/product/614948-REG/Kodak_1522267_2x10_Calibrated_Photographic_Gray.html
* DSC Labs: https://dsclabs.com/test-charts/handy-pocket-test-charts/
While the other companies might not have the 1/6 exposure increments, this could be manipulated using your aperture or ND filters.